Beth Cato's Blog, page 6
November 13, 2024
Bready or Not Original: Earl Grey Shortbread Bars
Whether you are coping with cold weather right now or psychologically easing into winter (something I know well from my time in Arizona), these Earl Grey Shortbread Bars will make you feel warm and cozy. Also, caffeinated.
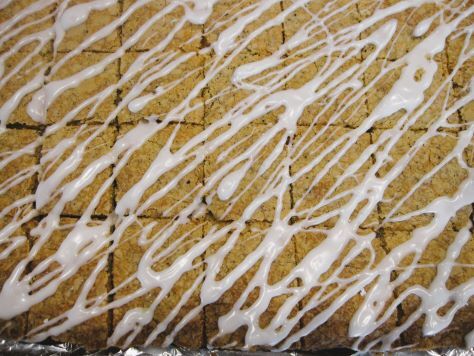
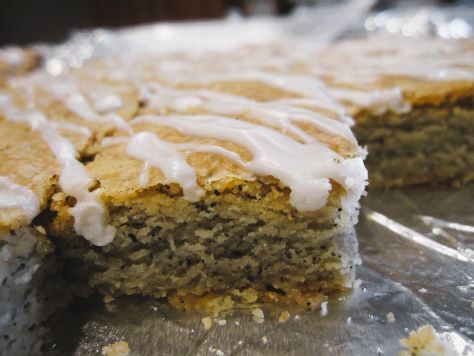
These bars are dense, soft, and a touch crumbly, the flavor of warm spice throughout. The drizzle of glaze adds sweetness and prettiness.
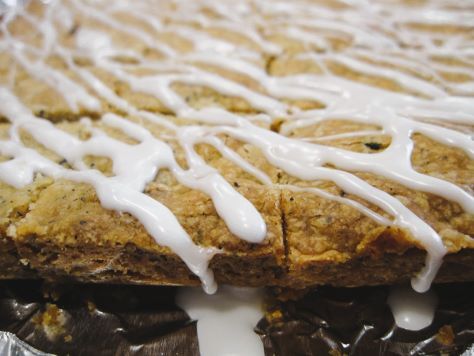
The tea flavor is quite strong here–it actually seemed to get bolder after a day–so the 1/4 cup amount is best made for people who like Earl Grey. I used Bigelow bags, but the amount of tea likely varies across brands. If you want a milder flavor, use less tea.
 PrintBready or Not Original: Earl Grey Shortbread BarsSoft, chewy texture and warm spices makes these shortbread bars a perfect treat!Course Breakfast, Dessert, SnackKeyword bars, teaAuthor Beth CatoEquipment9×13 panspice grinder or mortar and pestlewax paper or plastic wrapheavy glass or other weightpiping bag or freezer bagIngredientsDough1/4 cup Early Grey tea leaves about 4-5 Bigelow bags4 cups all-purpose flour1/2 teaspoon salt2 cups unsalted butter (4 sticks) room temperature2 1/2 cups confectioners’ sugar2 teaspoons vanilla extractGlaze1 cup confectioners’ sugar1 1/2 Tablespoons milk or half & halfInstructionsPreheat oven at 350 degrees. Line a 9×13 baking pan with aluminum foil and apply nonstick spray or butter.Use a spice grinder or a mortar and pestle to grind the Earl Grey leaves down a bit more, but not fully to powder. Move the tea to a medium bowl and stir with the flour and salt.In a large bowl, beat the butter until fluffy. Gradually add the confectioners’ sugar, followed by the vanilla. Beat until smooth. Gradually beat in the flour mixture to incorporate.Dollop the dough into the prepared pan. Use a piece of wax paper or plastic wrap to spread out the dough, then use something like a heavy glass to evenly compress the dough into the pan.Bake until shortbread is firm with golden edges, about 40 to 45 minutes. Cool in pan on rack.After the pan comes to room temperature, mix the glaze ingredients. Transfer them to a piping bag or to a freezer bag. Snip the corner to pipe the glaze in stripes over the pan. Let set for an hour, then use foil to lift contents onto a cutting board to slice into bars.Store in sealed container at room temperature. Bars will keep for an least 2 days.OM NOM NOM!
November 6, 2024
Bready or Not Original: Raspberry Frangipane Loaf Cake
This Raspberry Frangipane takes a little work, but the result is gorgeous and absolutely delicious. This is a great special occasion treat–and it’s easy to make a day ahead!
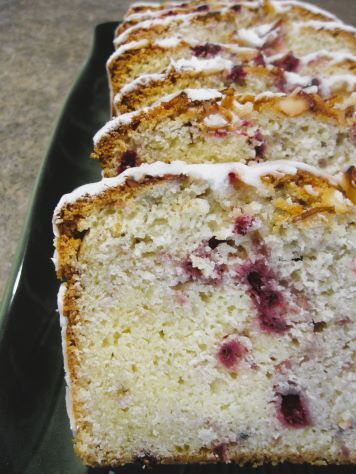
Layer cakes get a lot of the attention and fuss, but I think loaf cakes need more love. They can be stunning, too. This one certainly is. It contains homemade frangipane, one of my favorite things, and is convenient to make year-round by using frozen raspberries.
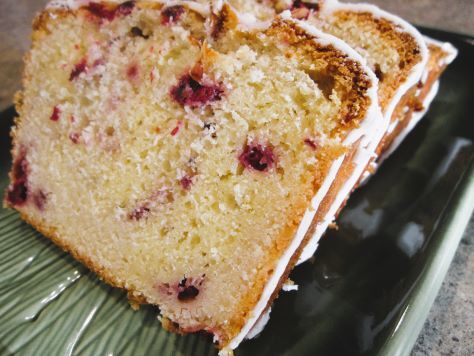
As this loaf does involve some labor, I found it simplified things to prepare it over two days. Day 1: make frangipane and chill it. Day 2: make loaf and glaze. Day 3: serve to my husband’s co-workers.
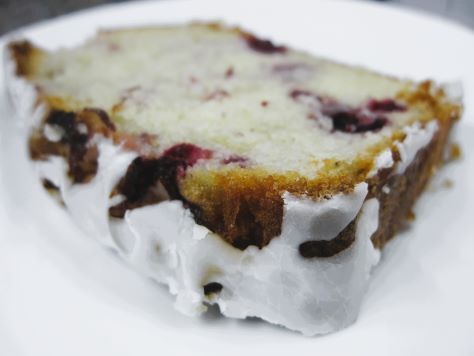
I found the cake kept beautifully, wrapped, for up to 4 days after baking.
PrintBready or Not Original: Raspberry Frangipane Loaf CakeThis luscious loaf cake is fantastic to make ahead of time for a stunning breakfast or brunch.Course Breakfast, Dessert, SnackKeyword almond, cake, loaf cake, raspberriesAuthor Beth CatoEquipment8×4 loaf panparchment papernonstick spraykitchen shearsIngredientsFrangipane1/2 cup unsalted butter (1 stick) room temperature 1/2 cup almond flour sifted1/4 cup white sugar2 Tablespoons all-purpose flour1 large egg white1/4 teaspoon kosher salt1/2 teaspoon almond extractBatter1 1/4 cups frozen raspberries1/2 cup unsalted butter (1 stick) room temperature 1 cup white sugar2 large eggs room temperature1 teaspoon vanilla extract1/4 teaspoon almond extract1 3/4 cups all-purpose flour plus 1 Tablespoon1 Tablespoon baking powder1/2 teaspoon kosher salt1/2 cup full-fat vanilla Greek yogurt or plain Greek yogurt2 Tablespoons sliced almondsGlaze1 cup confectioners’ sugar1 Tablespoon half & half or milk1/2 teaspoon clear vanillaInstructionsFrangipaneFrangipane can be made immediately before the batter or prepared a day in advance.In a medium bowl, stir butter until creamy. Add almond flour, sugar, all-purpose flour, egg white, salt, and almond extract. Stir until combined. Cover with plastic wrap pressed to the top, and place in fridge until ready to use.LoafPreheat oven at 375 degrees. Cut parchment paper to fit inside an 8×4 loaf pan like a sling extended up both long sides. Spray inside of pan with nonstick spray, then spray parchment.Use kitchen shears to break frozen raspberries into pieces of various size, measuring out 1 1/4 cup total. Stash raspberries back in freezer until ready to use.In a large bowl, beat together butter and sugar until fluffy. Add eggs one at a time followed by the extracts.In another bowl, sift together the 1 3/4 cups flour, baking powder, and salt. Gradually mix dry ingredients into the wet, mixing alternatively with the yogurt. Scrape the bottom of the bowl to make sure everything is combined.Fold the frangipane into the batter.Pull out the raspberries. Toss them with the remaining tablespoon of flour. Set aside 1/4 of coated berries for the top; fold the rest of the berries into the batter.Spread batter in prepared pan, evening out the top. Sprinkle reserved raspberries on top, followed by the sliced almonds.Bake for 20 minutes. Reduce oven temperature to 325 degrees. Continue to bake until the top is golden and the inside registers an interior temperature over 200 degrees, which will be about another 40 minutes. (Total baking time will be between 55 minutes and 1 hour 5 minutes.) If the loaf is looking brown early on, cover with a small piece of foil.Let cool in pan about 20 minutes, then use the parchment sling to lift the loaf onto a rack to completely cool.GlazeOnce the loaf is completely cool, mix the glaze. It should be fairly thick; add a touch more confectioners’ sugar if needed. Drizzle over loaf so that the top is covered with glaze dripping down the sides.Give the glaze at least 30 minutes to set before cutting into the loaf, or wrap loaf to serve later or the next day. Loaf will keep well, wrapped at room temperature, for up to 4 days.OM NOM NOM!October 30, 2024
Bready or Not Original: Big Batch Sugar Cookies and Mini Chocolate Chip Cookies
This recipe for a Big Batch Sugar Cookies and Mini Chocolate Chip Cookies makes it easy to get two kinds of cookies in one batch. It makes about 90 total cookies!
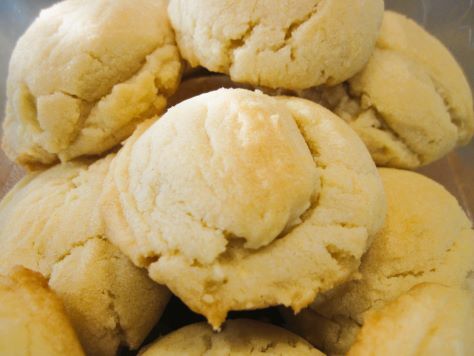
One thing to keep in mind: there is such a huge quantity of dough, stirring it can be tricky. Use your biggest bowl. I did a lot of the mixing in my KitchenAid, then had to finish stirring my hand.
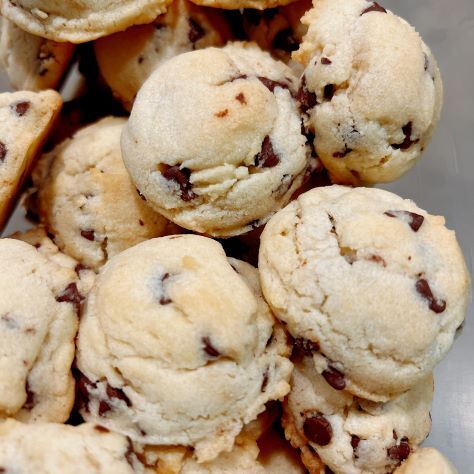
The foundation of this recipe is a classic sugar cookie. Soft, sweet, and crumbly. That base is fantastic with additional chocolate. Do note that mini chips are a must here, because the dough is so crumbly.
PrintBready or Not Original: Big Batch Sugar Cookies and Mini Chocolate Chip CookiesSplit this big batch of dough to get both sugar cookies and chocolate chip cookies. Note that mini chocolate chips are a must, as the dough is crumbly. Give the dough time to chill, or freeze it to make even later. Makes about 90 total cookies.Course Dessert, SnackCuisine AmericanKeyword chocolate, cookiesServings 90 cookiesAuthor Beth CatoEquipmentcookie scoop or spoonfood scaleIngredients1 cup unsalted butter (2 sticks) softened1 cup vegetable oil1 cup white sugar1 cup confectioners’ sugar2 large eggs room temperature1 teaspoon vanilla extract4 1/2 cup all-purpose flour1 teaspoon baking soda1 teaspoon cream of tartar1 cup mini chocolate chipsInstructionsIn a large bowl, beat together the butter, oil, and sugars. Add the eggs and vanilla. In another bowl, sift together the flour, baking soda, and cream of tartar. Gradually beat the dry ingredients into the wet. This will be a lot of dough; if an electric mixer was being used, it may be necessary to switch to stirring by hand.Use a food scale to divide the dough in half. Place one half back in the bowl. Remove a small handful, transferring that to the other portion. Add the mini chocolate chips to the bowl and stir to combine.Wrap each portion of dough in plastic wrap and chill for at least 2 hours, or up to 3 days. Freeze if it needs to be baked beyond that time frame.Preheat oven at 375 degrees. Prepare a baking sheet with parchment paper.Use a cookie scoop or spoon to portion out the dough. The chocolate chip kind will need to be compressed slightly to make it cohesive.Bake for 9 to 11 minutes, until cookies are set and tinted golden. Set on a rack to cool, and then place in sealed containers at room temperature.OM NOM NOM!October 23, 2024
Bready or Not: Pumpkin Spice Latte Pie
I’ve made many, many pumpkin pies. My husband said this Pumpkin Spice Latte Pie is now his all-time favorite.

This really is a special pie. Espresso powder is in both the crust and filling, but the regular pie spices come through, too. Pumpkin plays well with everything, and the texture of the filling is silky-smooth.

I want to note that this pie is best consumed within 3 days. At that third day, the pie crust began to soften. It was still edible and enjoyable, but the texture just wasn’t as good.

Modified from Food Network Magazine November 2023.
PrintBready or Not: Pumpkin Spice Latte PieThis is a truly special autumnal pie. It’s infused with espresso powder inside and out, and that flavor works beautifully with pumpkin. Note that the crust stage involves several phases of chilling, so it should be started days or hours ahead of baking time. Modified from Food Network Magazine November 2023.Course Breakfast, DessertCuisine AmericanKeyword coffee, pie, pumpkinAuthor Beth CatoEquipmentfood processorRolling Pindeep 9-inch pie platepie weightsaluminum foilIngredientsCrust1 1/4 cups all-purpose flour plus more for dusting1 teaspoon instant espresso powder1 teaspoon white sugar1/2 teaspoon apple cider vinegar1/4 teaspoon kosher salt1/2 cup unsalted butter (1 stick) cut into small pieces2 to 4 Tablespoons waterFilling1 1/4 cups heavy cream1 Tablespoon instant espresso powder15 ounces pure pumpkin puree2/3 cup white sugar2 large eggs room temperature2 teaspoons pumpkin pie spice1/2 teaspoon vanilla bean paste1/4 teaspoon kosher saltInstructionsMake the crustIn a food processor, pulse together the flour, espresso powder, sugar, vinegar, and salt. Add the butter and pulse until everything forms pie-sized pieces. Sprinkle in 2 tablespoons water and pulse the dough. If it comes together, great, but if not, add another tablespoon, pulse, then add another tablespoon if necessary. The dough should look crumbly but become cohesive when squeezed.Put dough on a strip of plastic wrap and pat into a disc shape. Encase in wrap and chill at least an hour, or a day or two.Sprinkle flour on a work surface then roll dough into a 12-inch round. Use the rolling pin to lift it onto a pie plate. Press into place, folding over extra at edges to crimp. Prick the bottom and sides with a fork. Cover with plastic wrap (such as the one just used to chill dough) and freeze for at least an hour, or overnight.Preheat oven at 350 degrees. Line the crust with foil. Fill pie with pie weights or dried beans. Bake until edges are golden, 20 to 25 minutes. Remove the foil and weights–such as lifting them onto a rimmed baking pan to cool–and continue baking crust for 10 to 15 minutes, until it is golden all over. Transfer to a rack to cool.Make the fillingWhisk together heavy cream and espresso powder in a large bowl until the powder has dissolved. Add the pumpkin puree, white sugar, eggs, pumpkin pie spice, vanilla paste and salt. Scrape the bottom a few times to incorporate everything.Pour filling into the cooled crust and smooth out the top. Bake until filling is set at edges but still slightly jiggly in center, 50 to 60 minutes. Transfer to a rack to cool for 3 hours.Store at room temperature, covered by foil. Slice and top with whipped topping. Pie is best eaten within 3 days.OM NOM NOM!October 16, 2024
Bready or Not Original: Cranberry-Date Bars
These Cranberry-Date Bars are thick, hearty and delicious, perfect for dessert, a snack, or as a breakfast bar.
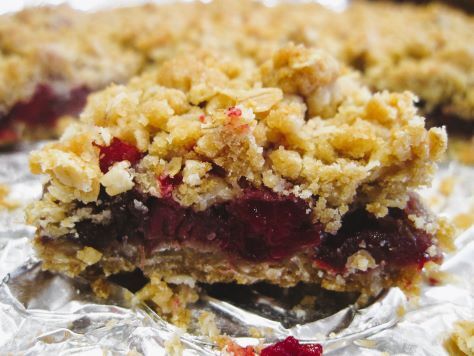
I used fresh cranberries for this recipe, as I had them in-season. I washed and thoroughly dried the cranberries. For the dates, I didn’t use precut, crusty date bits, but freshly chopped up dates that I had purchased at Costco. I much prefer eating those–they are soft, pliable, and especially sweet.
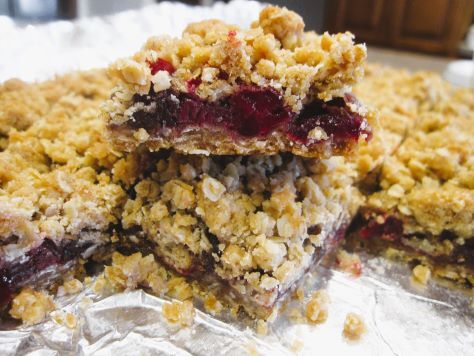
The dates provide a beautiful counterbalance to the tart cranberries. They also act as glue to hold everything together.

The bright red filling makes these especially pretty for the holiday time, too.
PrintBready or Not Original: Cranberry-Date BarsThese thick and hearty fruit-filled bars are great as a dessert, snack, or breakfast bar!Course Breakfast, SnackCuisine AmericanKeyword bars, cranberries, datesAuthor Beth CatoEquipmentmedium saucepan9×13 panfoilnonstick sprayIngredients16 ounces fresh or frozen cranberries8 ounces chopped dates1 teaspoon vanilla extract2 cups all-purpose flour2 cups quick oats1 1/2 cups brown sugar packed1/2 teaspoon baking soda1/4 teaspoon salt1 cup unsalted butter (2 sticks) meltedInstructionsPlace cranberries and dates in a medium saucepan and cook over low heat, stirring often, until the berries pop. Remove pan from heat to stir in vanilla. Set aside.Preheat oven at 350 degrees. Line a 13×9 pan with foil and apply nonstick spray or butter.In a mixing bowl, place flour, oats, brown sugar, baking soda, and salt. Pour in butter and stir until it forms a crumbly mixture. Press about half into the prepared pan, compressing to form an even layer.Bake for 8 minutes. Pull pan from oven. Dollop cranberry-date mixture over top, gently spreading out to create a layer. Sprinkle the remaining crumb mixture over the top. Put back in oven to bake for 20 to 25 minutes; the top should be golden brown with the crumbs set in the middle.Cool to room temperature, speeding the process in the fridge, if desired. Use foil to lift contents from pan onto a cutting board to slice into bars. Store at room temperature in a sealed container.OM NOM NOM!October 9, 2024
Bready or Not Original: Cranberry Swirled Blondies
My original recipe for Cranberry Swirled Blondies is the perfect way to use up leftover cranberry sauce from the holidays. Try out this recipe with a homemade sauce (like my recipe featured just last week) or a canned version.
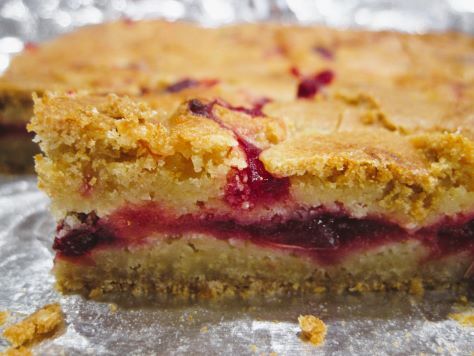
If you use a jellied version in a can, you should mush it first so that it’s easy to spread. Also note that the varying moisture content of difference sauces could make for a shorter or longer baking time.
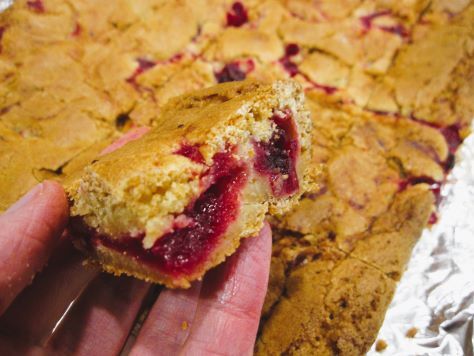
For this recipe, 10 ounces of sauce is the minimum because you need enough to spread into an even layer. I’d say you can go up to as much as 15 ounces.
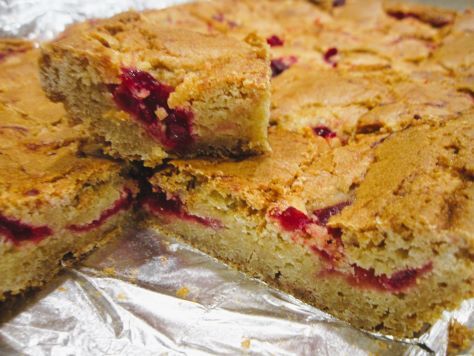
These bars are the perfect breakfast or snack bar in the holiday season. Heck, use them for a cookie tray! They keep fantastically frozen, too.
PrintBready or Not Original: Cranberry Swirled BlondiesThis casserole-sized blondie recipe is an ideal way touse up leftover cranberry sauce from the holidays!Course Breakfast, DessertCuisine AmericanKeyword cranberriesAuthor Beth CatoEquipment13×9 panaluminum foiluneven spatulaIngredients2 1/4 cups all-purpose flour1 1/2 teaspoons baking powder1/2 teaspoon salt3/4 cup unsalted butter (1 1/2 sticks) softened1 1/4 cups white sugar1 1/4 cups brown sugar packed2 teaspoons vanilla extract3 large eggs room temperature10 ounces cranberry sauce this is the minimum, use up to 15 ounces InstructionsPreheat oven to 350-degrees. Line 13×9 pan with wide aluminum foil and apply nonstick spray or butter.In a small bowl, mix together the flour, baking powder, and salt. Set aside.In a mixing bowl, beat together the butter, both sugars, and vanilla to create a smooth batter. Beat in eggs, one at a time, followed by the flour mixture. Place about 2/3 of the batter in the pan and carefully spread into a base later using an uneven spatula. Spread cranberry sauce on top. Dollop remaining dough on top. Use a knife to swirl layers together.Bake until evenly golden brown and set in the middle, 35 to 40 minutes. Cool completely at room temperature or chill before cutting. Use foil to lift contents onto a cutting board for easy slicing.Blondies keep for up to 3 days in a room temperature sealed container and can also be frozen.OM NOM NOM!October 2, 2024
Bready or Not: Easy Cranberry Sauce
It’s the first week of October, but we’re anticipating the holiday season with this Easy Cranberry Sauce recipe.
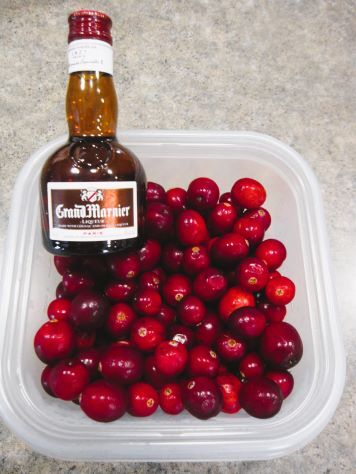
Last Thanksgiving was my first in almost 20 years when I didn’t get to go home to California. My mom is all about using the canned jellied cranberry sauce. I’ve hinted for years now that I could try making a fresh sauce, but tradition is tradition.
I was sad I couldn’t be with my folks at Thanksgiving, but hey, at least I could try a homemade sauce at long last. Being that I’m in Minnesota now, that also meant using local cranberries.
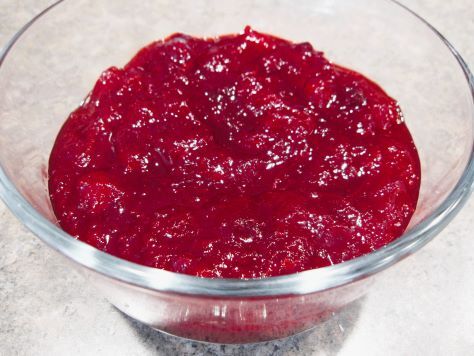
I used a 12-ounce bag of fresh cranberries, but frozen is fine, too. Since there were only two of us partaking in the feast, we had a lot of leftover sauce, but that was fine–I used most of the remainder in a Cranberry Swirled Blondies recipe that I’ll share next week!
PrintBready or Not: Easy Cranberry SauceThis sauce takes all of 15 minutes to make and can be stashed in the fridge for up to 5 days. That means it can be made ahead of a holiday meal. Modified from Bon Appetit November 2023.Course Side DishCuisine AmericanKeyword cranberriesAuthor Beth CatoIngredients12 ounces cranberries fresh or frozen3/4 cup white sugar1 Tablespoon Grand Marnierzest of one orangepinch kosher salt1 cup waterInstructionsPlace all of the ingredients in a medium saucepan on medium heat. Stir frequently as the contents warm through so that nothing sticks and burns. After 10-15 minutes, the cranberries will start to burst and the mixture will turn jammy. Cook another couple minutes as more berries break down. Remove from heat and cool before serving.Sauce can be made up to 5 days ahead. Store it in an airtight container in the fridge. Serve with meats such as turkey and ham, or with ice cream or within a baked dessert.OM NOM NOM!September 25, 2024
Bready or Not: Classic Pot Roast
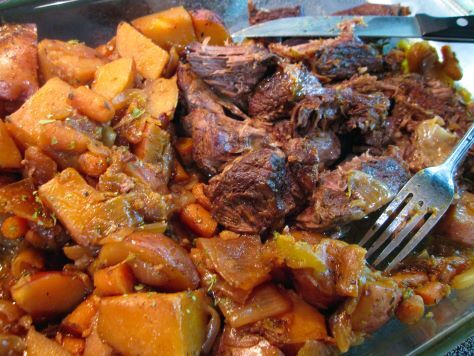
Classic Pot Roast. Why haven’t I featured this on Bready or Not before? Because Arizona is not conducive to prolonged use of the oven outside of the two months of ‘winter.’
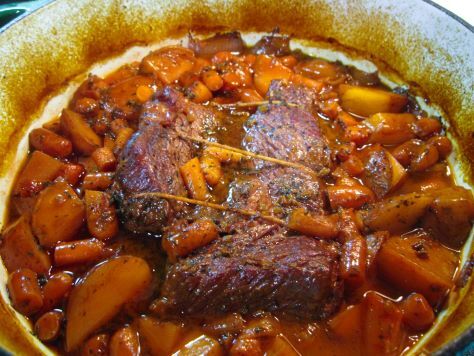
But I’m in the Midwest now. That means I can whip up a proper pot roast (quite likely on a Sunday), and might just use local ingredients, too.
Fun fact: I hate celery, but I like celery flakes. That’s why you see me use celery flakes in recipes like this. You can absolutely use a couple stalks of celery instead.

If you have a large can of tomato paste, portion out standard amounts that are used in recipes (like tablespoon dollops), freeze them on wax paper, then store them in a quart freezer bag to toss into recipes. If you forget to thaw them before cooking, no biggie, just add it in frozen and give it a touch extra time to break down.
PrintBready or Not: Classic Pot RoastThis is a classic stove-to-oven pot roast with beef, potatoes, and all the fixings. It takes about 3 hours total. Leftovers, of course, are wonderful heated up in a smaller pot over the next day or two. Modified from Taste of Home February-March 2015.Course Main CourseCuisine AmericanKeyword beefCook Time 3 hours hoursAuthor Beth CatoEquipmentlarge oven-safe Dutch oven or pot with lidIngredients3-4 pound chuck roast tied2 teaspoons pepper1 1/2 teaspoons salt plus another 1/2 teaspoon2 Tablespoons canola oil2 medium onions cut into 1-inch pieces3 garlic cloves minced2 Tablespoons celery flakes1/4 cup tomato paste1 teaspoon dried thyme2 bay leaves1 cup dry red wine or reduced-sodium beef broth1 can reduced-sodium beef broth1 1/2 pound small red potatoes cleaned and quartered1 1/2 cups baby carrots1/2 Tablespoon apple cider vinegardried parsleyInstructionsPreheat oven at 325 degrees. Dry roast and sprinkle with the pepper and 1 1/2 teaspoons salt on both sides.In a large pot on the stove, heat the oil. Add the roast and brown on all sides. Set meat aside.Add onions, garlic, and remaining salt to the pot. Cook over medium heat, stirring often, 8-10 minutes, until browned. Add celery flakes, tomato paste, thyme, and bay leaves, stirring in for about a minute.Add wine (or extra broth) and stir to loosen browned bits from pan. Add the can of broth. Return roast to the pan. Arrange vegetables around the roast while bringing the pot to a boil. Once that mark is reached, turn off burner and carefully transfer pot to oven. Cover and bake for 2 to 2 1/2 hours, until meat is fork-tender.Pull pot from oven. Carefully remove meat and vegetables to a platter. Discard bay leaves and skim any fat from the top of the liquids. Bring pot to a boil again, cooking for 10-12 minutes, until liquid is reduced by half. (While this is going on, prepare meat by removing string and slicing or cutting into chunks.) Add vinegar and parsley to the pot. Add more salt and vinegar to taste.Serve meat, potatoes, and veggies with sauce. Any leftovers are great reheated on the stove over the next day or so.OM NOM NOM!September 18, 2024
Bready or Not: Maple Bundt Cake with Maple Icing
Yes, it’s time for yet another maple cake on Bready or Not! This time, a straightforward Maple Bundt Cake with Maple Icing. Delicious cake, plain and simple.
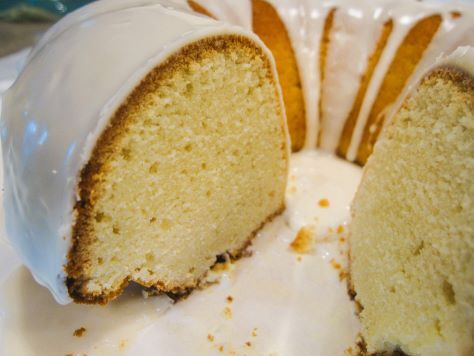
This recipe uses both maple syrup and maple flavor. I feel that both are really necessary here. Really, if you love maple, maple flavor is great to have around. It stays good forever. If you need recipes that use it, well, I think I have dozens of them here on my site.
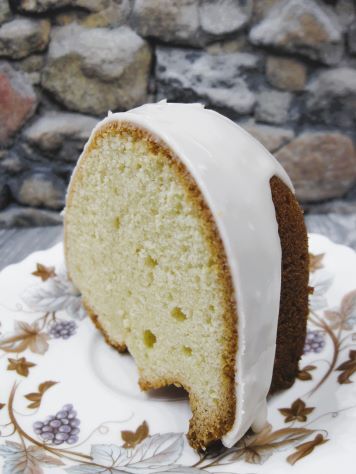
This is the kind of cake that works well for a breakfast, brunch, or dessert. It’s deliciously versatile like that.
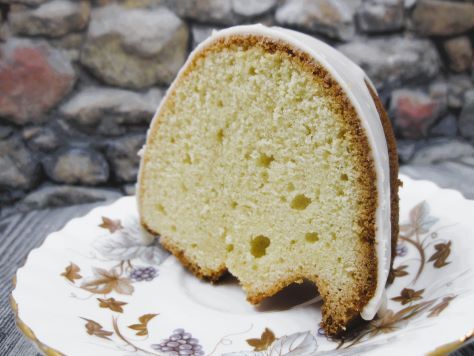 PrintBready or Not: Maple Bundt Cake with Maple IcingThis classic bundt cake is infused with maple flavor inside and out. It’s fantastic for breakfast, brunch, or dessert.Course Breakfast, Dessert, SnackKeyword bundt cake, cake, mapleAuthor Beth CatoEquipmentlarge bundt pan (12 cups/10 inches)nonstick spraybaking sheetIngredientsCake1 cup unsalted butter (2 sticks) room temperature1 cup white sugar1/2 cup pure maple syrup4 large eggs room temperature2 1/2 cups all-purpose flour1 teaspoon baking powder1/2 teaspoon sea salt1/2 cup half & half or milk1/2 teaspoon maple flavorIcing1 1/2 cups confectioners’ sugar2 Tablespoons pure maple syrup2 Tablespoons half & half or milkInstructionsPreheat oven at 350 degrees. Place a baking sheet inside to warm up. Apply nonstick spray to coat the interior of a large bundt pan.In a large mixing bowl, cream the butter until smooth. Add the sugar, scraping down the bowl a few times to make sure everything is mixed. Continue to beat until it becomes light and fluffy. Add the maple syrup followed by the eggs, one at a time.In another bowl, combine flour, baking powder, and salt. Gradually add the dry ingredients to the main bowl, interspersing it with the addition of the half & half. Add the maple flavor. Once everything is added, scrape the bottom of the bowl.Scoop the batter into the prepared bundt pan. Smooth the top with the back of a spoon.Place the bundt pan atop the hot baking sheet. Bake for 1 hour to 1 hour and 10 minutes, until a toothpick plunged into the middle of the cake comes out clean.Let cake rest in pan for 20 minutes, then invert it onto a rack to cool completely.Make the glaze by combining the three ingredients to form a thick texture. Drizzle over the top of the cooled cake.Store cake under a cake dome or other cover. Individual slices can be wrapped in plastic for transport or frozen for later.OM NOM NOM!
September 11, 2024
Bready or Not Original: Goat Cheese Biscuits
Today we are not only bready, to fit with the blog title of Bready or Not, but we are also cheesy. These Goat Cheese Biscuits are the perfect side for a supper meal.
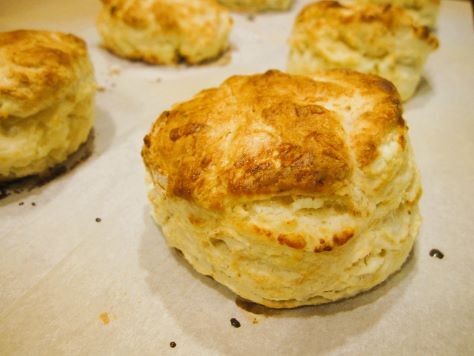
If you’re on the lookout for a good supper meal, too, stay tuned–in two weeks, I’m sharing a pot roast recipe that will set you up nicely for this fall and winter!
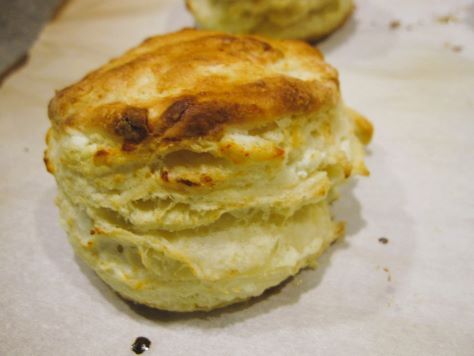
For this recipe, I love using the 4-ounce logs that are often available at Aldi. They are cheap and basic, not high end as far as chevre goes, but they are absolutely perfect in a recipe like this. Plain logs are ideal, but you can also use one with herbs.
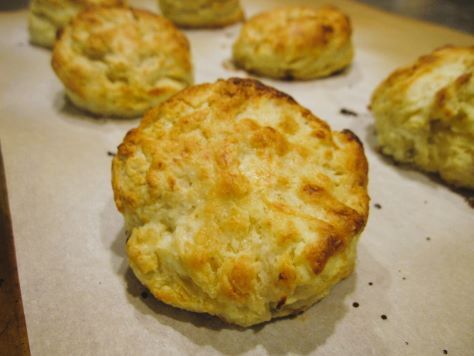
I like thick biscuits. I get 6 out of this recipe, but if you form them to be thinner, you could get 8 or more. The texture is cakey, the flavor rich because of the butter and goat cheese throughout.
PrintBready or Not Original: Goat Cheese BiscuitsThis super-easy small batch of cheesy biscuits is perfect to feed a family alongside a good soup or stew. Makes 6-8 biscuits, dependent on thickness.Course BreadKeyword cheese, quick breadServings 6 biscuitsAuthor Beth CatoEquipment2-inch round cutterpastry brushIngredients4- ounces plain goat cheese or used an herbed variety2 cups all-purpose flour plus more for surface1 Tablespoon baking powder1 teaspoon salt1/4 cup unsalted butter3/4 cup buttermilk or soured milk, see noteextra milk or half & halfInstructionsPreheat oven to 475-degrees. Line a baking sheet with parchment paper.Set the goat cheese in the freezer for just a few minutes as the dough is being prepared.In a large bowl, stir together the flour, baking powder, and salt. Cut in the butter and mash it until it is pea-sized. Pour in the buttermilk or soured milk.The chilled goat cheese will be easier to dice into small pieces without being a sticky mess. Fold those chunks into the dough.Sprinkle flour onto a clean work surface. Knead the dough to make sure it is cohesive, but don’t overwork. Pat into a thick round. Use a 2-inch cutter to cut out shapes. Set them on cookie sheet, then reform leftovers to cut out more biscuits.Once all of the scrap dough is used, pour a dab of milk or half & half into a saucer. Use a pastry brush to brush a thin layer of milk onto the top of each biscuit; this will create a nice golden crust.Bake for 10 to 12 minutes, until nicely golden. Serve immediately. Leftovers can be reheated in the microwave or wrapped in foil and set in the oven to briefly bake.OM NOM NOM!NotesTo make soured milk, set out a liquid measuring cup. Add enough lemon juice or vinegar to form a thin line on the bottom of the cup. Pour milk or half & half to equal the 3/4 amount called for in this recipe. Let it sit for 5-10 minutes; it should coagulate. Use in recipe.


