
Ruth Soukup's Blog, page 116
March 20, 2014
Thrifty Thursday {Week 52}

Happy Thursday and Happy First Day of Spring! I hope you are all having a fabulous week! Later this afternoon I am heading over to Miami to host a #SpringMadeSimple Garden Party at the Deerwood Home Depot. There will be yummy food and fun garden-themed DIY projects and even a garden expert on hand to answer questions. Best of all? The event is FREE for all! If you happen to be in the Miami area, I would LOVE to see you there. If not, you can follow me on Instagram or Twitter, or just follow hashtag #SpringMadeSimple to join the fun! Get more details about the event here.
Here are the most clicked links from last week:
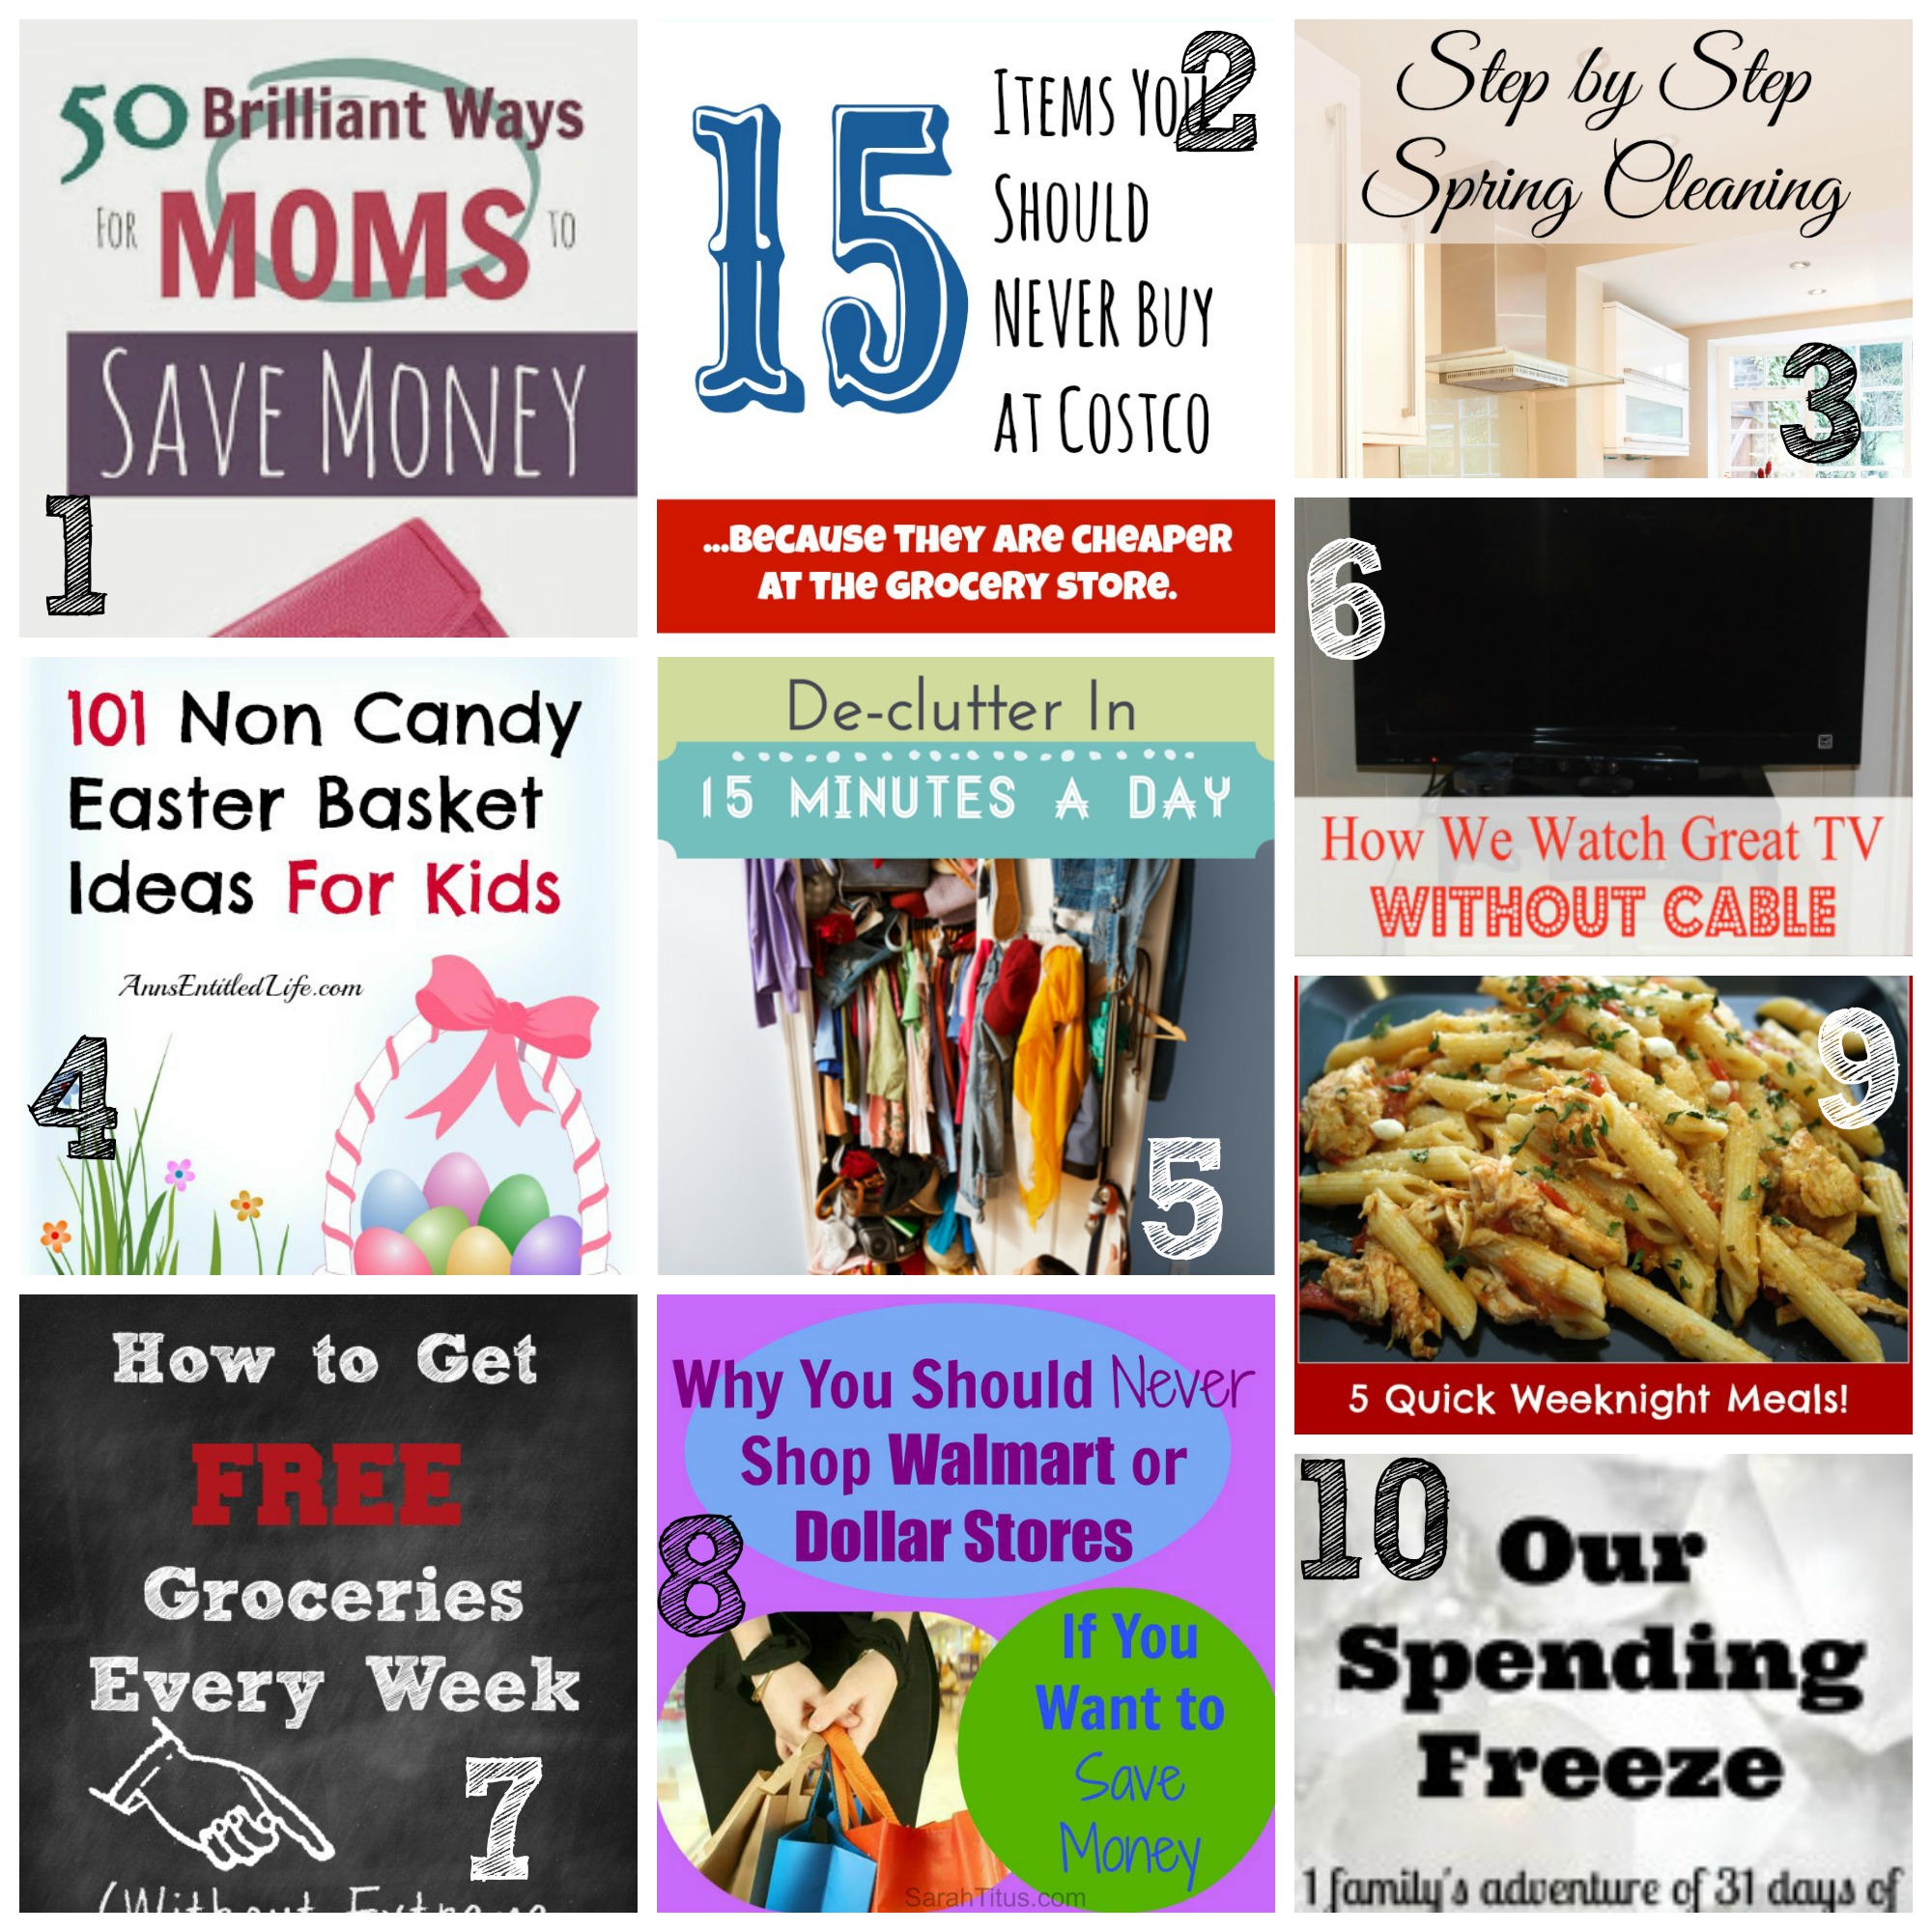
1. Mums Make Lists {50 Brilliant Ways for Moms to Save Money}
2. Kansas City Mamas {15 Things Not to Buy at Costco}
3. Raking in the Savings {Spring Cleaning: Kitchen Kick-Off }
4. Ann’s Entitled Life {101 Non Candy Easter Basket Ideas for Kids}
5. Savvy Shopper Central {De-clutter Your Home in 15 Minutes}
6. Family Balance Sheet {How We Watch Great TV Without Cable}
7. The Greenbacks Gal{How to Get Free Groceries Every Week}
8. Sarah Titus {Why You Should Never Shop at Wal-mart or Dollar Stores}
9. Detours in Life {5 Quick Weeknight Meals}
10. Aspired Living {Our Month Long Spending Freeze}
Never linked up to a party before? Here’s how:
Scroll down, find the little blue “Add your Link” Button and click on that.
Follow the instructions on the next page – add a great image of your project and an interesting title. Make sure you link to the direct page of your budget friendly post – not the main page of your blog!
Try to visit at least a few other blogs at the party. Be sure to leave a comment to let them know you stopped by!
Please link back to this post somehow. There are badges available here; a simple text link is just fine too.
 Feel free to tweet about Thrifty Thursday so others can join the fun, and don’t forget to check back here Sunday morning to see which posts have been featured this week!
If this is your first time here I also invite you to check out my eBook, How to Blog for Profit (Without Selling Your Soul). It is a fantastic resource if you are interested in building your blog, getting more traffic, or learning how to monetize. Or, if you have read the book and are still looking to take your blog to the next level, I encourage you to check out my options for one-on-one blog consulting.
An InLinkz Link-up
Pin It
The post Thrifty Thursday {Week 52} appeared first on Living Well Spending Less™.


March 19, 2014
Mountain Dew Apple Dumplings

When my friend Jenny–who you may remember from this amazing fish recipe–first shared this funny little recipe with me a few years ago, I literally laughed out loud. It just sounded so crazy! I mean, seriously…..Mountain Dew? In a baked dish? I thought she was joking.
Until, of course, I tasted it.
That’s when I begged her for the recipe. Luckily for me and for all of you, she was happy to share.
Of course I do feel the need to start with a word of caution for those of you, who despite the name “Mountain Dew Apple Dumplings,” were expecting some sort of whole-food-clean-eating-organic-gluten-free-or-otherwise-healthy dessert. It is not healthy in any way. It is full of preservatives and white sugar and probably even some high-fructose-corn-syrup. If this bothers you, just click away now! For the rest of you, keep reading. This is one quick & easy recipe you will want to whip up again and again!
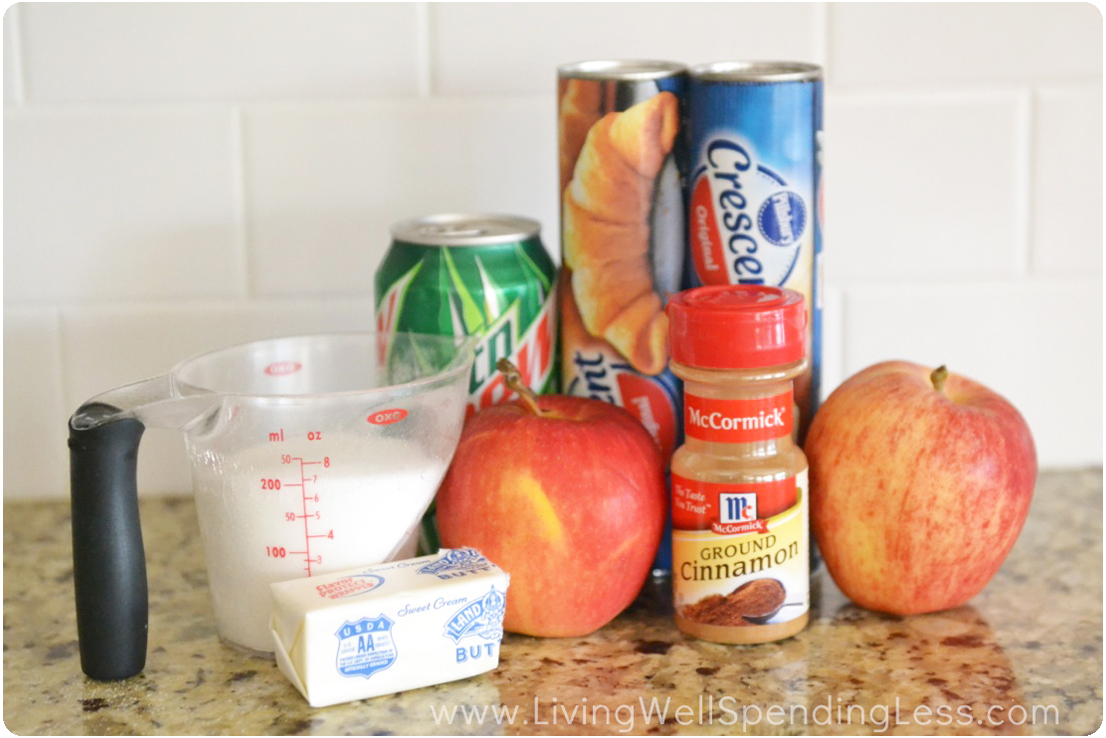
Here is what you need:
2 cans refrigerated crescent rolls
2 baking apples, such as Gala, McIntosh, or Granny Smith
3/4 cup sugar
1/2 stick of butter, melted
cinnamon
6 ounces Mountain Dew soda
cooking spray
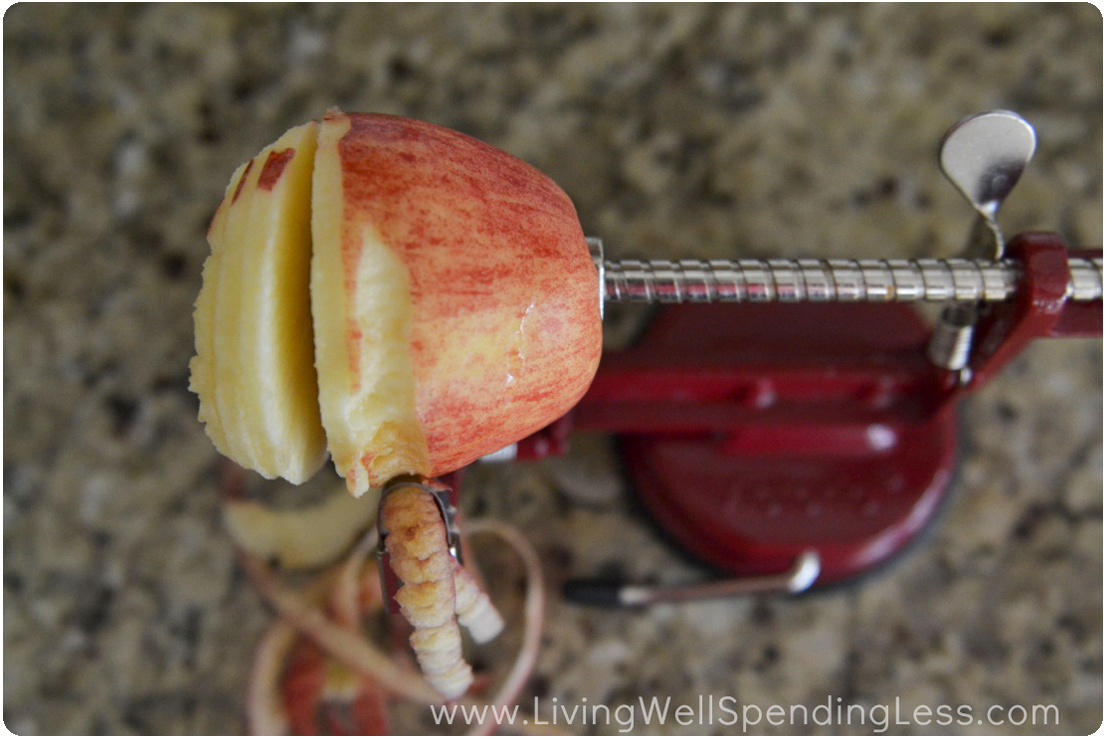
Step 1: Preheat oven to 350 degrees. Peel and core apples, then slice into 8 wedges each, or use an apple peeler-corer-slicer to do it.
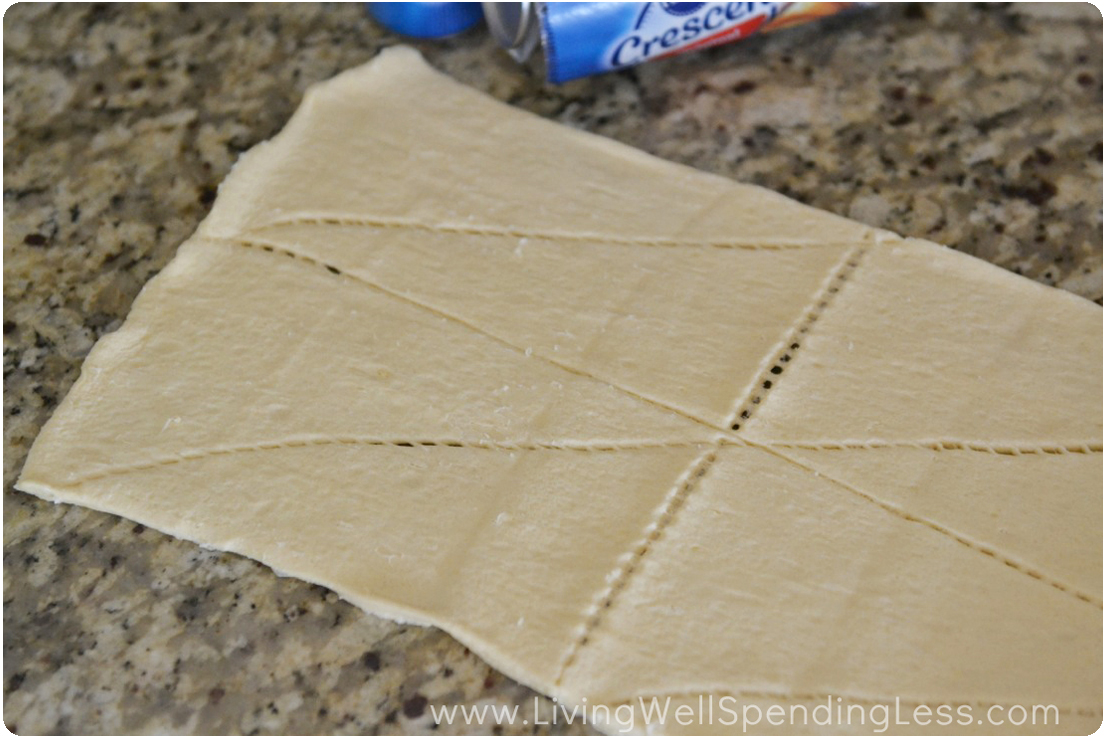
Step 2: Spray 9×13″ baking dish with cooking spray; set aside. Unroll crescent rolls.
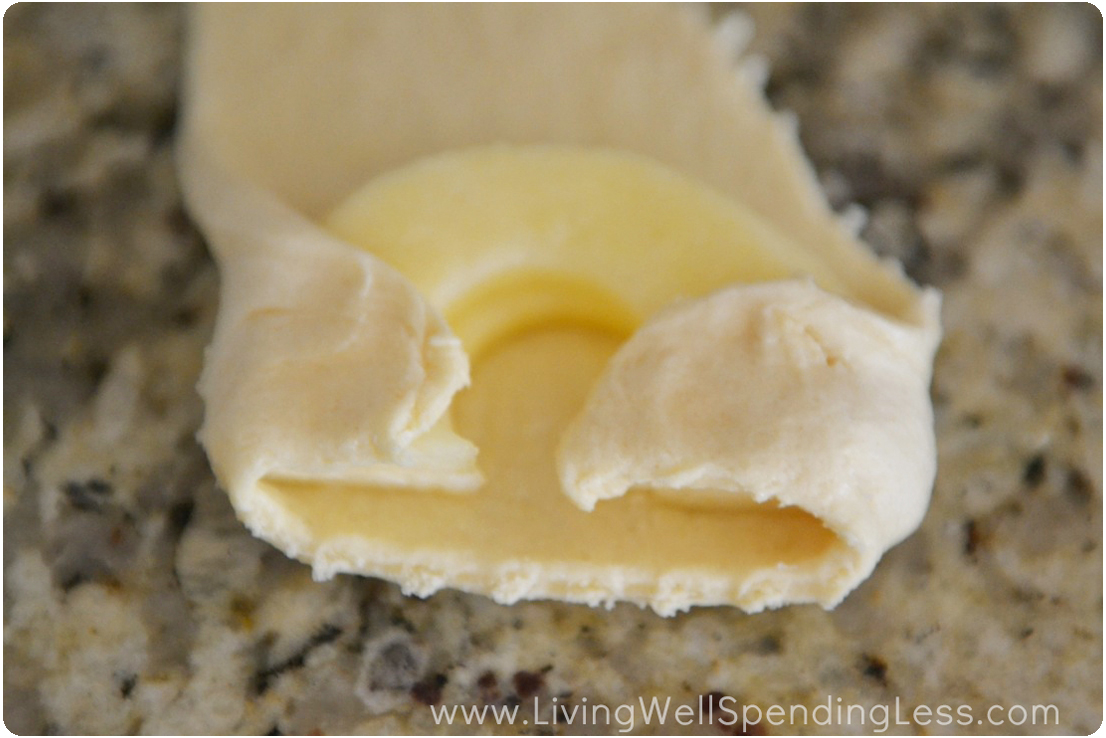
Step 3: Wrap 1 apple wedge in crescent roll, then pinch seams together to cover apple completely. Place in dish; repeat with remaining apple wedges.

Step 4: Mix together melted butter & sugar, then liberally crumble sugar mixture over top of crescent rolls. Sprinkle with cinnamon.
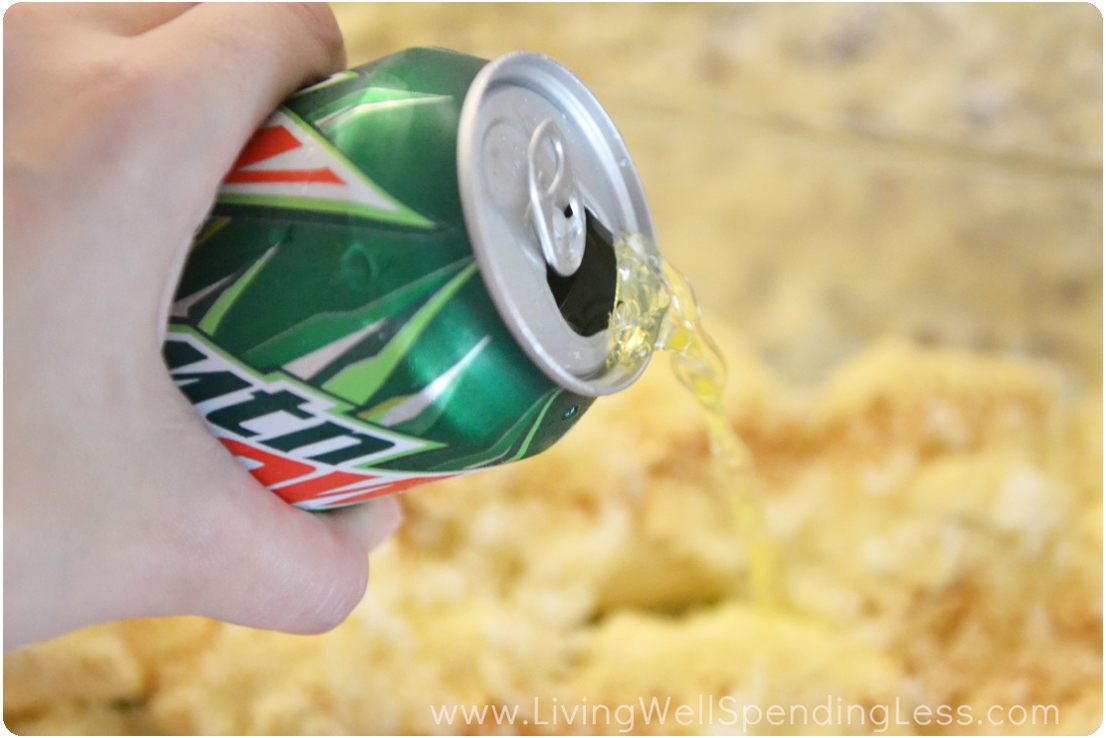
Step 5: Pour Mountain Dew over crescent rolls. Bake at 350 degrees for 40 minutes, until rolls are golden brown. Serve warm, with ice cream if desired.

Print This!
Recipe: Mountain Dew Apple Dumplings
Summary: Super tasty apple dessert that is way easier than pie!
Ingredients
2 cans refrigerated crescent rolls
2 baking apples, such as Gala, McIntosh, or Granny Smith
3/4 cup sugar
1/2 stick of butter, melted
cinnamon
6 ounces Mountain Dew soda
cooking spray
Instructions
Preheat oven to 350 degrees. Peel and core apples, then slice into 8 wedges each, or use an apple peeler-corer-slicer to do it.
Spray 9×13″ baking dish with cooking spray; set aside. Unroll crescent rolls.
Wrap 1 apple wedge in crescent roll, then pinch seams together to cover apple completely. Place in dish; repeat with remaining apple wedges.
Mix together melted butter & sugar, then liberally crumble sugar mixture over top of crescent rolls. Sprinkle with cinnamon.
Pour Mountain Dew over crescent rolls. Bake at 350 degrees for 40 minutes, until rolls are golden brown. Serve warm, with ice cream if desired.
Preparation time: 5-10 minute (s)
Cooking time: 40 minute(s)
Number of servings (yield): 16

* * *
Have you ever tried Mountain Dew dumplings?
Pin It
The post Mountain Dew Apple Dumplings appeared first on Living Well Spending Less™.
March 18, 2014
Part 3: How to Clean Your Living Space
This is Part Three of an 8-Part Beginner’s Guide to Cleaning Series. See the overview here.
* * *
Welcome back to the Beginner’s Guide to Cleaning! So far in this series we have addressed the “why” and the “when” of cleaning,taking an honest look at the reasons having a clean house even matters to us, as well as creating a workable cleaning schedule that fits with our own needs. Then, last week, we also took a look at the “what” of cleaning—those cleaning products and tools we may need to get the job done.
But this is the week we will finally start getting our hands dirty….and our houses clean. Each week we will methodically make our way through one area at a time, starting today with our living space—the most visible and most highly trafficked rooms in our home. The good news is that after this week’s assignment your house will look and feel a whole lot cleaner. The bad news is that this week’s assignment is probably the biggest of this whole series. But wouldn’t you rather get the hard part over with first?
The format for this portion of the series will be pretty simple. I will walk you through the steps for cleaning the surfaces most commonly found in this zone, giving detailed instructions for how to clean each one. If you are a seasoned house-cleaner, much of it may be review—feel free to skip to the end of the post, or add your own tips & tricks in the comments below! At the end of the post you will get a printable checklist to use as you tackle your living space.
Are you ready? Good! Then let’s get started.
Step 1: Pre-clean & create a collection zone
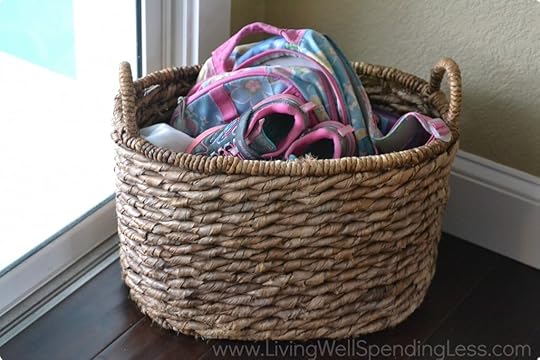
Supplies needed: A large box or basket or individual baskets for each family member (I like this large chalkboard label basket or this seagrass stair basket, but you could use whatever you have around the house, or even build a pretty box out of scrap wood.)
How-To: Pick up any items lying around the living area, including any clutter that has collected on tables or shelves. Throw away garbage or papers that are no longer needed. Place remaining items in appropriate baskets for each family, or collect in a single basket to be put away. (This is a great task for kids while you are cleaning the room!) Consider creating a permanent collection zone somewhere in your home—either at the front entrance, near the stairs, or in a corner of the living room. Use your basket or baskets to collect any items that would normally get left lying around. If mail & paperwork is normally a problem, create a 2nd collection zone specifically for items that need to be kept (but try to throw away junk mail & catalogs as soon as they come in!)

Step 2: Clean Ceiling Fans, Vents, Lights & Upper Ledges
Supplies needed: Vacuum with hose attachment, hand vacuum, or portable wet dry vac, warm soapy water, rag or sponge
How-To: Vacuum excess dust from top of fan and/or upper ledges. Use wet rag to gently clean blades; rinse and repeat if necessary.
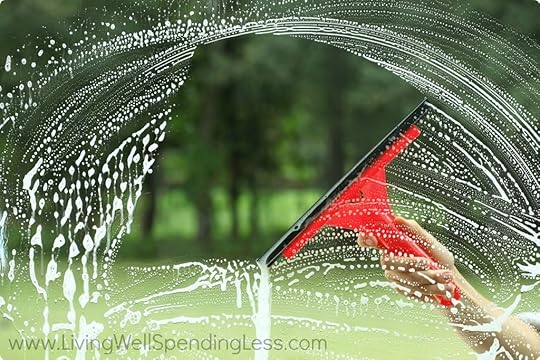
Step 3: Wash Windows
Supplies needed: Glass cleaner, squeegee, rag
How-To: Spray glass; run squeegee against glass from side to side, wiping blade with rag as necessary.
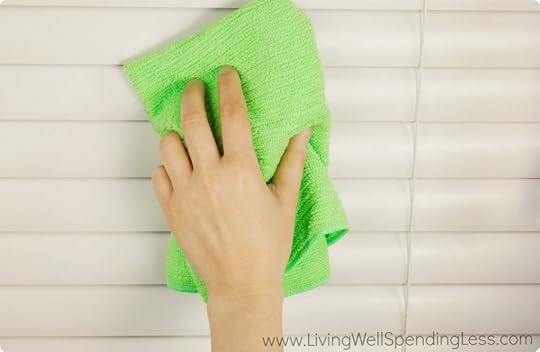
Step 4: Clean Curtains & Blinds
Supplies needed: washing machine, iron & ironing board, duster, mild soapy water & rag
How-To: If curtains are washable, remove curtains and wash in cold water on permanent press. Tumble dry on low and remove while still very slightly damp. Iron and re-hang. If curtains are dry clean only, consider having them cleaned or spot clean with mild soapy water. For blinds, dust gently with dusting wand until all dust is gone. If necessary, spot clean gently with a wet rag and mild soapy water.
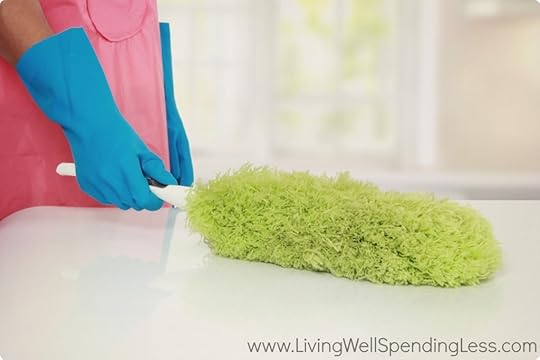
Step 5: Dusting
Supplies needed: Reusable or disposable dusting wand or dusting mitt.
How-To: Run duster over all horizontal surfaces, including bookshelves, the tops of light switches and fixtures, picture frames, clocks, mirrors, and any knick knacks or figurines.
Step 6: Clean & Polish Wood Furniture
Supplies needed: Murphy’s Oil Soap, Furniture Polish, rags
How-To: Fill sink or bucket with warm water and a few capfuls of Murphy’s oil soap. Use rag moistened with oil soap mixture to clean all wood furniture, including bookshelves or hutches, desks, tables, and dining chairs. I also like to use this mixture to clean my leather furniture, although it does not specifically say on the bottle that it is intended for leather, so be sure to test a small hidden area first! Once wood is clean, polish surfaces with an oil-based furniture polish. Apply polish to damp cloth, rub on surface, than buff off with a second dry cloth.
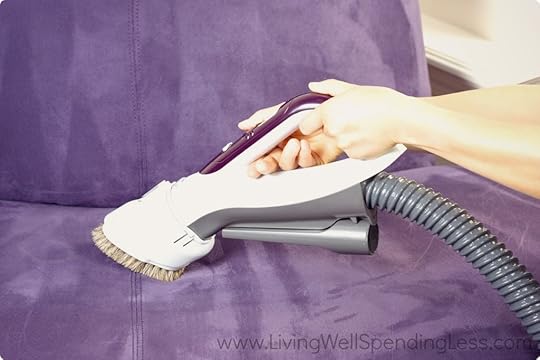
Step 7: Clean Upholstered Furniture
Supplies needed: Vacuum with brush hose attachment, dish soap, rag
How-To: Start by vacuuming all upholstered furniture using brush hose attachment to remove all dust, lint, & pet hair. If possible, remove cushions to clean underneath as well. Fill sink or bucket with mild soap solution, then use a rag to spot clean any marks or dirt.

Step 8: Clean Baseboards
Supplies needed: Vacuum with hose attachment, dish soap, rag
How-To: Start by vacuuming along baseboards to pick up any loose dirt, lint, or pet hair. Fill sink or bucket with mild soap solution, then wipe baseboards clean with wet rag.
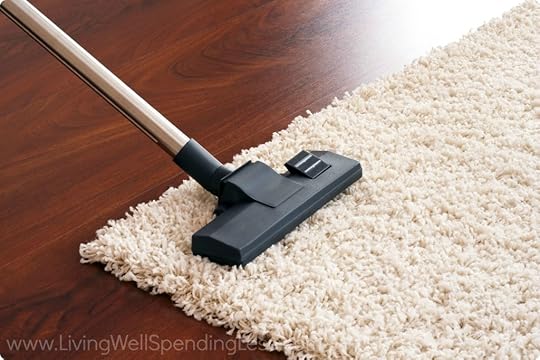
Step 9: Clean rugs & carpets
Supplies needed: Vacuum, baking soda, stain remover, dish soap, rag
How-To: Before beginning, be sure to check whether bag or canister is full, and empty if necessary. Also check rollers to make sure they are free of strings or debris. Vacuum rugs to remove all loose dirt and surface hair. Fill sink or bucket with mild soap solution, then spot clean rugs with stain remover and/or mild water solution. To deodorize after spot cleaning, sprinkle rug with baking soda, let sit for 20 minutes, then vacuum again.

Step 10: Clean hard floors
Supplies needed: Broom & dust pan, dust mop, wet mop, all purpose cleaner.
How-To: Before beginning, move as much furniture from the floor as possible. Starting at one end of the room, carefully sweep loose dirt and hair towards the center of floor. Methodically make your way around the room, sweeping all dirt towards the center into one pile. Sweep into dustpan and throw away. Next, do a sweep of the floor with your dust mop to remove any remaining dust or hair. Spot clean any sticky or dirty spots, or mop entire floor with wet mop and let dry.
But now that you know just what to do, it is time to get to work! To stay on task, use this handy printable checklist to help walk you through all the steps:

{Get your printable Living Space Cleaning Checklist here}
Part Three Assignment
Just to review, here is your third assignment:
Set aside a good chunk of time—at least 2-4 hours—sometime this week to work on deep cleaning your main living spaces—the great room, living room, family room, and/or dining room.
Round up a pretty box or basket (or one for each family member) and create a collection zone for stray items somewhere in your home, whether it be on the stairs, near the front entry way, in the laundry or mud room, or in a corner of the family room.
Follow the Living Space Cleaning Checklist to get your living area shining from top to bottom. If possible, open up the windows to let in some fresh air as well!

* * *
Did I miss anything? What are biggest challenges to keeping your living areas clean?
Pin It
The post Part 3: How to Clean Your Living Space appeared first on Living Well Spending Less™.
How to Clean Your Living Space
This is Part Three of an 8-Part Beginner’s Guide to Cleaning Series. See the overview here.
* * *
Welcome back to the Beginner’s Guide to Cleaning! So far in this series we have addressed the “why” and the “when” of cleaning,taking an honest look at the reasons having a clean house even matters to us, as well as creating a workable cleaning schedule that fits with our own needs. Then, last week, we also took a look at the “what” of cleaning—those cleaning products and tools we may need to get the job done.
But this is the week we will finally start getting our hands dirty….and our houses clean. Each week we will methodically make our way through one area at a time, starting today with our living space—the most visible and most highly trafficked rooms in our home. The good news is that after this week’s assignment your house will look and feel a whole lot cleaner. The bad news is that this week’s assignment is probably the biggest of this whole series. But wouldn’t you rather get the hard part over with first?
The format for this portion of the series will be pretty simple. I will walk you through the steps for cleaning the surfaces most commonly found in this zone, giving detailed instructions for how to clean each one. If you are a seasoned house-cleaner, much of it may be review—feel free to skip to the end of the post, or add your own tips & tricks in the comments below! At the end of the post you will get a printable checklist to use as you tackle your living space.
Are you ready? Good! Then let’s get started.
Step 1: Pre-clean & create a collection zone
Supplies needed: A large box or basket or individual baskets for each family member (I like this large chalkboard label basket or this seagrass stair basket, but you could use whatever you have around the house, or even build a pretty box out of scrap wood.)
How-To: Pick up any items lying around the living area, including any clutter that has collected on tables or shelves. Throw away garbage or papers that are no longer needed. Place remaining items in appropriate baskets for each family, or collect in a single basket to be put away. (This is a great task for kids while you are cleaning the room!) Consider creating a permanent collection zone somewhere in your home—either at the front entrance, near the stairs, or in a corner of the living room. Use your basket or baskets to collect any items that would normally get left lying around. If mail & paperwork is normally a problem, create a 2nd collection zone specifically for items that need to be kept (but try to throw away junk mail & catalogs as soon as they come in!)
Step 2: Clean Ceiling Fans, Vents, Lights & Upper Ledges
Supplies needed: Vacuum with hose attachment, hand vacuum, or portable wet dry vac, warm soapy water, rag or sponge
How-To: Vacuum excess dust from top of fan and/or upper ledges. Use wet rag to gently clean blades; rinse and repeat if necessary.
Step 3: Wash Windows
Supplies needed: Glass cleaner, squeegee, rag
How-To: Spray glass; run squeegee against glass from side to side, wiping blade with rag as necessary.
Step 4: Clean Curtains & Blinds
Supplies needed: washing machine, iron & ironing board, duster, mild soapy water & rag
How-To: If curtains are washable, remove curtains and wash in cold water on permanent press. Tumble dry on low and remove while still very slightly damp. Iron and re-hang. If curtains are dry clean only, consider having them cleaned or spot clean with mild soapy water. For blinds, dust gently with dusting wand until all dust is gone. If necessary, spot clean gently with a wet rag and mild soapy water.
Step 5: Dusting
Supplies needed: Reusable or disposable dusting wand or dusting mitt.
How-To: Run duster over all horizontal surfaces, including bookshelves, the tops of light switches and fixtures, picture frames, clocks, mirrors, and any knick knacks or figurines.
Step 6: Clean & Polish Wood Furniture
Supplies needed: Murphy’s Oil Soap, Furniture Polish, rags
How-To: Fill sink or bucket with warm water and a few capfuls of Murphy’s oil soap. Use rag moistened with oil soap mixture to clean all wood furniture, including bookshelves or hutches, desks, tables, and dining chairs. I also like to use this mixture to clean my leather furniture, although it does not specifically say on the bottle that it is intended for leather, so be sure to test a small hidden area first! Once wood is clean, polish surfaces with an oil-based furniture polish. Apply polish to damp cloth, rub on surface, than buff off with a second dry cloth.
Step 7: Clean Upholstered Furniture
Supplies needed: Vacuum with brush hose attachment, dish soap, rag
How-To: Start by vacuuming all upholstered furniture using brush hose attachment to remove all dust, lint, & pet hair. If possible, remove cushions to clean underneath as well. Fill sink or bucket with mild soap solution, then use a rag to spot clean any marks or dirt.
Step 8: Clean Baseboards
Supplies needed: Vacuum with hose attachment, dish soap, rag
How-To: Start by vacuuming along baseboards to pick up any loose dirt, lint, or pet hair. Fill sink or bucket with mild soap solution, then wipe baseboards clean with wet rag.
Step 9: Clean rugs & carpets
Supplies needed: Vacuum, baking soda, stain remover, dish soap, rag
How-To: Before beginning, be sure to check whether bag or canister is full, and empty if necessary. Also check rollers to make sure they are free of strings or debris. Vacuum rugs to remove all loose dirt and surface hair. Fill sink or bucket with mild soap solution, then spot clean rugs with stain remover and/or mild water solution. To deodorize after spot cleaning, sprinkle rug with baking soda, let sit for 20 minutes, then vacuum again.
Step 10: Clean hard floors
Supplies needed: Broom & dust pan, dust mop, wet mop, all purpose cleaner.
How-To: Before beginning, move as much furniture from the floor as possible. Starting at one end of the room, carefully sweep loose dirt and hair towards the center of floor. Methodically make your way around the room, sweeping all dirt towards the center into one pile. Sweep into dustpan and throw away. Next, do a sweep of the floor with your dust mop to remove any remaining dust or hair. Spot clean any sticky or dirty spots, or mop entire floor with wet mop and let dry.
But now that you know just what to do, it is time to get to work! To stay on task, use this handy printable checklist to help walk you through all the steps:
{Get your printable Living Space Cleaning Checklist here}
Part Three Assignment
Just to review, here is your third assignment:
Set aside a good chunk of time—at least 2-4 hours—sometime this week to work on deep cleaning your main living spaces—the great room, living room, family room, and/or dining room.
Round up a pretty box or basket (or one for each family member) and create a collection zone for stray items somewhere in your home, whether it be on the stairs, near the front entry way, in the laundry or mud room, or in a corner of the family room.
Follow the Living Space Cleaning Checklist to get your living area shining from top to bottom. If possible, open up the windows to let in some fresh air as well!
* * *
Did I miss anything? What are biggest challenges to keeping your living areas clean?
Pin It
The post How to Clean Your Living Space appeared first on Living Well Spending Less™.
March 17, 2014
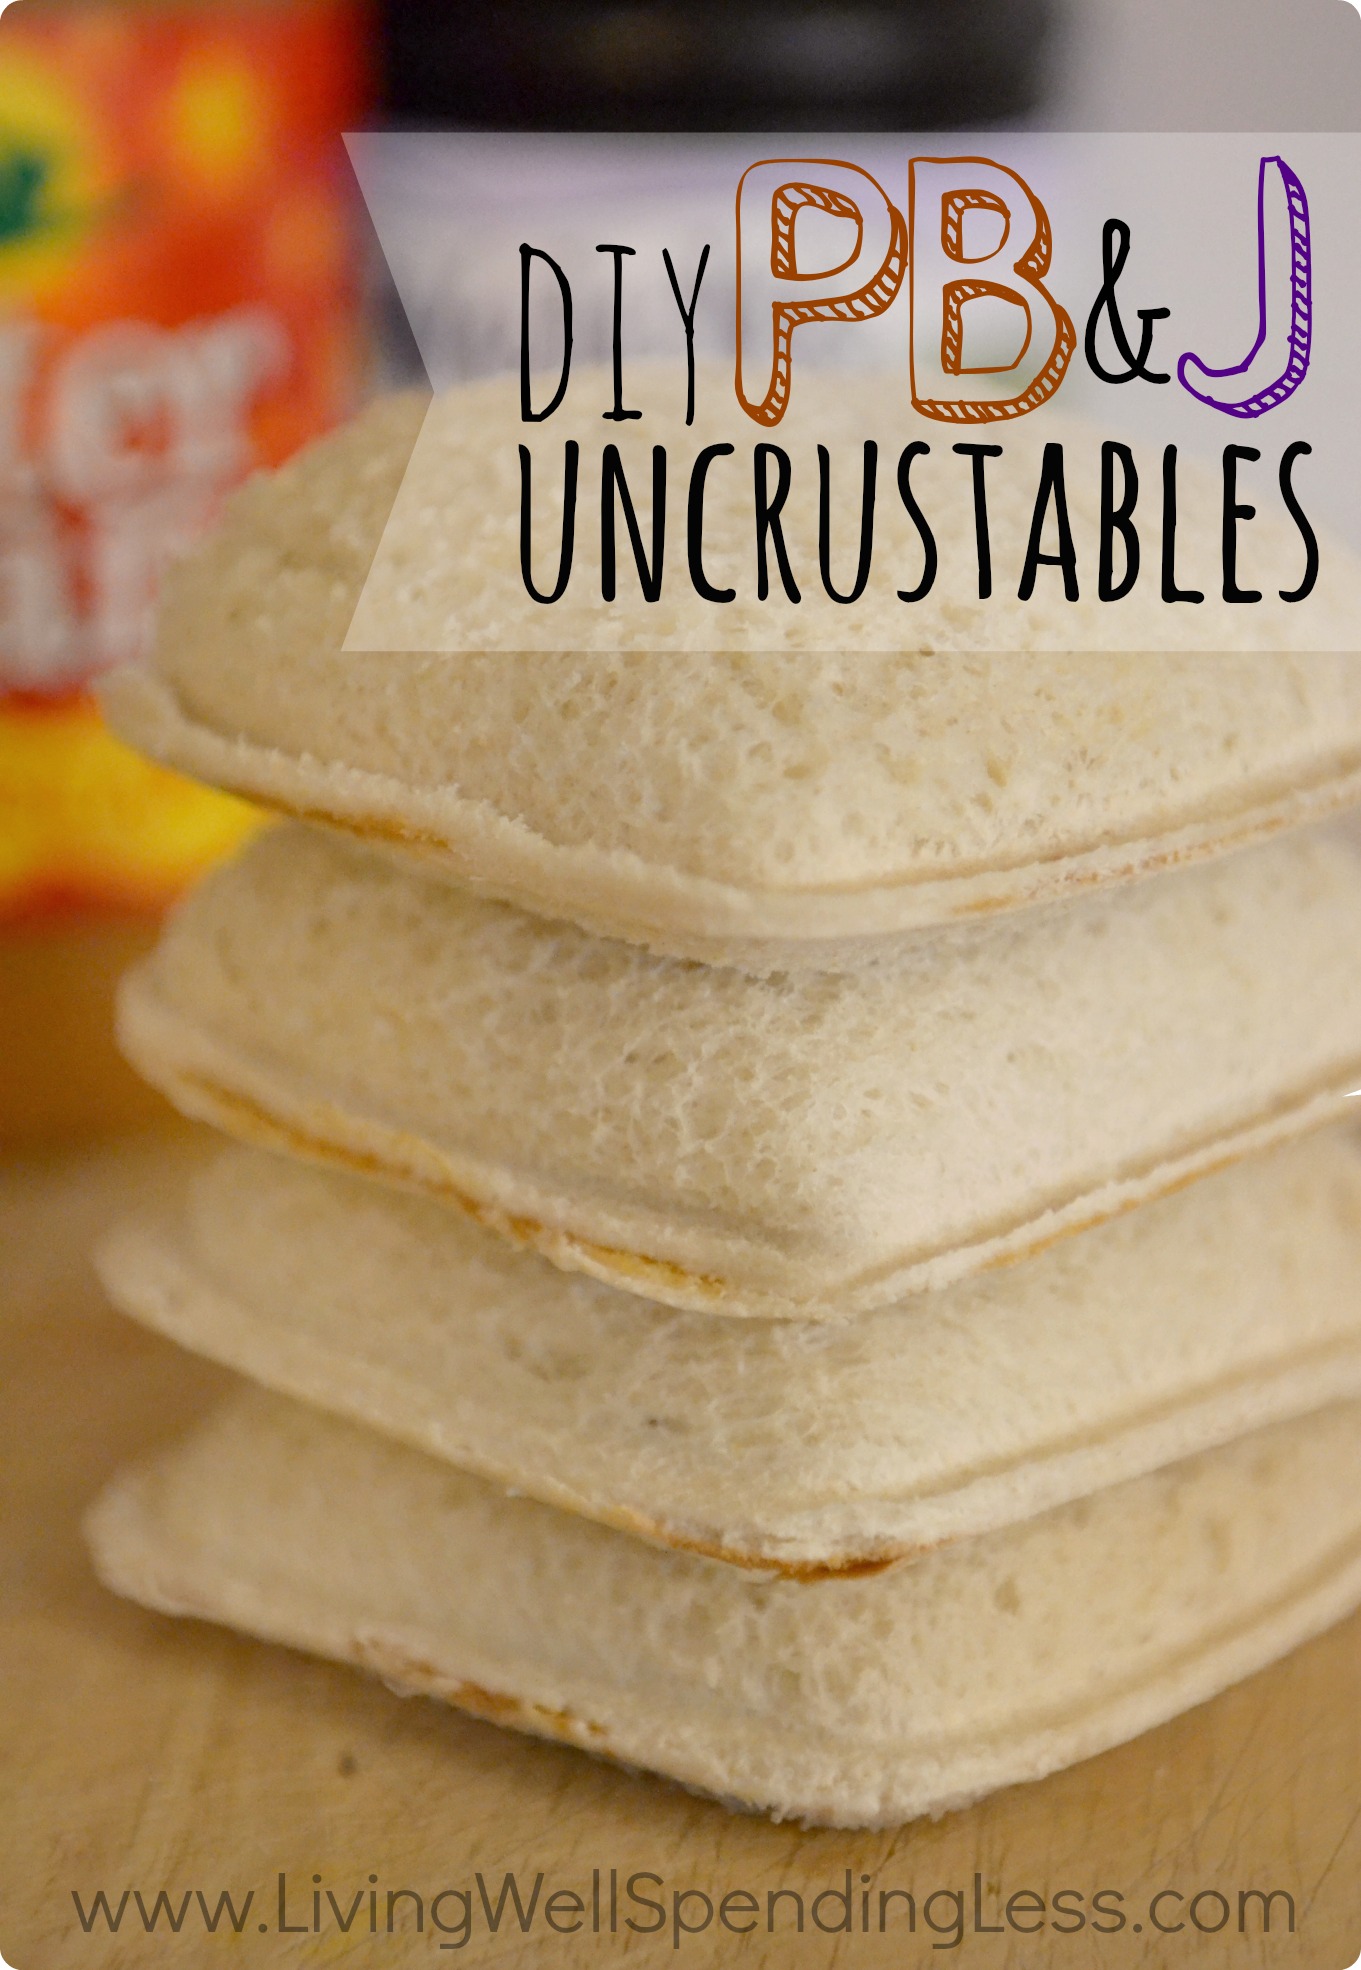
DIY PB&J Uncrustables

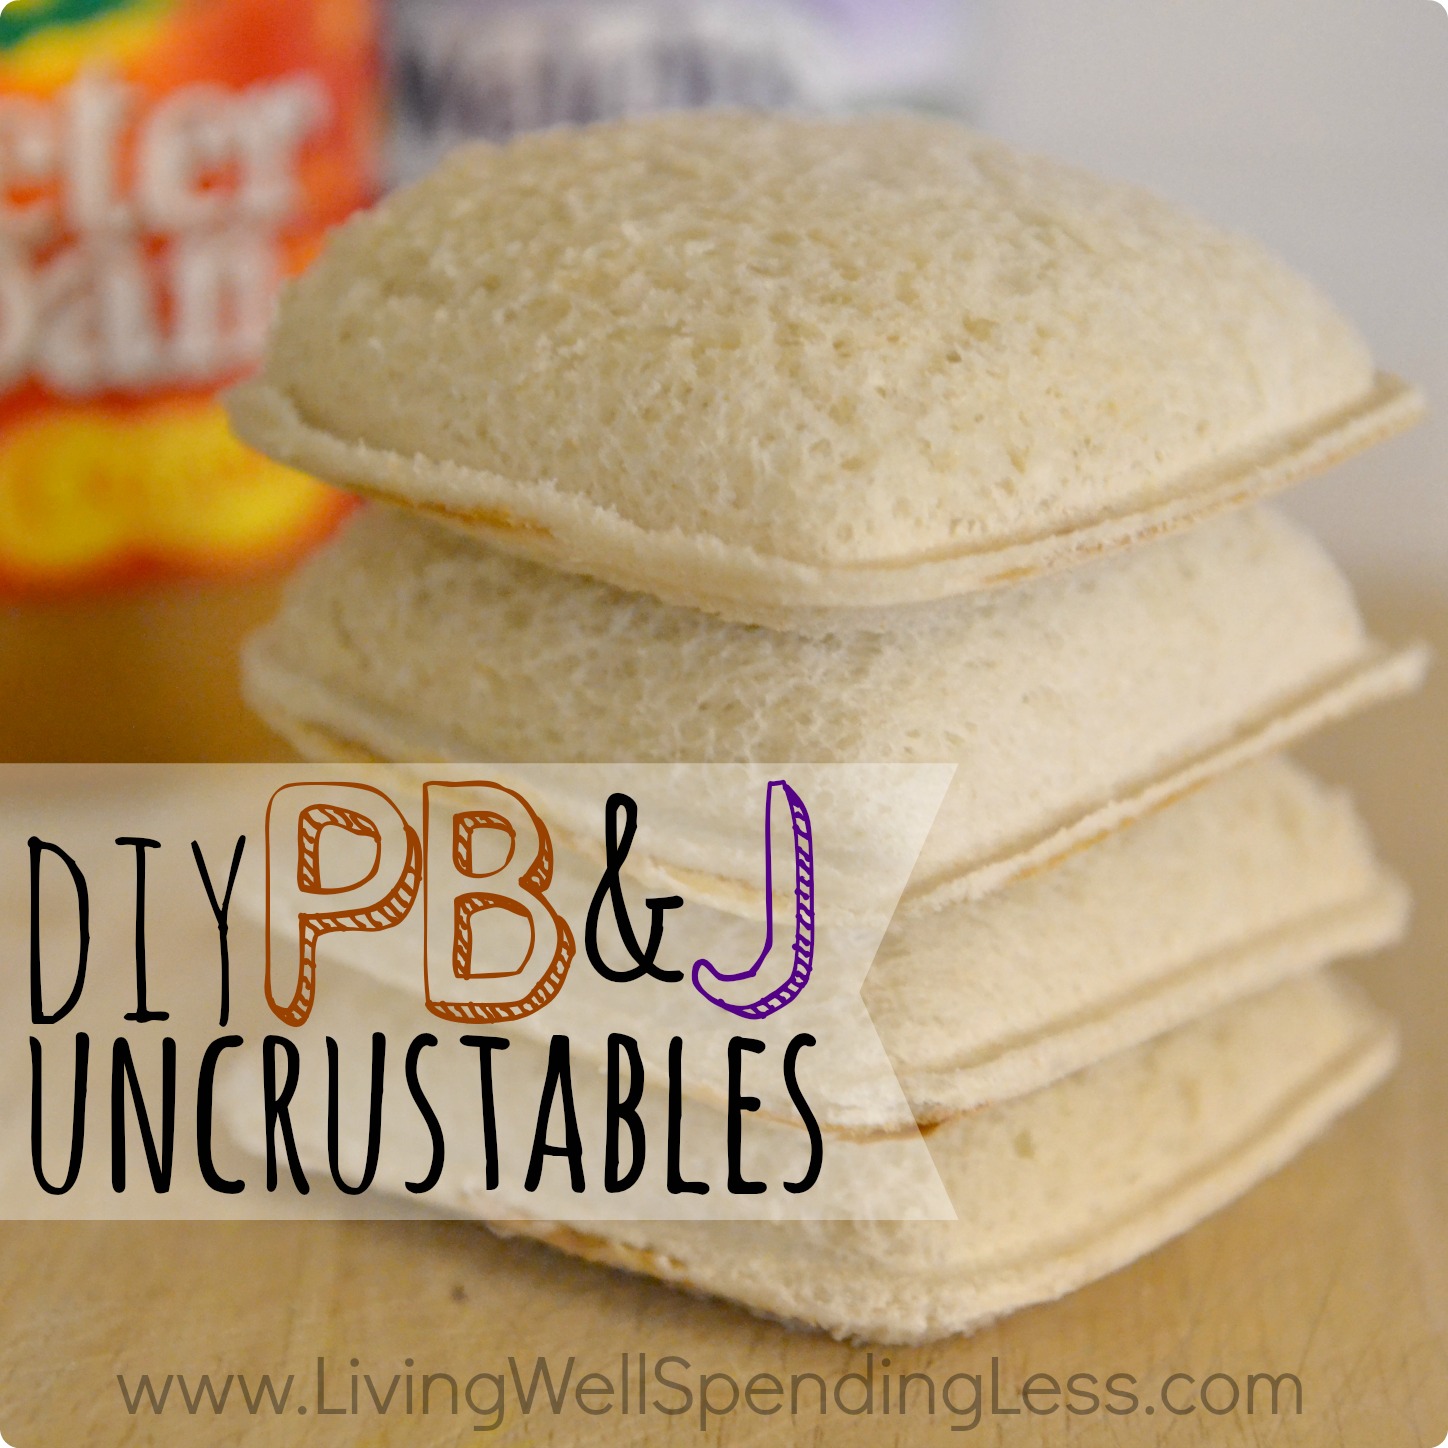
I don’t know how things are in your home, but in our family weekday mornings can be just a little bit hectic. And while there are many things that contribute to the chaos, at the top of our stressor list is the dreaded task of making school lunches.
Every time we hit the freezer aisle at the grocery store, my daughter begs us to buy a box of Smuckers Uncrustables for her lunches. And while I will readily admit that the idea of just plopping a ready-made sandwich that I know she will love into her lunch bag and calling it good sounds like a perfect solution to our weekday morning time shortage, I’m not quite ready to spend between $0.75 and $1.00 a pop for peanut butter and jelly!
But then a few months ago I came across this handy little sandwich sealer & de-cruster and realized it was the perfect solution–I could just make my own Uncrustables, saving money, making our mornings a little easier, and making my daughter happy all in one shot. It’s a Win-Win-Win!
I have found that the key to making these as cost effectively as possible is to snag the bread when it is super cheap, which at Publix means Buy 1, Get 1 Free. I also try to stock up on peanut butter and jelly when they are on sale. 1 loaf of bread makes 10 sandwiches and uses about 10 ounces of peanut butter and about 5 ounces of jelly. Using those ratios, I figured I spent between $0.25-$0.30 per sandwich, or about a third of what the ready-made version would cost.

Here is what you need:
soft sandwich bread
peanut butter
jelly
sandwich sealer & decruster
Ziploc sandwich bags
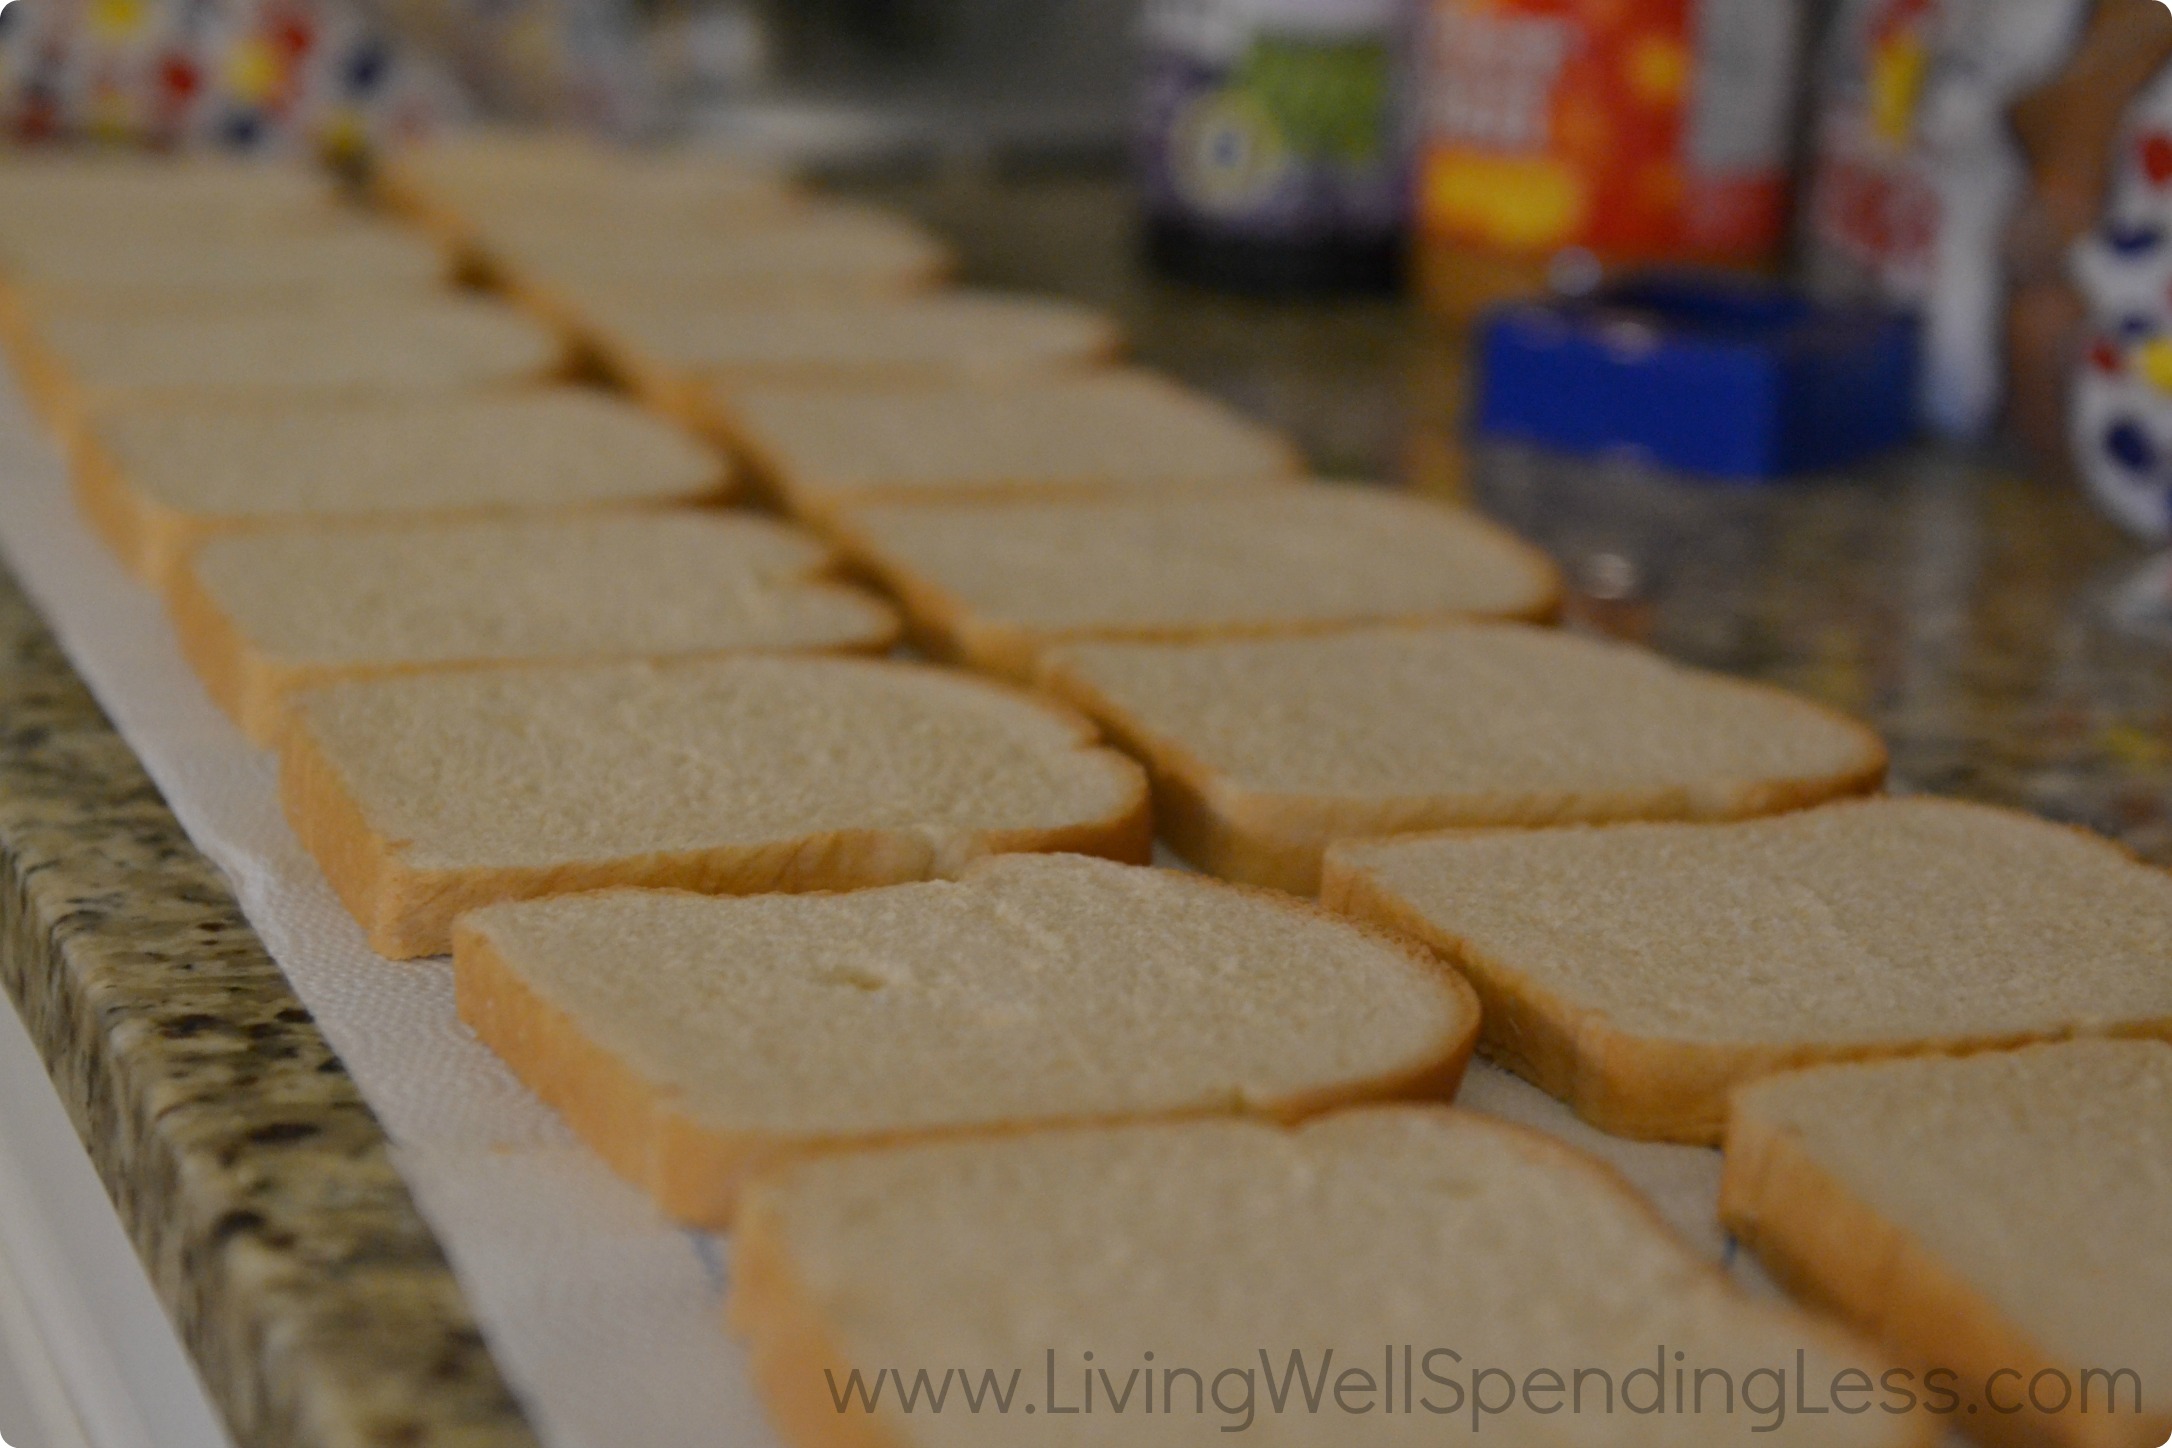
Step 1: Spread out your bread on the counter or paper towel. I did one loaf at a time, which gave me 20 slices (enough for 10 sandwiches.) It doesn’t have to be Wonder Bread, that just happened to be what was on sale at Publix.
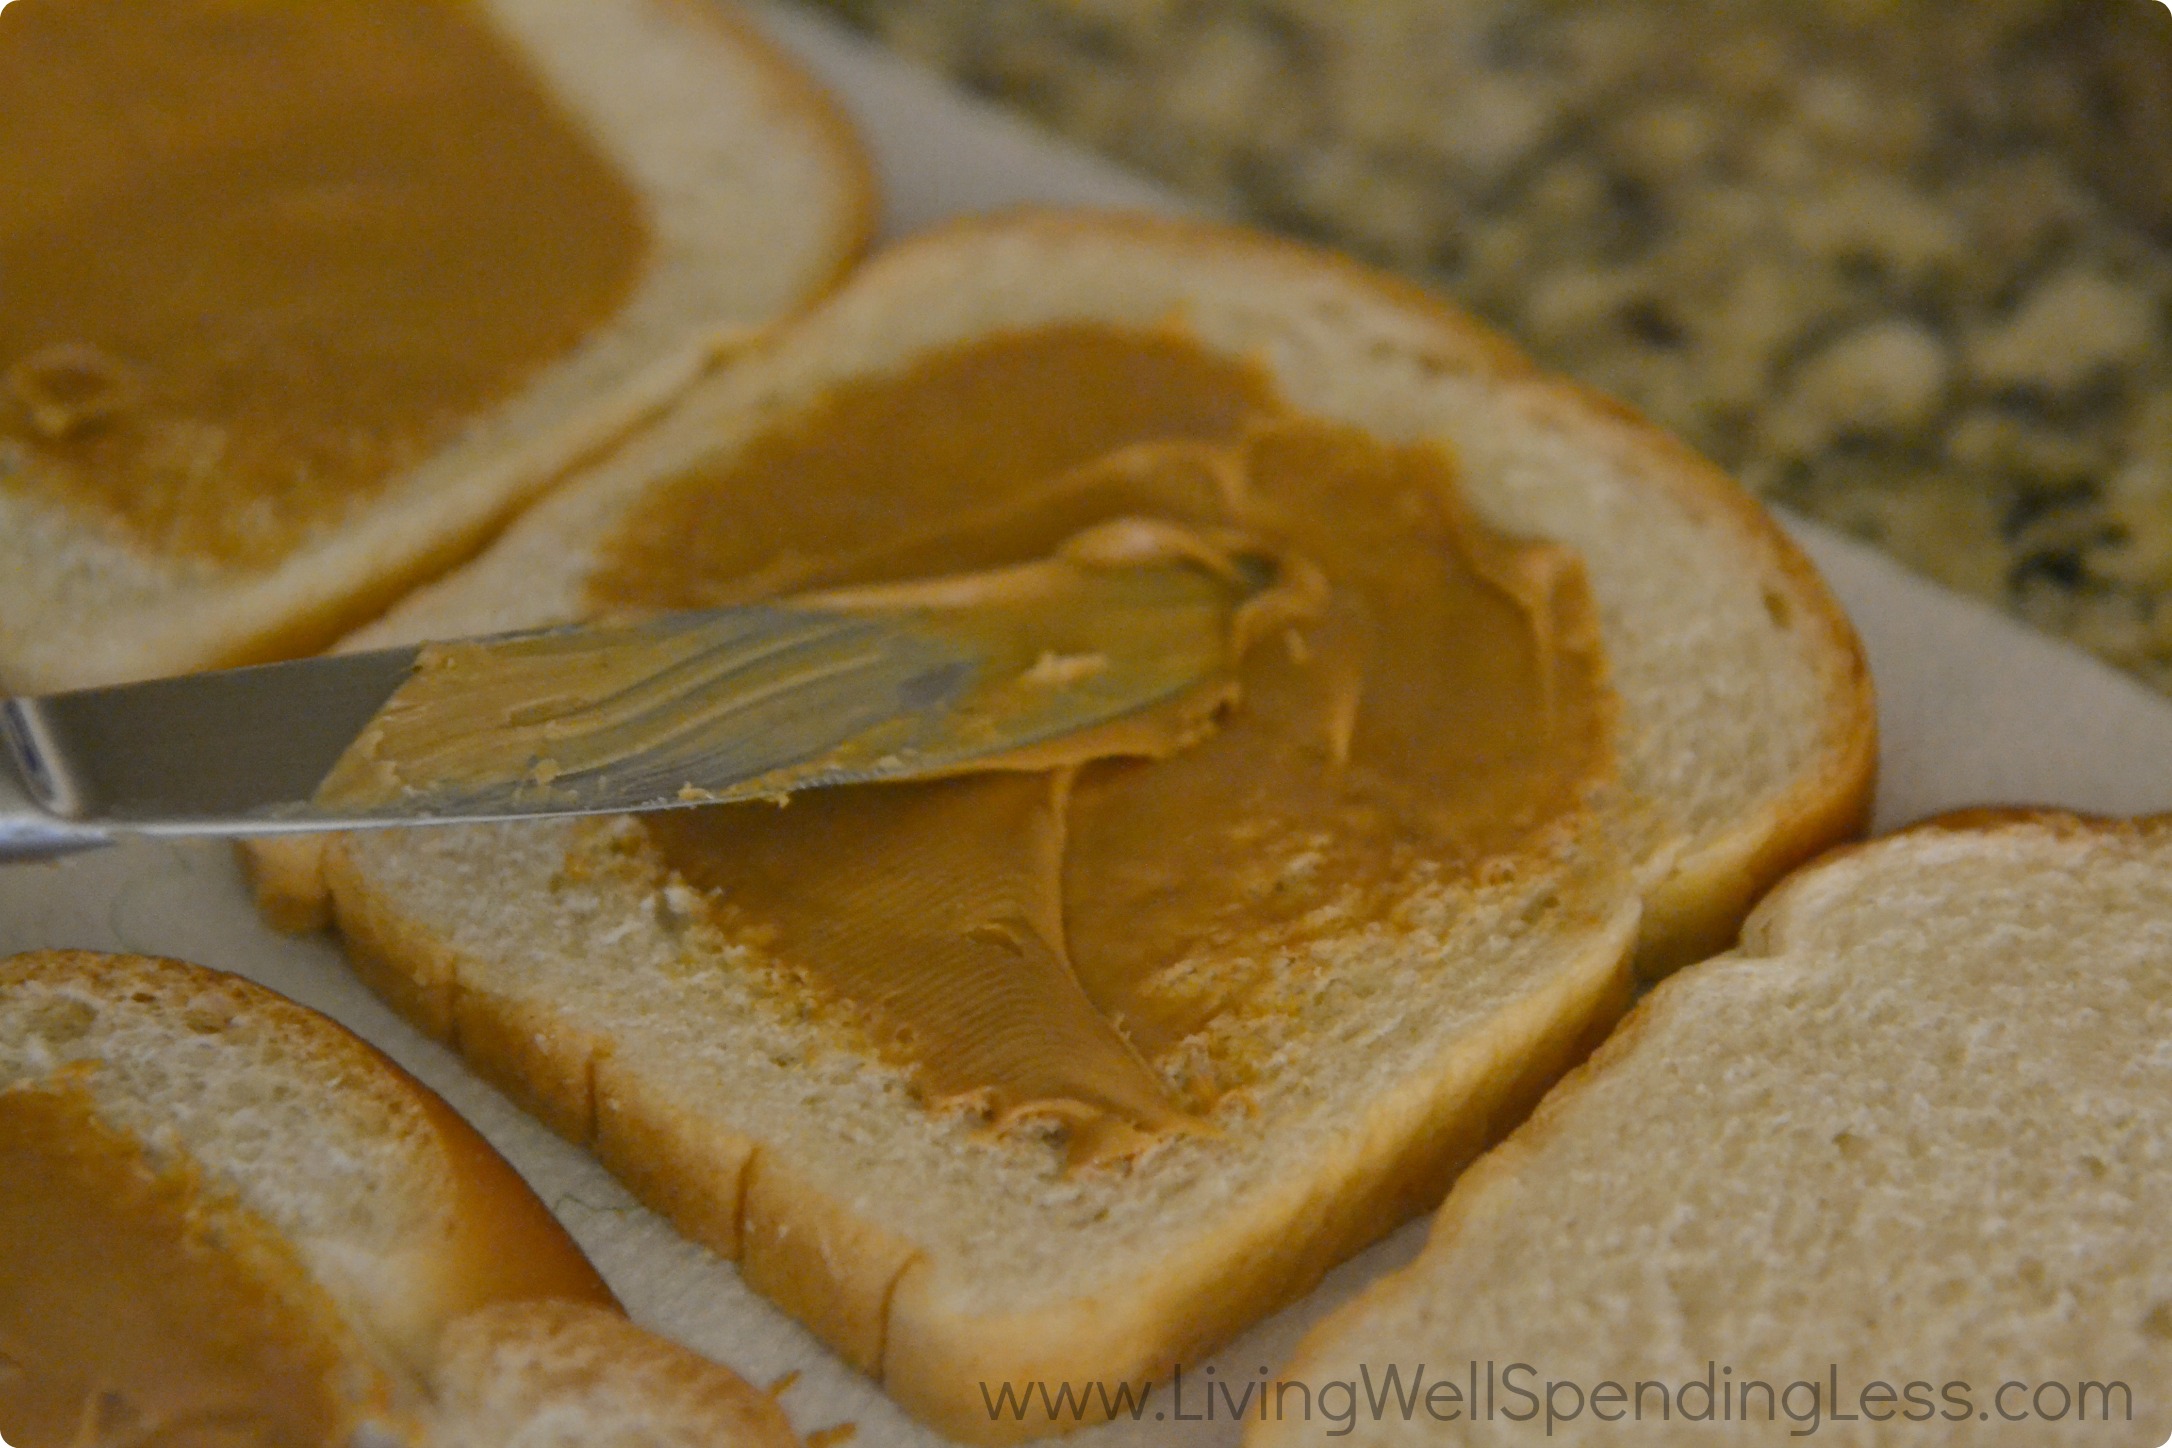
Step 2: Spread peanut butter in center of each bread slice. Do not spread all the way to the edges.
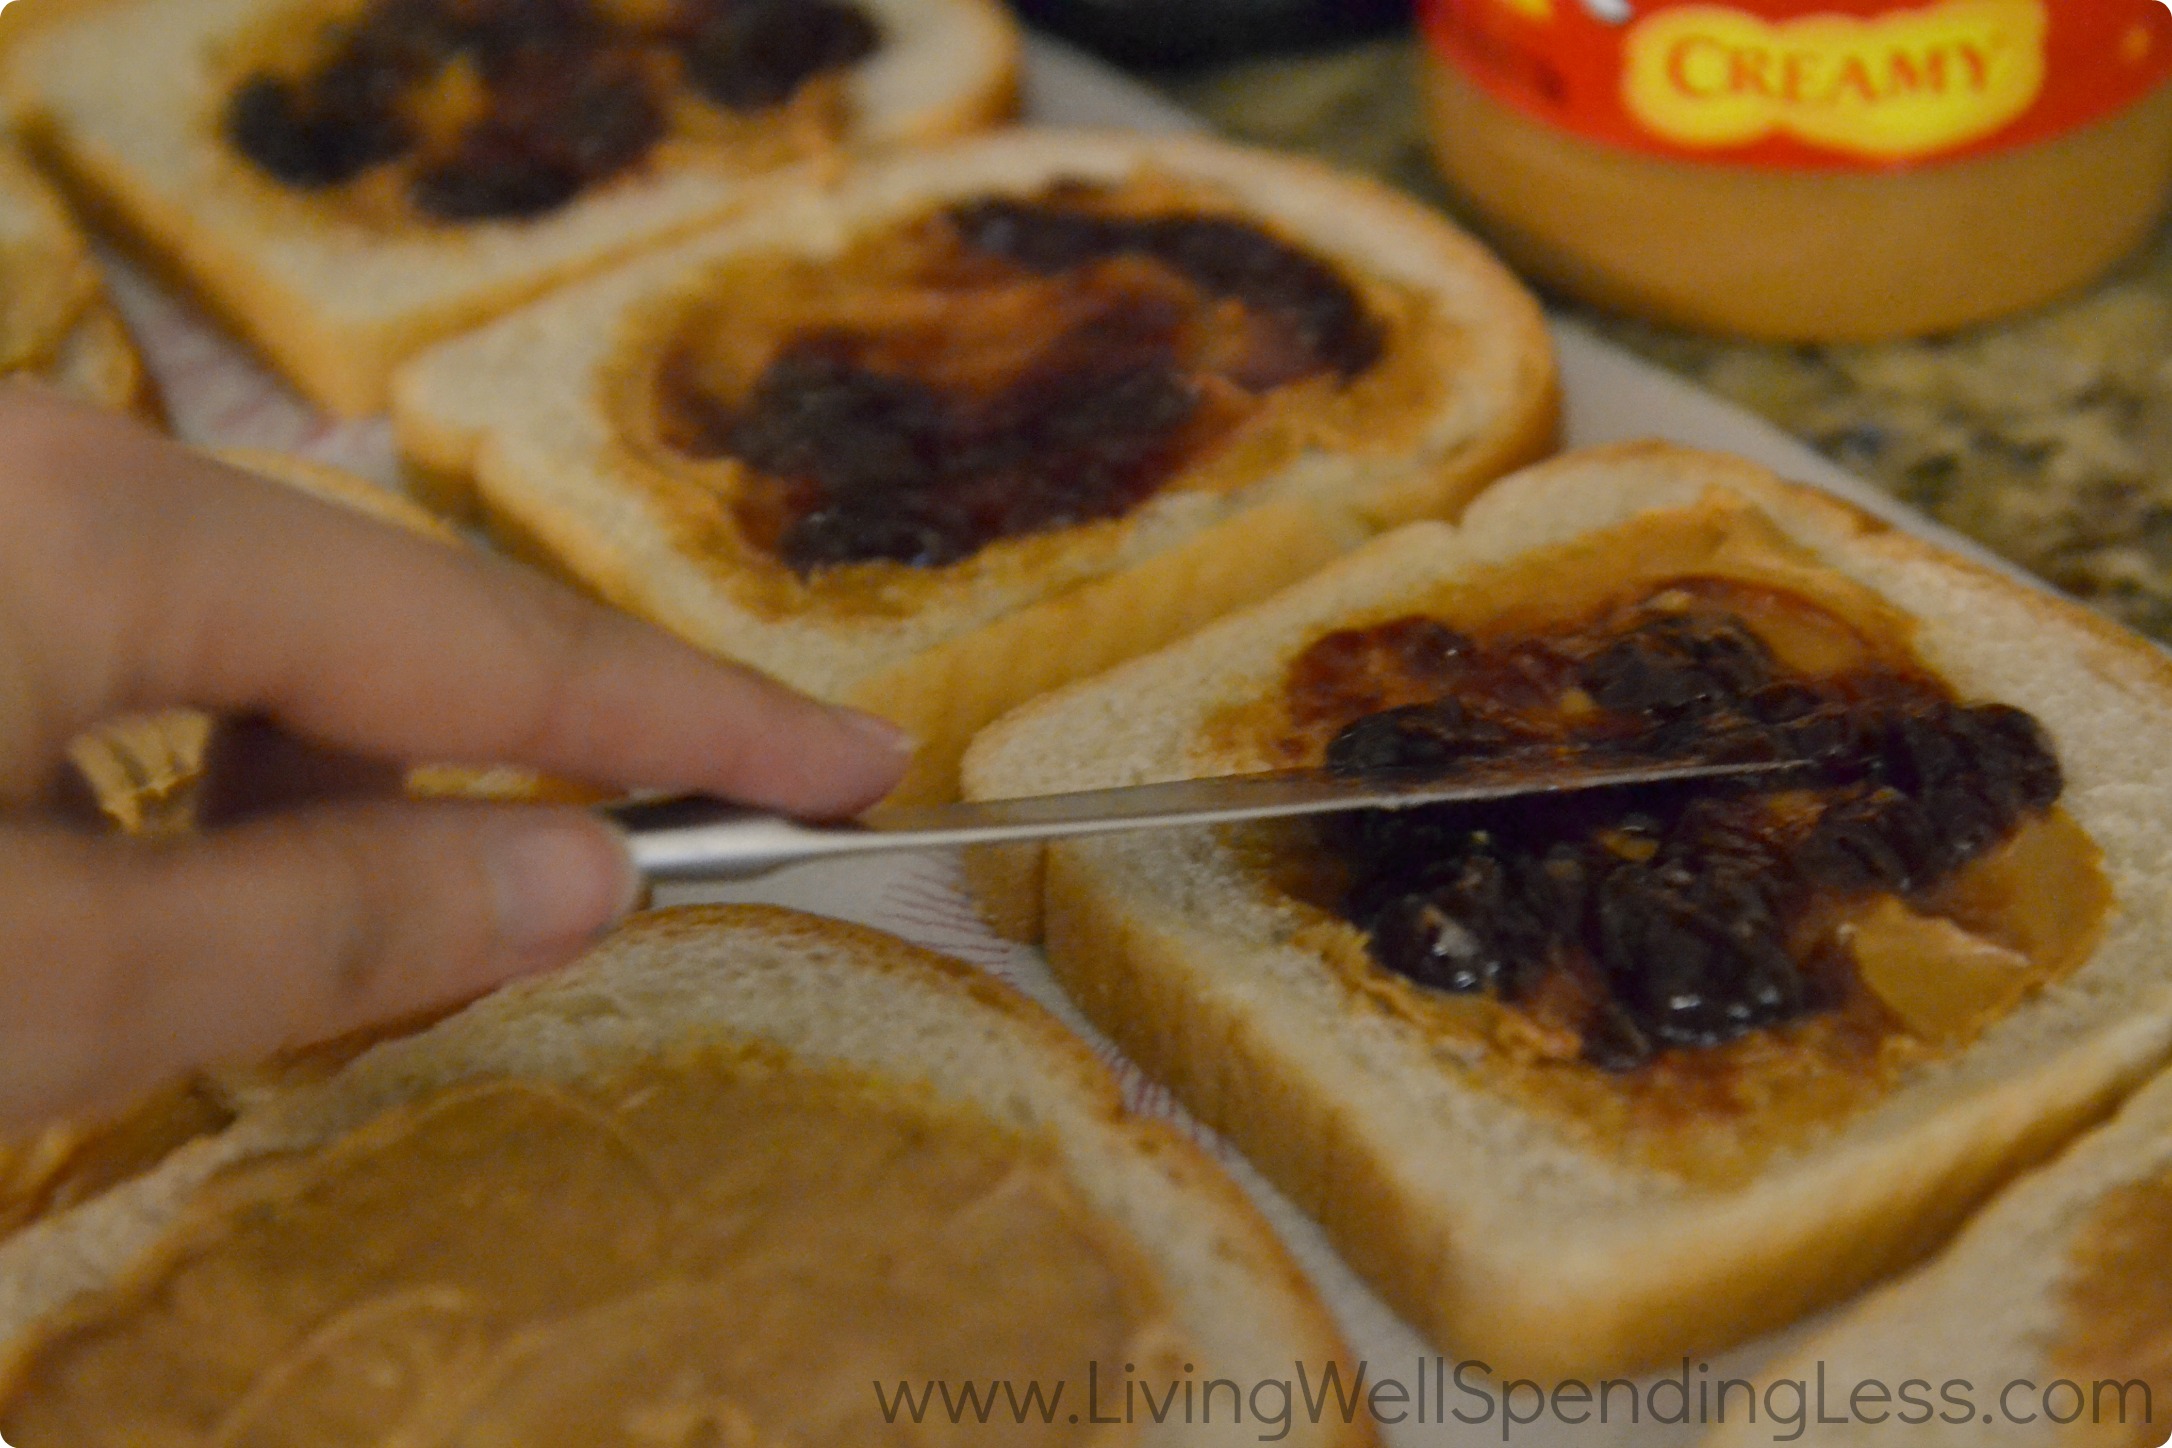
Step 3: Spread jelly over peanut butter on half of the bread slices. Then place peanut butter only slices on top of PB&J slices to make sandwich.

Step 4: Use sandwich sealer & decruster to cut off crusts and crimp edges together.
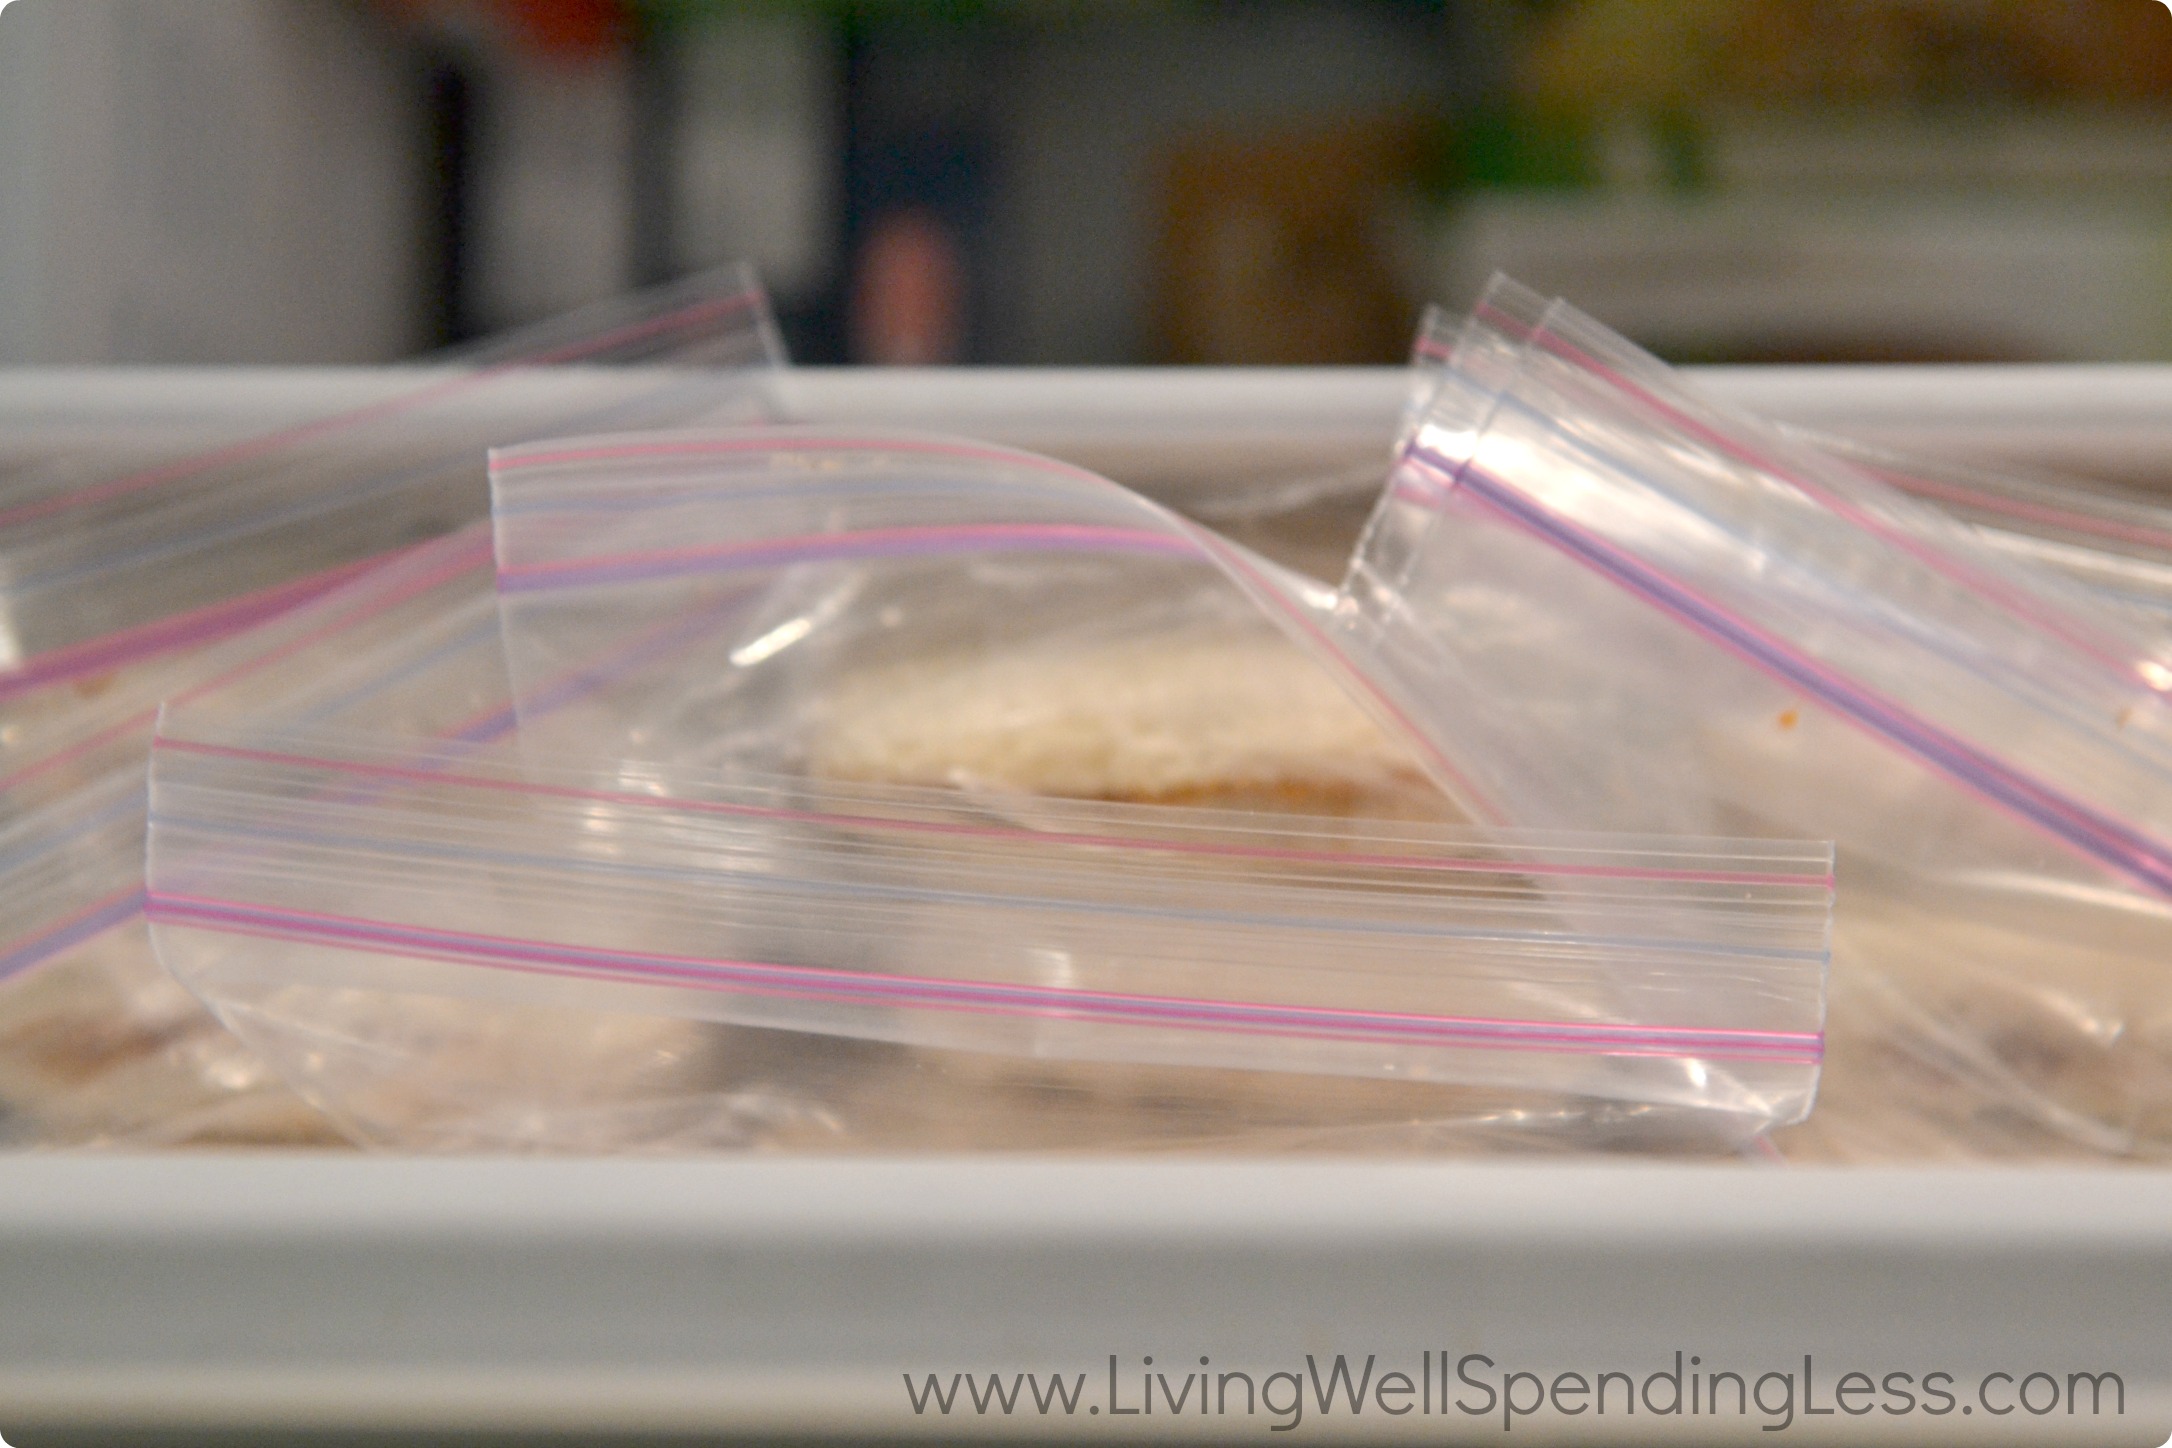
Step 5: Place sandwiches in sandwich bags, seal, and freeze. To serve, thaw at room temperature for at least 30 minutes, or place in lunch bag in the morning so that it is ready to eat by lunchtime.
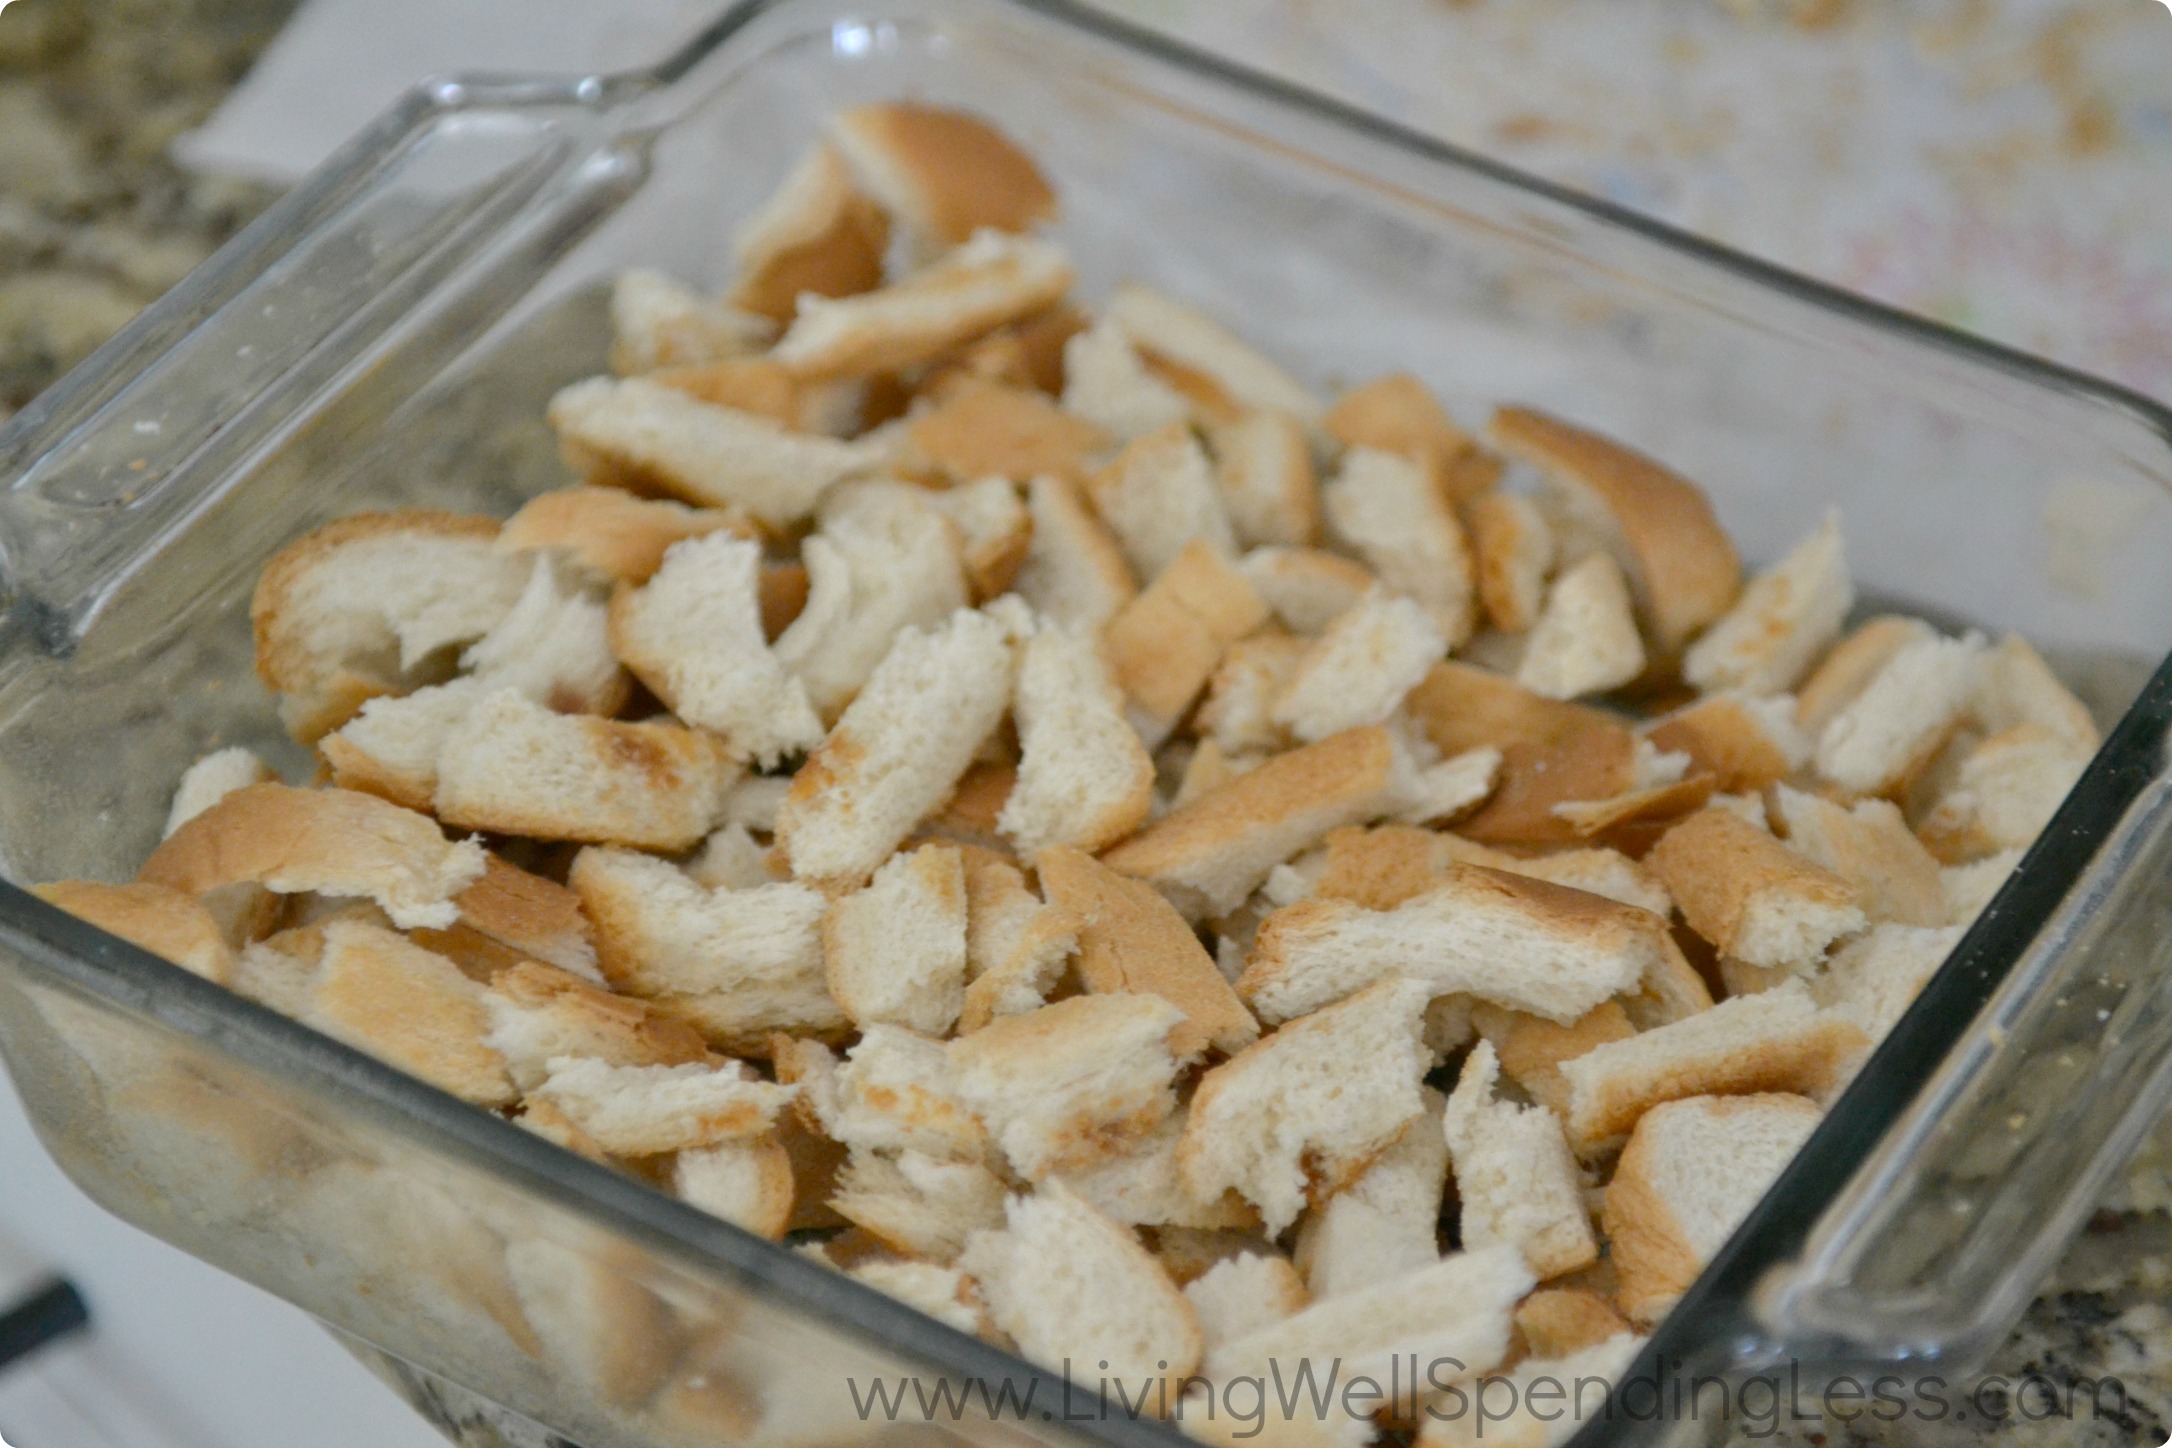
Note: There will be a lot of crusts left over, and if you are anything like me, you hate the idea of wasting food! I let my crusts dry out on the counter for a few hours, then use them to make a yummy breakfast casserole. You could also use them to make Kalyn’s yummy homemade bread crumbs!
Print This!
DIY: PB & J Uncrustables
Summary: The perfect solution to busy mornings!
Supplies Needed
1 loaf soft sandwich bread
10 ounces peanut butter
5 ounces jelly
sandwich sealer & decruster
10 Ziploc sandwich bags
Instructions
Spread out your bread on the counter or paper towel.
Spread peanut butter in center of each bread slice. Do not spread all the way to the edges.
Spread jelly over peanut butter on half of the bread slices. Then place peanut butter only slices on top of PB&J slices to make sandwich.
Use sandwich sealer & decruster to cut off crusts and crimp edges together.
Place sandwiches in sandwich bags, seal, and freeze. To serve, thaw at room temperature for at least 30 minutes, or place in lunch bag in the morning so that it is ready to eat by lunchtime.
Preparation time: 20 minutes
Cooking time: NA
Number of servings (yield): 10
* * *
How do you simplify your morning routine?
Pin It
The post DIY PB&J Uncrustables appeared first on Living Well Spending Less™.
March 16, 2014
Weekend Wandering


Whew, it has been a fun & busy week of Spring Break projects here at the Soukup house, but I have to admit….I am ready to get back into our regular routine! Did your kids have Spring Break this week or does yours come later?
And speaking of Spring, if you are in the Miami area, I want to invite you to join me this Thursday, March 20th for a #SpringMadeSimple Garden Party at the Deerwood Home Depot. Celebrity chef Amy Pennington will be making some yummy garden-to-table fare to try, and there is also an awesome herb tower DIY project to make. Best of all, it is totally free to attend! Get all the details here.
* * *
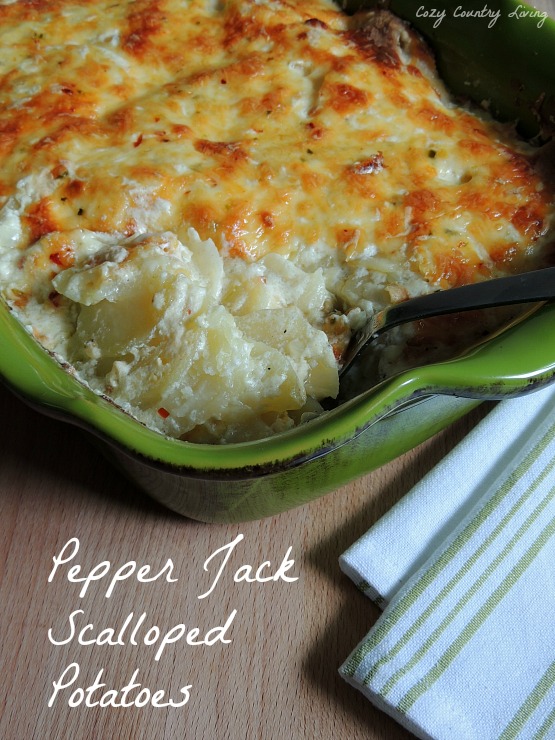
First off, I am always a sucker for anything that combines carbs and cheese, so the cheesy, melty goodness of these Pepper Jack Scalloped Potatoes from Cozy Country Living had me drooling! YUM!
I also love both Pad Thai and spaghetti squash, which made me hungry for this Pad Thai Spaghetti Squash combo from Blue Crab Martini.

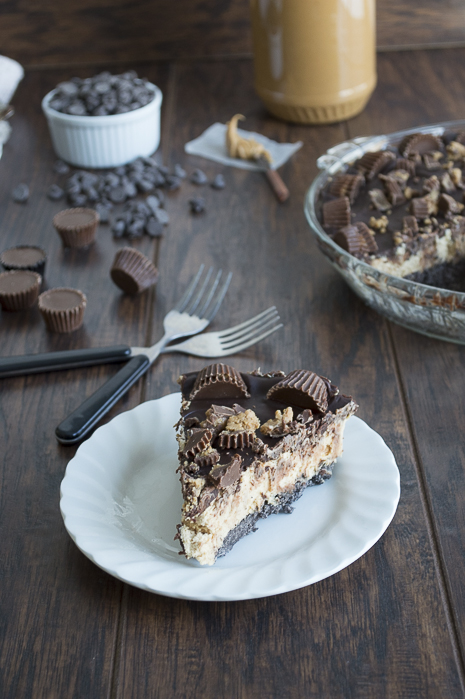
And while we are on the theme of delicious food combos, this Peanut Butter Cup Chocolate Pie fromThe First Year Blog had me at hello.
Next on the list, this Irish Cream French Toast from Growing Up Gabel sounds like the perfect way to start off your St.Patrick’s Day tomorrow.

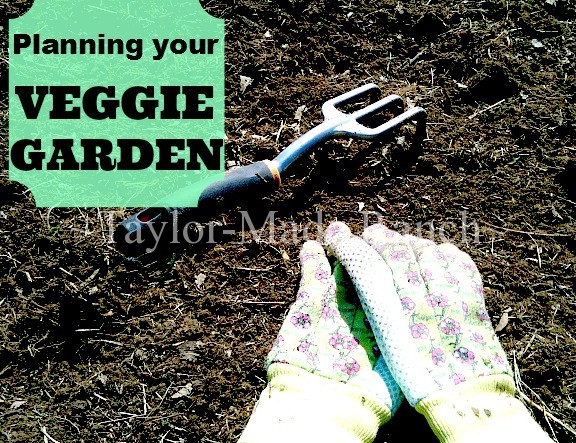
Spring is just 5 days away–are you planning a garden this year? If so Taylor Made Ranch has great advice on Vegetable Garden Planning Made Easy!
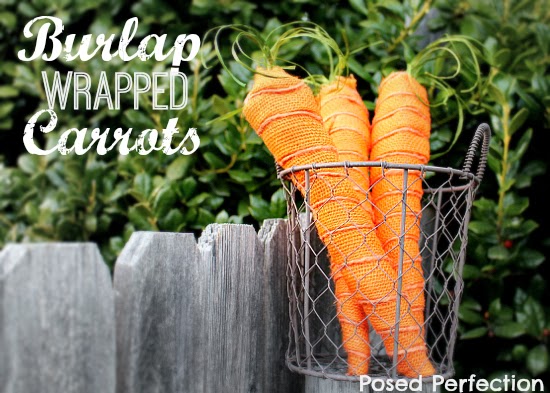
How cute are these Burlap Wrapped Carrots from Posed Perfection? The perfect addition to any Spring inspired tablescape!
This Garbage Disposal Cleaner from Coupon Crazy Girl is a great way to get a fresh citrus scent throughout your kitchen.

I have to admit, cleaning my car is one of those tasks I always put off! Creative Savings has an awesome post on The Most Efficient Way to Spring Clean Your Car that makes it seem a lot more doable!

Are you a blogger? Army Wife to Suburban Life has some practical tips for How to Generate Massive Opportunity from Link Parties.
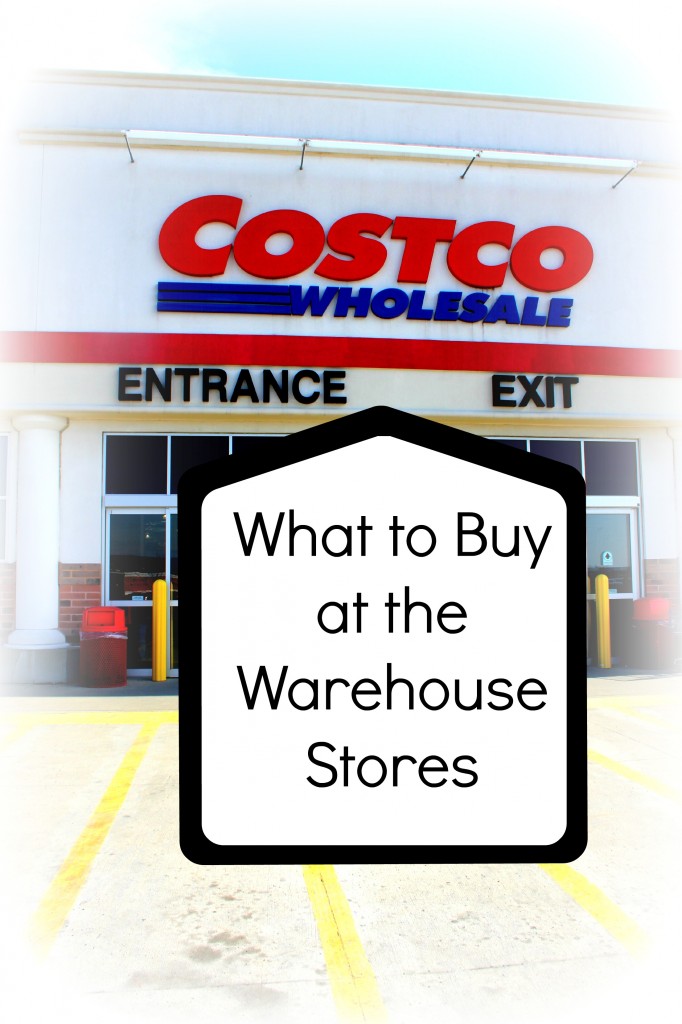
 Shopping the warehouse stores are not aways cheaper. Be sure to check out which 15 Items You Should Never Buy at Costco from Kansas City Mamas!

On the flip side,Carmel Moments has some great tips for what you SHOULD buy at the warehouse stores. Read them both & you’ll be all set! 
 Finally, who doesn’t want to uncover buried treasure? The Latina Homemaker has 5 Ways to Find Hidden Money in Your Home!

* * *
What did you love this week?
Pin It
The post Weekend Wandering appeared first on Living Well Spending Less™.
March 14, 2014
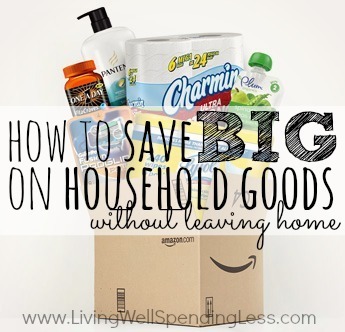
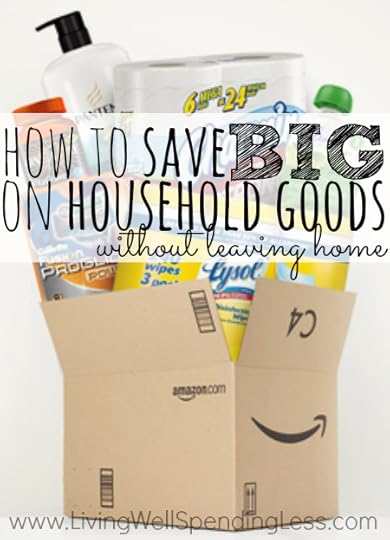
How to Save BIG on Household Goods (Without Leaving Home)
When I first started down this path of living well and spending less, I was an avid coupon-user. The thrill of getting food and household goods for next to nothing was incredibly exciting, and I couldn’t wait to shop the sales each week. Thursday mornings were always spent hopping from one grocery store to the next, and Sunday afternoons were reserved for making the rounds at Walgreens and CVS. I took great pride in my bountiful stockpile, and filled our guest room closet with my own mini-Walmart.
But as much as I love coupons, I eventually had to face the reality that spending two days a week going from store to store was probably not the best use of my time, no matter how good the deals were. I decided to limit my grocery shopping trips to just one store and stopped shopping the drugstores completely.
Instead I now order most of our household necessities—the same items I used to buy at the drugstore—through Amazon’s Subscribe & Save program combined with savings from Amazon Mom. There are a few hoops that you have to jump through to get the best deals, but the amount of time and money I save makes it worth the effort. The prices aren’t always quite as good as shopping the drugstore deals, but they are better than Sam’s Club or Costco, and for me the convenience makes up for the slight loss in savings.
Here is what you need to do to get the best deals:
Sign up for Amazon Mom . You do not have to be a mom to qualify—you can also be a dad, aunt, uncle, or grandparent. This program used to be free for everyone but now costs $79 per year if you are not already have Amazon Prime. Once you join Amazon Mom you will get all the benefits of Prime as well, such as free 2 day shipping, free Prime video streaming, and access to the Kindle lending library. (Side note: I have personally been a faithful Prime member for almost 10 years now, ever since the program started, and I absolutely love it. However, whether or not it is a good fit for your family will really depend on how much you typically purchase online.)
Order FIVE items through the Subscribe & Save program that are all on the same delivery schedule. You can choose from delivery once a month up to once every six months. For most things I choose six months. Shipping is free on Subscribe & Save items. Once you have signed up for Amazon Mom AND subscribed to five items you will save an additional 20% off your entire order, often off of already significantly discounted items. Note: If you opt NOT to sign up for Amazon Mom, you will save 15% instead of 20%.
(Optional) Cancel your subscription after your shipment arrives if you do not wish to receive it again. Canceling a subscription is super easy—just go to the “manage subscriptions” page in your Amazon account. You can always re-subscribe later!
Here are 12 of the best Subscribe & Save deals I have found (prices are after combined Subscribe & Save and Amazon Mom discounts):
Angel Soft Toilet Paper Double Rolls, 48 Count ($17.59): In all my years of couponing I have never been able to get toilet paper for free, but I do consider it a “rock bottom price” anytime I can get a double roll for less than $0.50 a roll. This Angel Soft toilet paper is only $0.36 a roll, and there is also a $1.00 coupon you can clip which will make it just $0.34 a roll for your first shipment.
Sparkle Paper Towels Giant Rolls, 24 Count ($19.13): At just $0.79 per giant roll, this is another item you can get at a stock-up price. Like the Angel Soft, there is also a $1.00 coupon available for your first shipment which makes it only $0.75 per roll.
Cottonelle Ultra Comfort Toilet Paper Double Rolls, 32 Count ($14.87): While at $0.46 per roll, this is not quite as good of a price as the Angel Soft, I have to admit that I personally prefer the Cottonelle brand just a little better. Luckily there is a $2.00 coupon that will bring your first shipment down to $12.87, or just $0.40 a roll.
Glad Tall Kitchen Drawstring Bags, 90 Count ($10.38): At just $0.11 per bag, these are significantly cheaper than the same bags at Sam’s Club, where they are $0.16 per bag.
Finish Powerball Dishwasher Tabs, 60 Count ($9.53): My super picky engineer husband is hooked on these Finish tabs which get our dishes cleaner than every other detergent we’ve tried. They are also super convenient! At $0.15 a tab they are also a steal, and there is also a 15% off coupon that will make your first order just $8.10, or $0.13 a tab!
Maxell AA Alkaline Batteries, 48 Count ($9.98): There is nothing more annoying than not having batteries on hand when you need them! These Maxell batteries have fantastic reviews and at right around $0.20 apiece, are almost half the cost of the name brands.

Tide Pods Detergent, 77 Count ($15.38): Another favorite of my husband, these Tide pods work wonders on dirty clothes. At just $0.20 per load, they are also cheaper than either the Tide liquid or the pods price at Sam’s Club.
Swiffer Wet Jet Pads, 20 Count ($9.58): I’ll admit it, I love the convenience of my Swiffer Wet Jet and I don’t think I could bear to ever go back to an old-fashioned mop, even if it means paying for refills. At $0.47 per pad, (almost $0.10 less per pad than Sam’s Club), it is a price I’ll gladly pay.
Tampax Pearl Compak Tampons , 80 count ($12.98): Let’s face it….when you need these, you really need them, regardless of how much they cost. Better to stock up and have some on hand! The regular price at the grocery store or drugstore for this price brand of tampons is about $8.79 for 36, or approximately $0.24 apiece. At Sam’s Club you can get a 96 count box for $13.88 which makes them just $0.14 apiece, significantly cheaper. The Subscribe & Save price matches the Sam’s Club price, but there is a $2.00 off coupon you can clip which makes your first shipment just $10.98 for 80, or $0.13 apiece.
Huggies Natural Care Wipes, 648 count ($12.34): We may be finally out of the diaper stage, but we do still keep baby wipes on hand for all sorts of quick freshening tasks. At just under $0.02 apiece, these Natural Care wipes are cheaper than Sam’s Club, and the dollar off coupon for your first order makes them an even better deal, at just over a penny apiece.
Huggies Snug & Dry Diapers (As low as $0.13 apiece): Diaper prices vary based on which size you are buying (size 1 is cheaper per piece than size 5, etc.) and whether or not you buy in bulk, but the general rule is that anytime you can pay less than $0.15 apiece for size 1 of the name brand diapers it is time to stock up. These same diapers are almost double the price at Sam’s Club, and triple the price at your local grocery store or drugstore. Even better? There is a $1.00 off coupon to use on your first order.
Luvs Diapers (As low as $0.10 apiece): You will be hard pressed to find cheaper diapers anywhere, especially since these also have a $1.00 off coupon to use on your first order.
Other great options for Subscribe and Save might include gluten free foods, pet supplies, coconut oil, or other household goods. Just be sure to pay attention to the per-unit prices, as not every item is automatically a good deal! I used to order my Keuring K-cups and Pull-Ups through Subscribe & Save but I can now get both of those items cheaper at Sam’s Club. A good way to compare is to check the online prices at Sam’s Club or Target to get an idea of what you might pay elsewhere.
Remember that in order to get the prices listed here, you need to subscribe to FIVE items for delivery in the same month and you must also sign up for Amazon Mom. If you don’t want to continue receiving that particular item, be sure to cancel your subscription after your shipment arrives.
Please also remember that while the prices listed here are significantly cheaper than what you will find at Sam’s Club or Target, you can probably still get better prices through extreme couponing. If you are interested in learning how to use coupons, check out my Beginner’s Guide to Coupons, which is a comprehensive, step-by-step guide to learning how to extreme coupon.
Finally, please note that the Amazon prices listed here are subject to change!
* * *
How do you save on household goods? Are you an Amazon Prime member? What things do you order through Subscribe and Save?
Pin It
The post How to Save BIG on Household Goods (Without Leaving Home) appeared first on Living Well Spending Less™.
March 13, 2014
Thrifty Thursday {Week 51}
Happy Thursday! My girls are on Spring Break this week, so we are enjoying the slower pace of no homework, no rushed mornings, and no after-school activities. I think sometimes we don’t even realize how hectic life has become until we have a break from it! It has been so nice to just hang out at home and do not too much of anything. Do you have big plans for Spring Break this year?
Last week’s one year celebration & giveaway was a lot of fun. The 3 winners were posted on Sunday’s Weekend Wandering post–be sure to check it out if you haven’t already!
Here are the most clicked links from last week:
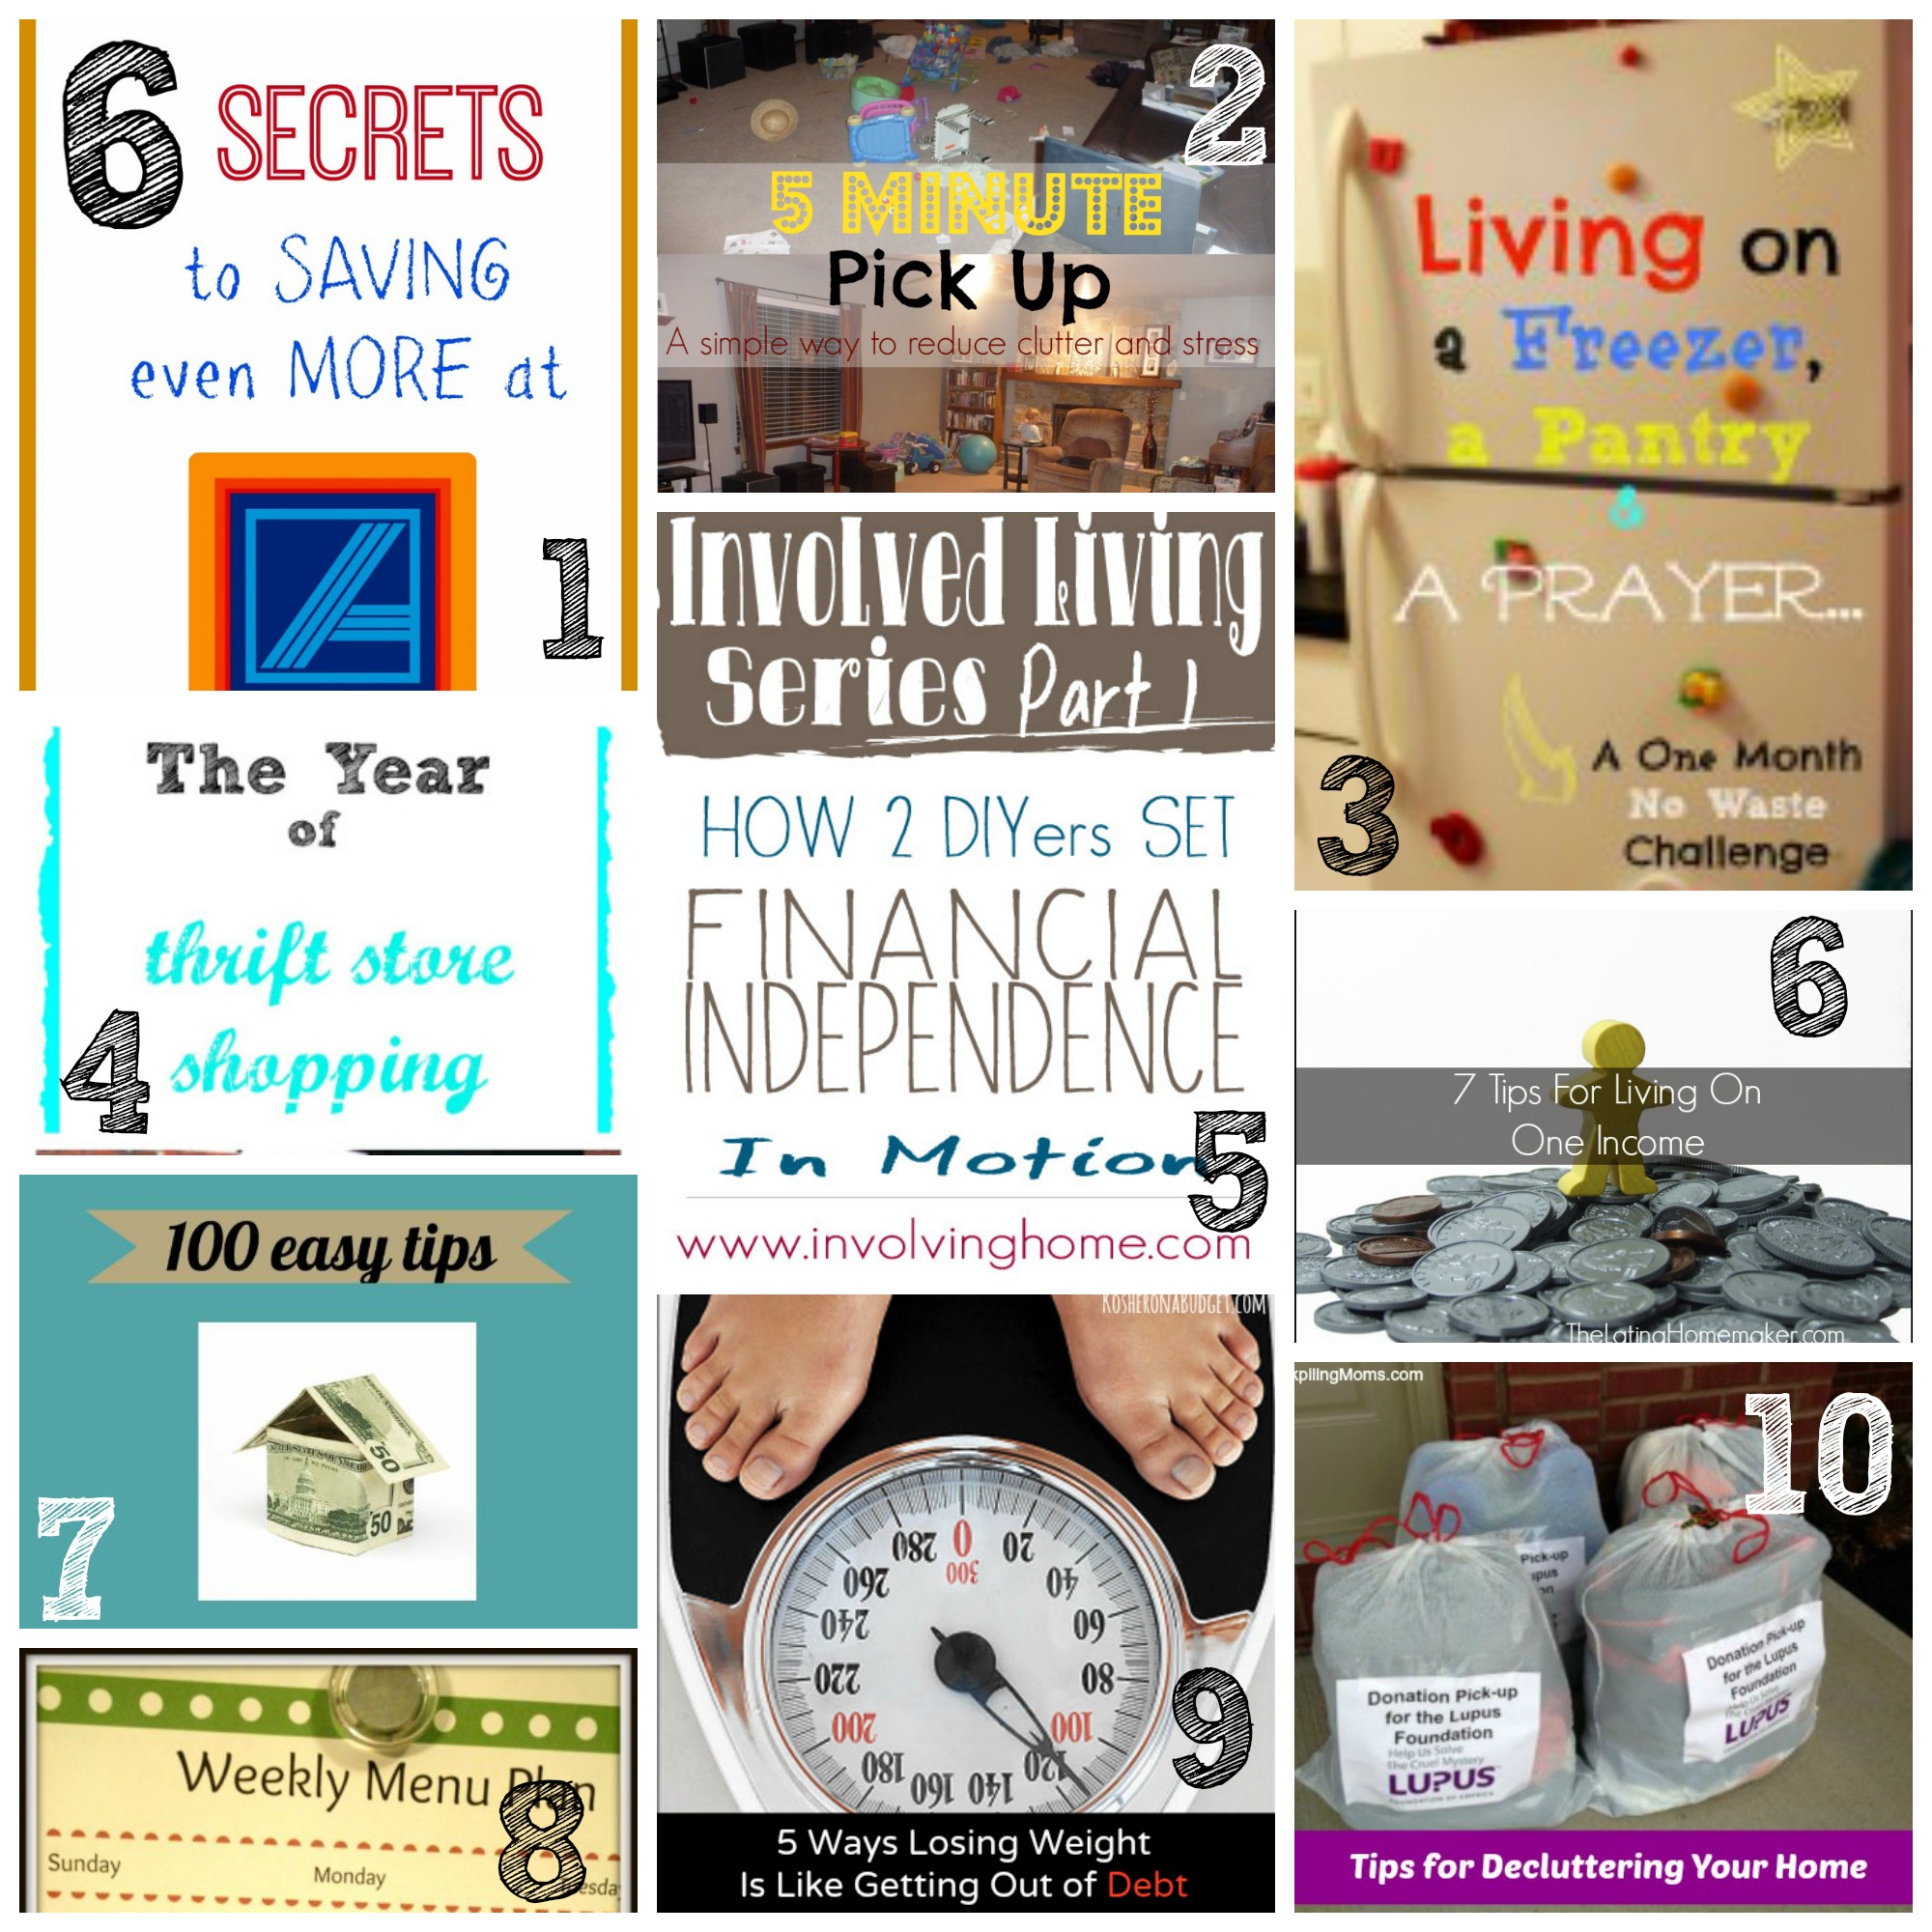
1. Cha Ching on a Shoestring {6 Secrets to Saving Even More at ALDI}
2. From This Kitchen Table {5 Minute Pick Up: A Simple Way to Reduce Clutter & Stress}
3. Thrifty Little Mom {Living on a Pantry, a Freezer & a Prayer }
4. Eat, Pray, Read, Love {The Year of Thrift Store Shopping}
5. Involving Home {How 2 DIYers Set Financial Independence in Motion}
6. The Latina Homemaker {7 Tips for Living on One Income}
7. A Day in Our Shoes{100 Easy Tips to Trim Your Household Spending}
8. Detours in Life {Easy Meal Planning}
9. Kosher on a Budget {5 Ways Losing Weight is Like Getting Out of Debt}
10. Stockpiling Moms {De-cluttering Your Home}
Never linked up to a party before? Here’s how:
Scroll down, find the little blue “Add your Link” Button and click on that.
Follow the instructions on the next page – add a great image of your project and an interesting title. Make sure you link to the direct page of your budget friendly post – not the main page of your blog!
Try to visit at least a few other blogs at the party. Be sure to leave a comment to let them know you stopped by!
Please link back to this post somehow. There are badges available here; a simple text link is just fine too.
Feel free to tweet about Thrifty Thursday so others can join the fun, and don’t forget to check back here Sunday morning to see which posts have been featured this week!
If this is your first time here I also invite you to check out my eBook, How to Blog for Profit (Without Selling Your Soul). It is a fantastic resource if you are interested in building your blog, getting more traffic, or learning how to monetize. Or, if you have read the book and are still looking to take your blog to the next level, I encourage you to check out my options for one-on-one blog consulting.
An InLinkz Link-up
Pin It
The post Thrifty Thursday {Week 51} appeared first on Living Well Spending Less™.
March 12, 2014
One Pot Beef Stew


My husband and I often take turns cooking, but the rule is that the one who cooks also has to clean up. And while I love to cook, I’m not always quite so enthusiastic about having to clean up afterwards.
Enter the Dutch Oven, the lazy, er efficient chef’s best friend. Just one amazing pot from start to finish for meals that taste far more complicated than they actually are. Quite frankly, I don’t know how I managed to make it the first 34 years of my life without one. And while I do still love my crockpot, there is something about slow-cooking food in the oven that brings out so much more flavor.
This super-flavorful beef stew only takes about 20 minutes of actual hands-on prep time, followed by a few hours in the oven. The vegetables get added in the last hour of cooking so they still have a nice crunch. It is especially good served with a thick crusty bread such as this Easy Beer Bread.
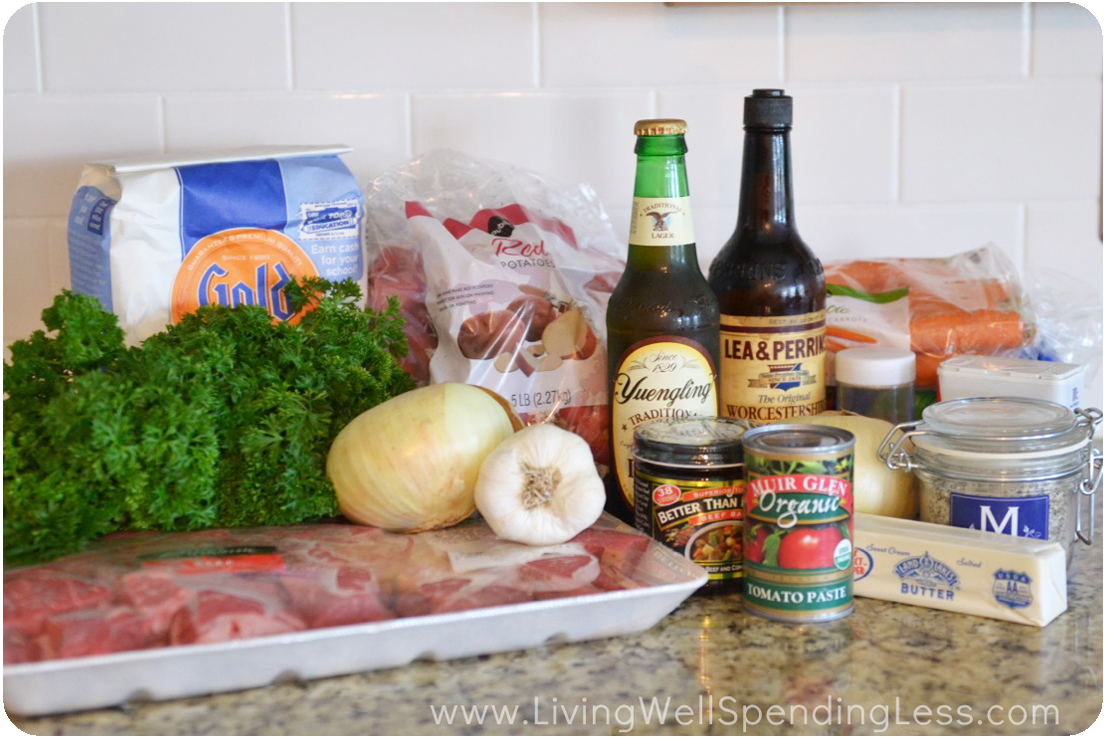
Here is what you need:
3 pounds chuck roast or stew meat, cut into chunks
8 tablespoons flour
1 1/2 teaspoons seasoned salt
1/2 teaspoon pepper
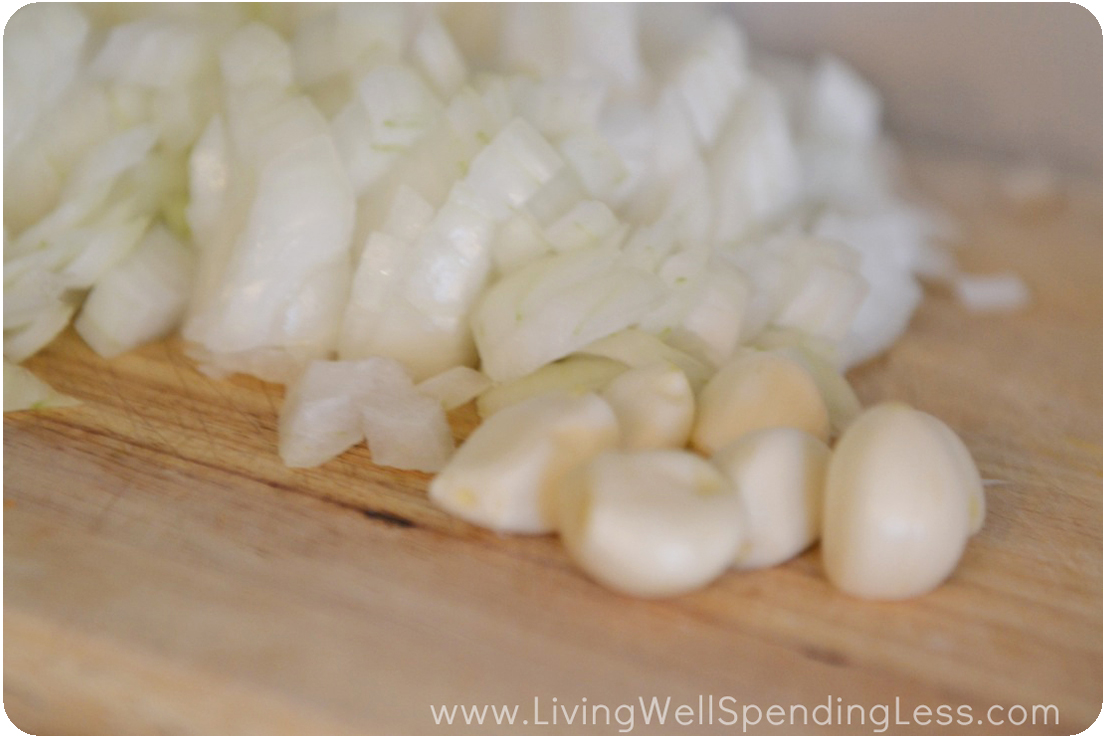
2 sweet onions
5-6 garlic cloves
4-6 tablespoons butter
1 8oz can tomato paste
1 12 oz can beer
6-8 cups beef broth
1 tablespoon Worcestershire
1 teaspoon ground thyme
6 whole carrots, washed
6-10 red potatoes, washed
6 stalks celery, washed
fresh parsley (optional)
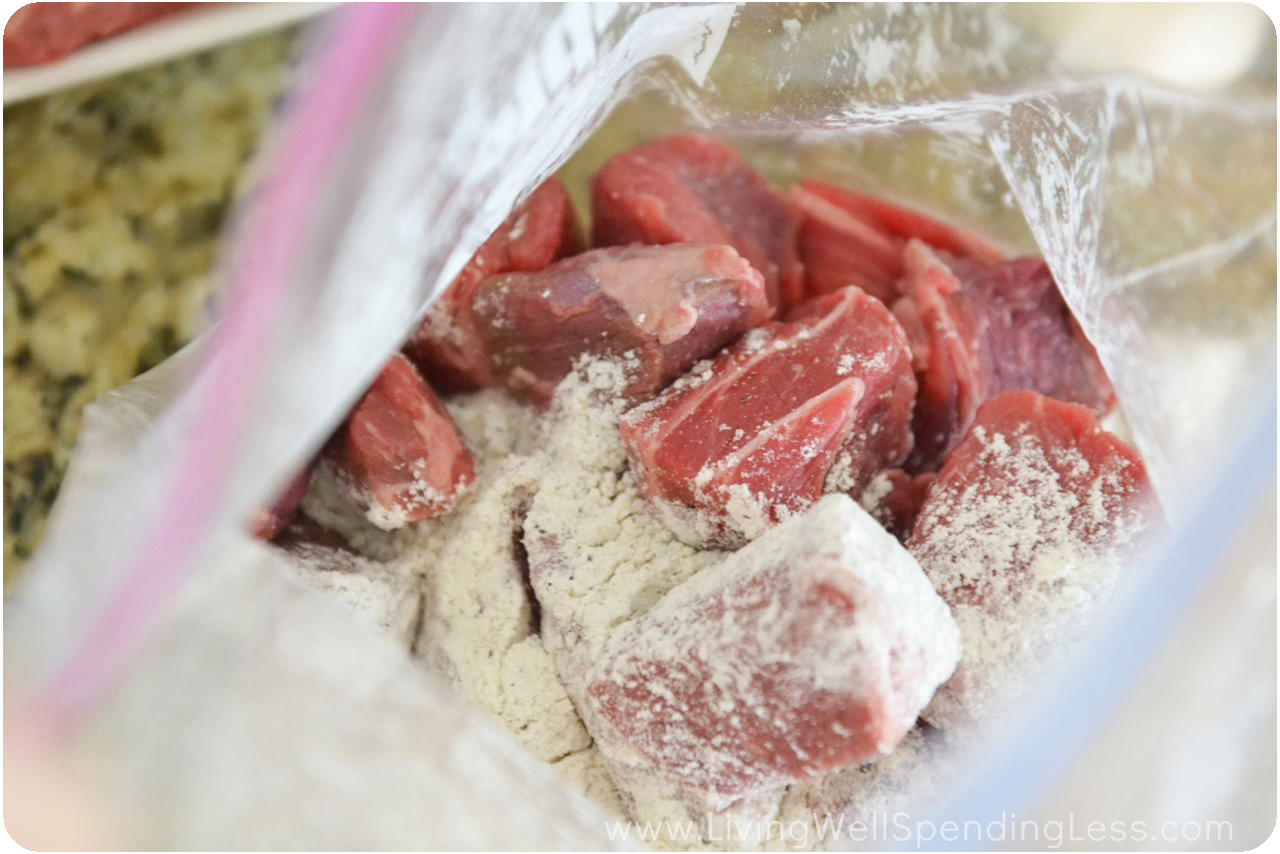
Step 1: Warm Dutch oven over low heat. Preheat oven to 350 degrees. In large Ziploc bag, blend flour, salt, and pepper. Add 1/2 of meat to bag then shake until coated. Remove meat, set aside, and repeat with remaining meat.

Step 2: Chop onion and garlic; set aside.
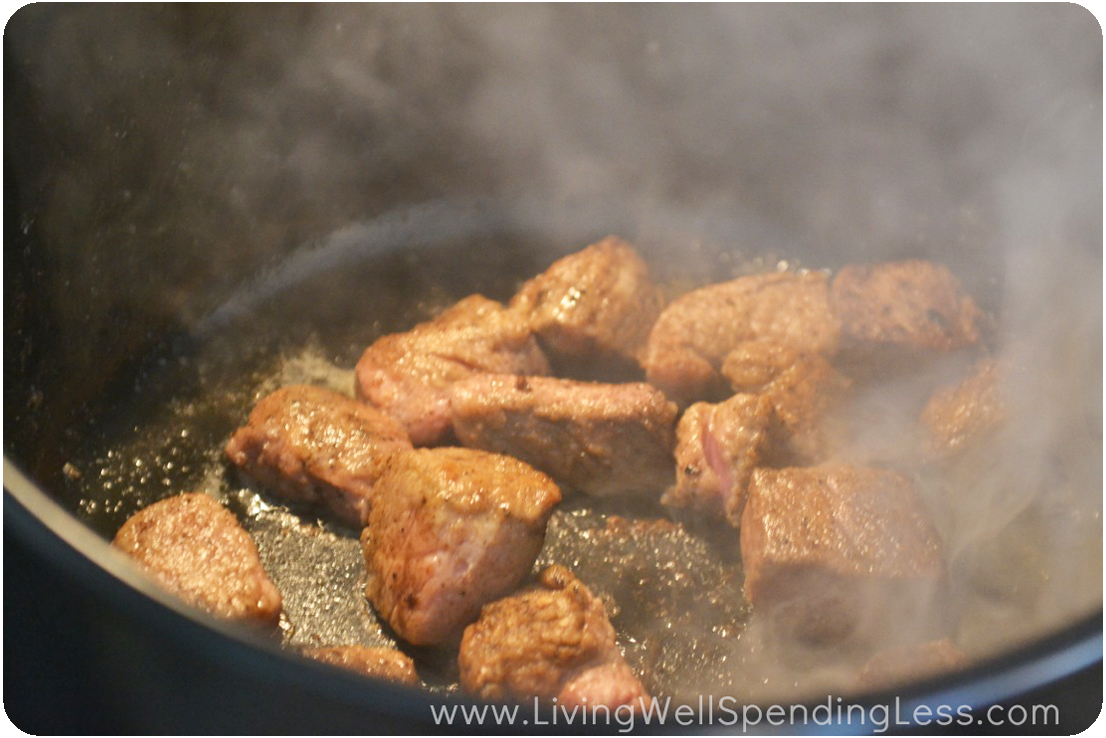
Step 3: Heat butter in Dutch Oven over medium-high heat; sear beef chunks on all sides, then remove meat and set aside. Reduce heat to medium-low.
Step 4: Add onions to Dutch oven and sauté until softened, 4-5 minutes. Add garlic and cook until onions are golden brown, 4-5 minutes more, being sure to scrape the bottom and sides of the Dutch Oven as it cooks.

Step 5: Add tomato paste, beer, beef broth, Worcestershire, and thyme to pot; whisk well until blended.

Step 6: Add beef back to pot.
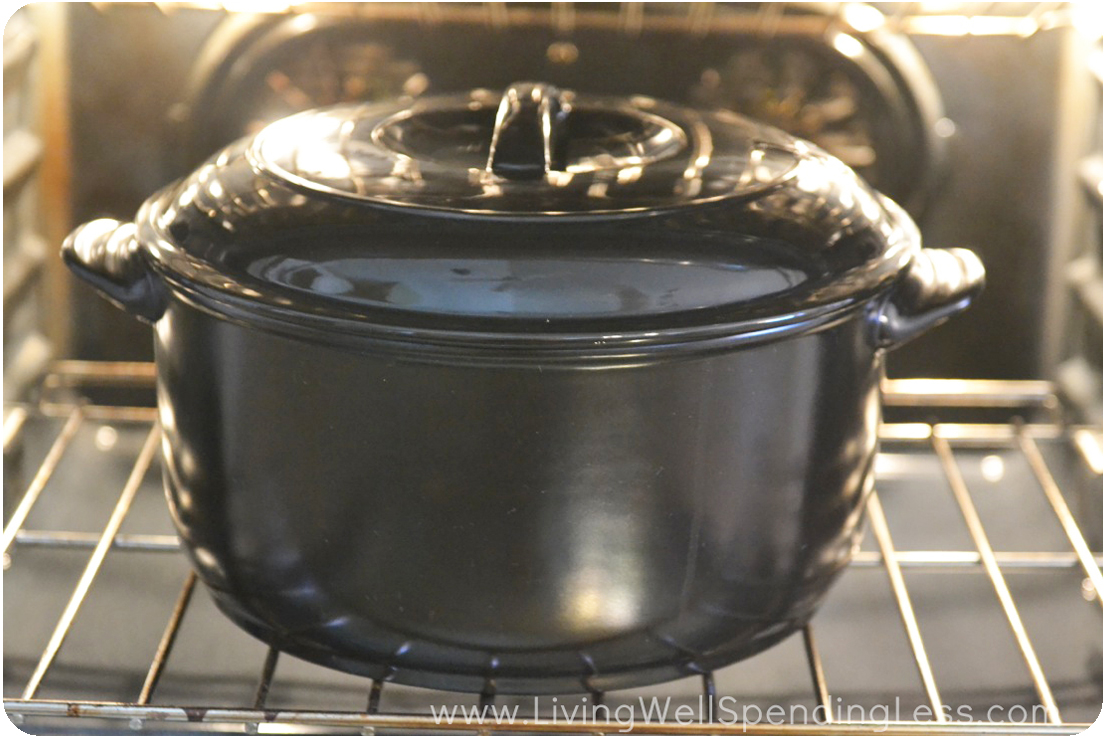
Step 7: Cover and bake at 350 degrees for 1 1/2 hours.
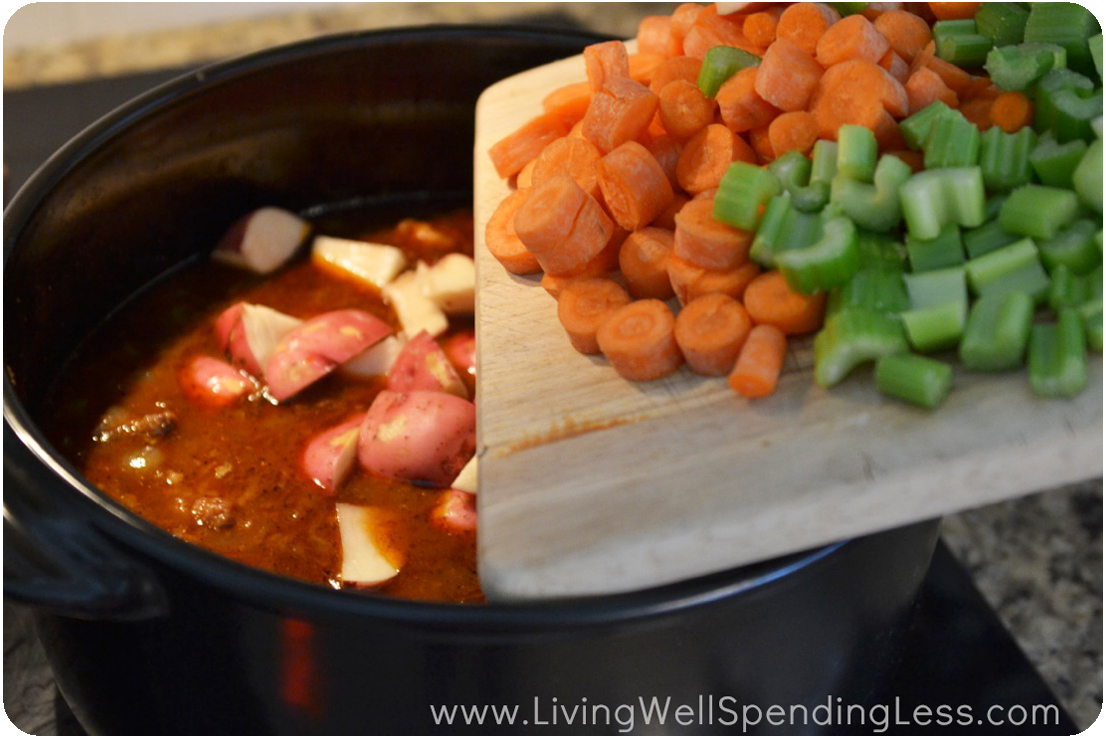
Step 8: Chop unpeeled carrots, potatoes, and celery into large bite-sized chunks; add to pot. Chop parsley if desired and add to pot as well. Bake for 60 minutes more until vegetables are cooked. Serve with crusty beer bread!
P.S. The 10 quart Ceramcor Dutch Oven that I use is on sale this month for $199 (normally $249), plus you can take an additional 10% off when you use promo code LIVE10WELL. It is a great deal for an awesome pot!

Print This!
Recipe: One Pot Beef Stew
Summary: A foolproof hearty meal that uses just one pot!
Ingredients
3 pounds chuck roast or stew meat, cut into chunks
8 tablespoons flour
1 1/2 teaspoons seasoned salt
1/2 teaspoon pepper
2 sweet onions
5-6 garlic cloves
4-6 tablespoons butter
1 8oz can tomato paste
1 12 oz can beer
6-8 cups beef broth
1 tablespoon Worcestershire
1 teaspoon ground thyme
6 whole carrots, washed
6-10 red potatoes, washed
6 stalks celery, washed
fresh parsley
Instructions
Warm Dutch oven over low heat; preheat oven to 350 degrees. In large Ziploc bag, blend flour, salt, and pepper. Add 1/2 of meat to bag then shake until coated. Remove meat and repeat with remaining meat.
Chop onion and garlic; set aside.
Heat butter in Dutch Oven over medium-high heat; sear beef chunks on all sides, then remove meat and set aside. Reduce heat to medium-low.
Add onions to Dutch oven and sauté until softened, 4-5 minutes. Add garlic and cook until onions are golden brown, 4-5 minutes more, being sure to scrape the bottom and sides of the Dutch Oven as it cooks.
Add tomato paste, beer, beef broth, Worcestershire, and thyme to pot; whisk well until blended.
Add beef back to pot.
Cover and bake at 350 degrees for 1 1/2 hours.
Chop unpeeled carrots, potatoes, and celery into large bite-sized chunks; add to pot. Bake for 60 minutes more until vegetables are cooked. Serve with crusty beer bread!
Preparation time: 20 minute(s)
Cooking time: 2 hour(s) 30 minute(s)
Number of servings (yield): 12
* * *
What are your favorite one-pot meals?
This post was underwritten by Ceramcor, the proud makers of Xtrema All Natural 100% Ceramic Cookware. All opinions are mine.
Xtrema Ceramic Cookware is Healthy Cookware for Healthy Eating!
Improve the Quality of Your Life with Xtrema Ceramic Cookware.
Save 10% off your entire order using coupon code: LIVE10WELL
Xtrema is the manufacturer of the healthiest and most versatile cookware on the Planet.They are healthier than any other cookware and have documented scientific and laboratory testing results to corroborate it. Xtrema is the healthy alternative to potentially toxic metal and non-stick cookware. Xtrema is Lead, Cadmium and Heavy Metal Free. It is PFOA & PTFE Free with no unsafe non-stick coating. Xtrema is 100% natural ceramic cookware.

Pin It
The post One Pot Beef Stew appeared first on Living Well Spending Less™.
March 11, 2014
Part 2: Cleaning Supply 101
This is Part Two of an 8-Part Beginner’s Guide to Cleaning Series. See the overview here.
* * *
Over the years, I’ve had to learn the hard way that more cleaning supplies will not necessarily result in a cleaner house. Even so, there are definitely a few essentials that every home needs in order to get things truly spic and span. Thus, before we get started on the “how” of tackling every surface, we are going to first spend some time gathering our “what”—the must-have cleaning products and cleaning tools to get the job done.
Cleaning Products
The sheer number of cleaning products on the market can be pretty overwhelming, but the truth is that just a few basic cleaners are really all you need to get the job done right. Here is a breakdown of the different types of cleaners you should keep on hand and what they clean:
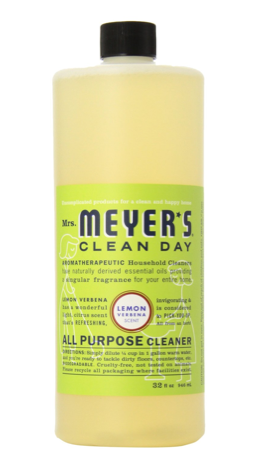
1. All Purpose Cleaner. A good all-purpose cleaner can clean and sanitize everything from your kitchen counters, sink, & appliances to your bathroom shower, tub, and toilet. It can also be used to spot clean tile backsplash, floors, or walls and linoleum.
Try these : Clorox Clean-Up or Mrs. Meyers All Purpose Cleaner
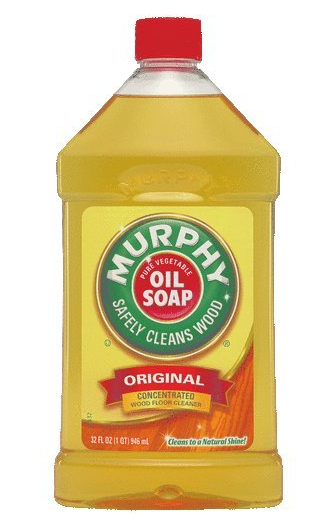
2. Furniture Cleaner & Polish: A good oil-based furniture cleaner & polish will make your surfaces shine and can keep your wood furniture in great condition for years to come. Be careful to avoid products that will cause buildup on furniture, especially aerosol dusting sprays! This should be used on all wood furniture, including dressers, tables, chairs, and desks. A concentrated version can also make a great mop solution for cleaning hardwood floors.
Try these: Murphy’s Oil Soap or Method Good for Wood Cleaner
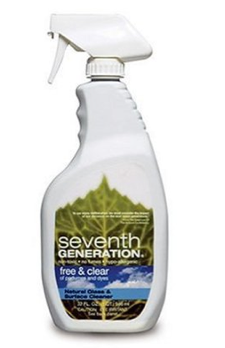
3. Glass Cleaner: A good glass & surface cleaner will not only make your mirrors and windows sparkle, but is also great for polishing bath & kitchen fixtures and for making countertops shine. I also use it for my glass-topped range. Use with a squeegee, lint-free cloth, or old newspaper rather than paper towels for a streak-free shine.
Try these: Glass Plus or 7th Generation Free & Clear Glass Cleaner
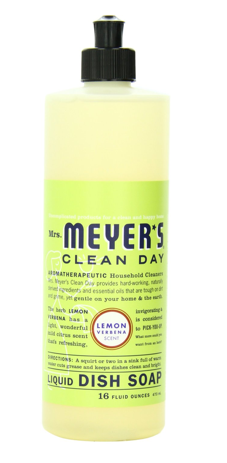
4. Liquid Dish Soap: Liquid dish soap is the secret weapon of your cleaning closet and its many uses go far beyond scrubbing your pots and pans. Use it in concentrated form to remove stains in clothing, or use a mild warm soapy water solution for everything from mopping floors to washing dirty lampshades.
Try these: Dawn Ultra or Mrs. Meyers Clean Day Dish Soap
5. Bleach: Another powerful and versatile cleaning aid, bleach goes the distance when it comes to cleaning and disinfecting. Use it in every single load of whites to prevent dinginess and graying of clothing, sheets, and towels. Add it to your soapy water solution to provide disinfecting power, pour it directly in your toilet brush holder to disinfect the brush between cleanings, and use it directly on grout and tile to combat mold.
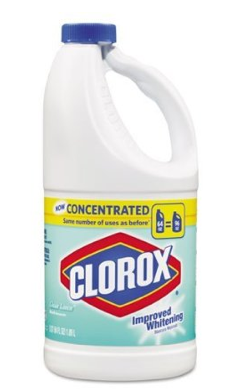
Try this: Clorox Concentrated
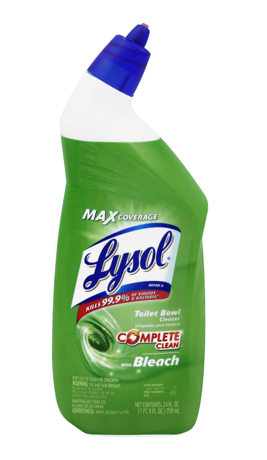
6. Toilet Bowl Cleaner: A thick gel will cling to the rim for extra cleaning power, and added bleach helps keep things nice and white.
Try this: Lysol Max with Bleach
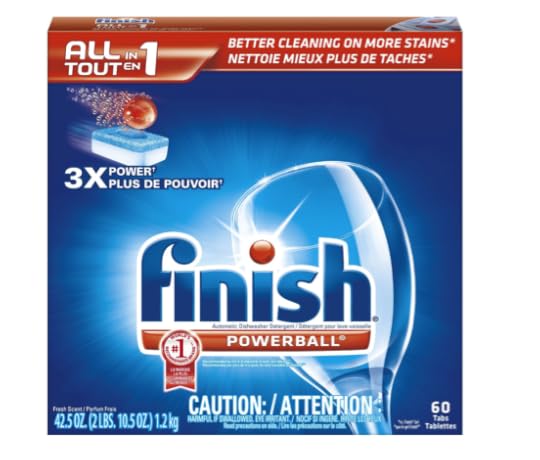
7. Dishwasher Detergent: I haven’t yet discovered any secret secondary uses for dishwasher detergent, but it is one of those products that doesn’t have a great substitute either (unless you make your own). However, if you use a dishwasher, it is worth your time to find a detergent that does the job well. I personally love the easy-to-use tablets.
Try these: Finish Powerball Tablets or Cascade Actionpacs
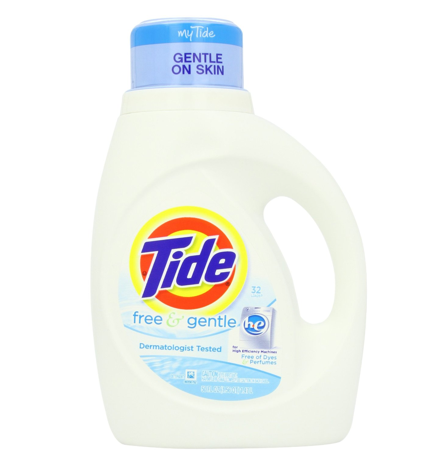 8. Laundry Detergent: A good laundry detergent will not only get your clothes clean, but keep them looking newer longer by not fading colors. I prefer making my own powder detergent, but my husband—now the main laundry person in our house—prefers commercial liquid detergent. Because of my daughter’s skin sensitivities, we normally buy the dye & scent-free version, which is gentle enough for baby clothes as well!
Try these: Tide Free & Gentle or All Free & Clear Mighty Pacs
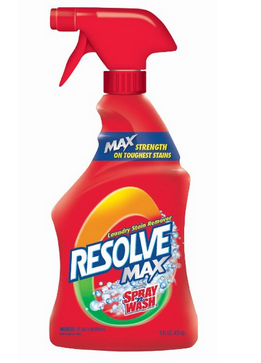
9. Stain Remover: Not all stains are created equal, but a powerful concentrated stain remover will tackle most of them
Try these: Resolve Max or Shout Advanced Gel
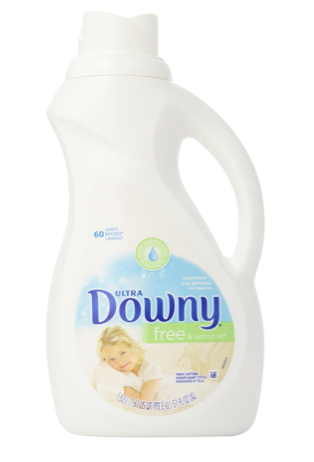
10. Fabric Softener: I grew up thinking fabric softener only came in the form of super smelly dryer sheets. As an adult I discovered liquid fabric softener and have never looked back—it does the job so much better! If you have a front loader you can pour the softener in at the beginning; a top loader requires waiting for the rinse cycle or opting for sheets in the dryer. Again, we prefer the dye & scent-free versions to get the softening power without all the heavy perfumes.
Try these: Downy Free & Clear or Bounce Free Sheets
Homemade Cleaning Products

While I’ve listed some of my favorite commercial cleaning products in the list above, please don’t think you need to run out and buy a whole cupboard full of cleaners to get the job done. Making your own homemade cleaners is not only cheaper than buying commercial products, it is also better for the environment. And surprisingly enough, just 10 common household products are pretty much all you really need to make ten different cleaners that can clean every surface in your home. Get all the recipes here, or print the free chart below to hang in your laundry room.

{Get your printable Green & Thrifty Cleaners chart here}
Cleaning Tools
In addition to the cleaning products listed above, there are also a few essential house cleaning tools that will make your job a whole lot easier.
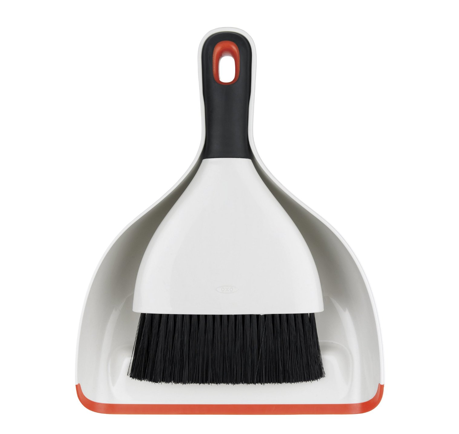
11. Broom & Dustpan: A must-have for every home, make sure your broom’s bristles are in good shape. If they are broken, worn, or jagged, consider trading it in for a new one—you will be amazed at how much more dust and debris it will catch. Choose a dustpan with a rubberized edge and comfortable handle.
Try these: Libman Precision Angle Broom and OXO Good Grips Dustpan
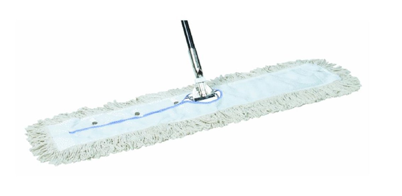
12. Dust Mop: If your home is mostly hardwood or tile, a large commercial dust mop is essential. Use this daily to pick up dust and keep floors looking clean in between mopping sessions.
Try this: O Cedar Commercial Dust Mop
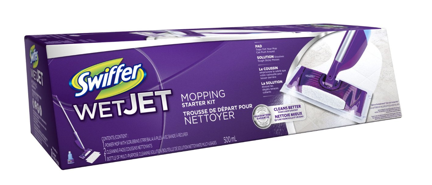
13. Wet Mop: I personally have not owned a “real” mop in years, preferring instead to use a Swiffer Wet Jet—it is just so much more convenient! Even so, heavily trafficked floors that get extra dirty might benefit more from a traditional wet mop that can be used with a warm soapy water solution.
Try these : Swiffer Wet Jet or O Cedar Mop & Easy Wring Bucket System
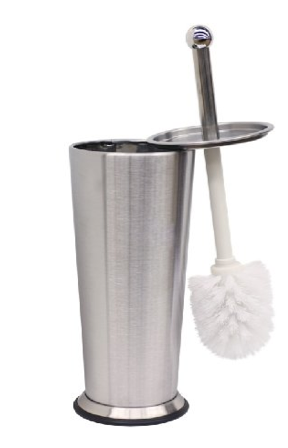
14. Toilet Brush & Holder: Find a toilet brush with a holder that can hold bleach so that your brush can be sanitized between cleanings. Be sure to replace the bleach regularly–at least every 2 weeks.
Try this: Home Basics Stainless Steel Toilet Brush and Holder
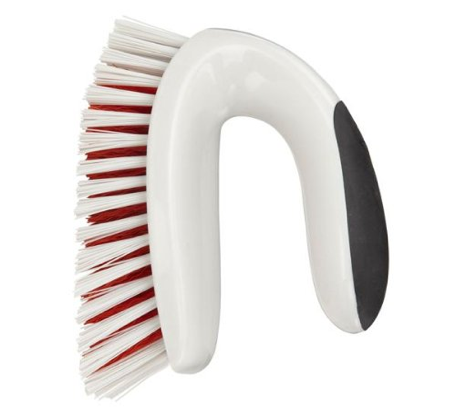
15. Scrub Brush: A good scrubber is key for cleaning tiles & grout—just be careful when scrubbing bathtubs or shower surfaces, as some scrub brushes will scratch acrylic or porcelain. In that case, opt for a wet rag instead!
Try this: OXO Good Grips Household Scrub Brush
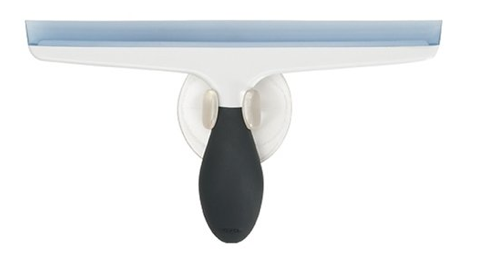
16. Squeegee: A good squeegee makes cleaning large glass surfaces a breeze—just spray on your glass cleaner and move the squeegee back and forth across the glass until it shines, wiping the blade with a rag in between strokes.
Try these: OXO Good Grips All Purpose Squeegee
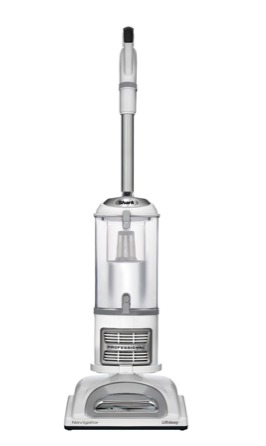
17. Vacuum: The amount of carpet in your home, as well as other factors such as pets and stairs should determine how much you are willing to invest into a high-quality vacuum. Take the time to read the reviews to find a vacuum that works well, sucks up dirt, and is easy to clean.
Try these: Shark Navigator or Dyson Animal Complete
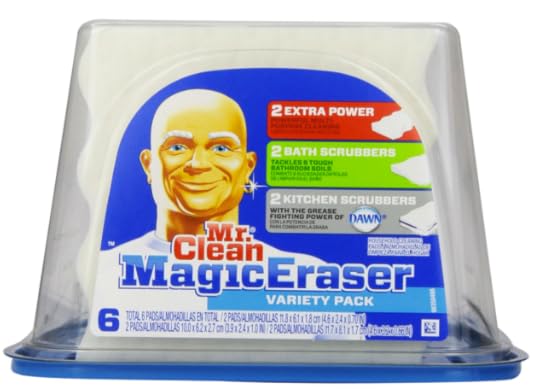
18. Magic Eraser: These little magic sponges are the best tool I’ve found for removing fingerprints from dirty doors and cabinets. They also do a great job of removing spots from tile floors and errant crayon or marker marks from tables and walls.
Try this: Magic Eraser Variety Pack

19. Duster: A duster is a great tool for cleaning bookshelves, window blinds, the tops of pictures and mirrors, ceiling fans, and any other areas where knick-knacks prevent a full wipe-down. I personally love the disposable Swiffer Dusters, but a washable duster can work great too.
Try these: Swiffer Dusters or OXO Good Grips Microfiber Duster
20. Lint-Free Cloth: A lint-free cloth is an invaluable tool for cleaning windows and mirrors without leaving little specks of lint behind. Old newspapers can make a great substitute for this, just make sure you use newspapers that are at least three weeks old to allow the ink time to set. Otherwise you may end up with very black hands!
Try this: Genuine Joe Microfiber Cleaning Cloth 4-Pack
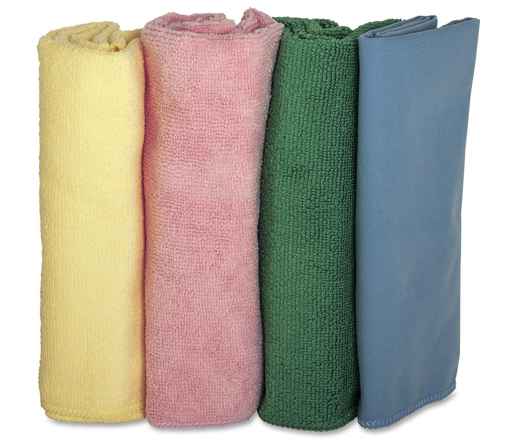
21. Rags: Every cleaning closet needs a good supply of rags that can be used for everything from cleaning the bathroom to wiping down the floor to polishing furniture. Old towels in a variety of sizes are perfect for this, just make sure they don’t have holes or strings that can get in the way.
What You Don’t Need:
You don’t need separate cleaners for each room (kitchen vs. bathroom cleaners, etc.) A good all-purpose cleaner can tackle all those areas. Also avoid aerosol dusting sprays, as they can cause build-up on furnitures, and skip extras and frills such as scented laundry boosters or countertop spray.
Part Two Assignment
Just to review, here is your second assignment:
Gather all your cleaning products and tools for a major purging session. Throw out any cleaners that haven’t worked or that you don’t like. There is no point in keeping something you know you won’t use. Inspect your broom, mop, and other supplies to make sure they are all in good shape, and get rid of anything that doesn’t make the grade.
Clear a space in your laundry or utility room to store your cleaning supplies so that they are all in one convenient place, then arrange them so they are neat and organized.
Once you’ve sorted the supplies you have on hand, make note of any supplies you still need. Make or purchase any necessary items.
* * *
Did I miss anything? What are your favorite cleaning products & tools?
Pin It
The post Part 2: Cleaning Supply 101 appeared first on Living Well Spending Less™.


