
Bready or Not Original: Cadbury Egg Brownies 13×9 Size (Redux)
Eight years have passed since I shared one of my signature recipes: it is time to revisit Cadbury Egg Brownies.

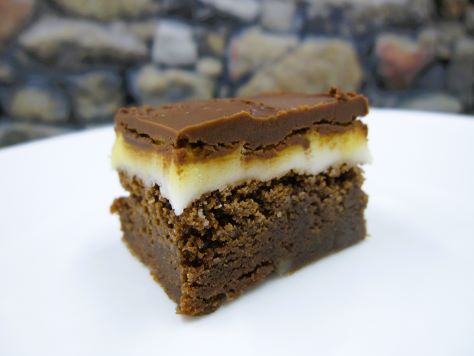
These homemade brownies taste like the Cadbury Eggs I was obsessed with as a kid. If you’re not familiar with this candy, it features a hollow chocolate egg the size of a real large chicken egg. Inside is a gooey super-sweet filling that is white and yellow to simulate the white and yolk of a real egg.
These special brownies are not hard to make; if you can make brownies from scratch, you can do this recipe. There is some extra planning involved, though, as the layers must be worked on in spurts, with chilling time in between.
Truly, these Cadbury Egg Brownies are a showstopper recipe. They look cool. They taste amazing. Keep in mind that this recipe makes a lot, so do make sure you’re sharing these with a crowd.
PrintBready or Not: Cadbury Egg BrowniesThese Cadbury Egg Brownies taste like the candy, but better, as the brownie base balances with the acute sweetness of the top layers. This recipe produces a full 13×9 pan of goodness; make this to share with a crowd!Course Dessert, SnackKeyword bars, brownies, chocolateAuthor Beth CatoEquipment9×13 panaluminum foil or parchment paperuneven spatulamicrowave safe bowl or double boilerIngredientsFor Brownies:1 1/3 cup all-purpose flour1/4 cup cocoa powder sifted1 teaspoon salt1 teaspoon espresso powder optional12 ounces milk chocolate chopped1 cup unsalted butter (2 sticks) cut into cubes 1/2 cup white sugar1 cup light brown sugar packed4 large eggs room temperature, lightly beaten2 teaspoons vanilla extractFor Cream Filling:1/2 cup light corn syrup4 tablespoons unsalted butter (half stick) room temperature 1 teaspoon vanilla extract1/4 teaspoon salt3 cups confectioners' sugar siftedyellow food coloring gelFor Glaze:8 ounces milk chocolate chopped4 Tablespoons unsalted butter half stick, cut into cubes InstructionsBrownie stagePreheat oven to 350-degrees. Line the bottom and sides of a 9×13-inch pan with aluminum foil or parchment paper, making sure to overlap the sides to create handles. Cover with nonstick spray.Sift together flour, cocoa, and salt (and espresso powder, if using) in a small bowl and set aside.Melt chocolate and butter together in a double boiler or in slow increments in microwave. Stir until smooth. Whisk in sugars and stir until dissolved and mixture has cooled slightly, then add eggs and vanilla extract until just combined.Fold together the chocolate and flour mixes until just incorporated. Pour into prepared pan.Bake for 25 to 30 minutes or until toothpick inserted into the middle comes out clean. Transfer pan to a wire rack and allow to cool completely.Cream filling stageBeat together corn syrup, butter, vanilla, and salt on medium-high speed until smooth. Add powdered sugar, a little bit at a time, mixing until creamy.Dump 3/4 of the cream mixture on top of cooled brownies and spread into an even layer. Add a drop of yellow food coloring gel to remaining cream mixture and stir until evenly colored. Drop dollops of yellow cream on top of white layer, and then swirl gently with a spatula. Refrigerate for at least 2 hours or until set.Glaze stageSlowly melt the chocolate and butter together in a double boiler or microwave bowl. Stir until smooth. Pour over cream filling, carefully spreading into a thin, even layer.Chill in the fridge long enough for the chocolate to not quite harden, 15-20 minutes, OR let it chill for several hours and then let set at room temperature for about 15 minutes. The chocolate needs to be soft enough to cut through without cracking, but not soft enough to smear with each cut.Use the foil/paper to lift the entire block out of the pan and onto a cutting board. Using a large sharp knife, cut into 2-inch squares. Keep in sealed container in fridge; brownies will keep upward of a week.OM NOM NOM!


