
Beth Cato's Blog, page 15
May 26, 2023
Moving!
I’m interrupting the usual flow of recipes and book news to bring you an important update: I am moving from scalding hot Arizona to the wintery wilds of Minnesota. That means you may see me at Twin Cities-area conventions and other Midwest gatherings in the coming years. Do you have a favorite? Are you involved with a convention or bookstore that’s looking for future guests? Well hey, drop a comment on this post, send an email via my contact form, reach out on social media–make a connection! (But also please understand if I’m slow to reply.)
As this move is happening at the same time as the full release of A Thousand Recipes for Revenge, I’m also looking for people to keep an eye out for promotions I might miss while in-transit and unpacking. There might be ads on Goodreads or Kindles, recommendations from Amazon–all kinds of things! If you see something, please try to get a picture or screencap and send it my way! Thank you in advance.
#SFWAPro


May 24, 2023
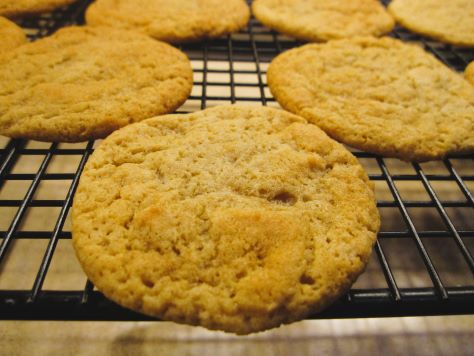
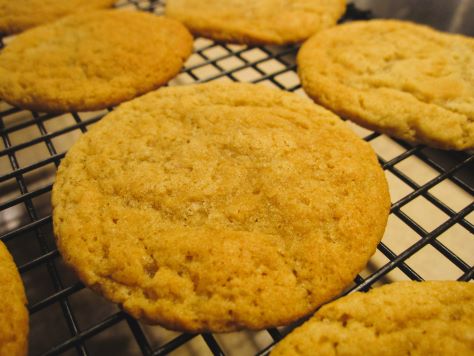
Bready or Not: Soft Lemon-Ginger Cookies Redux
Today we’re returning to a Soft Lemon-Ginger Cookies recipe I last featured in July 2017! Why let something delicious wallow in the archives, right?
This is a great dough to make hours or days ahead; just stash it in the fridge until baking time. Coolness also makes the sticky dough easier to work with.
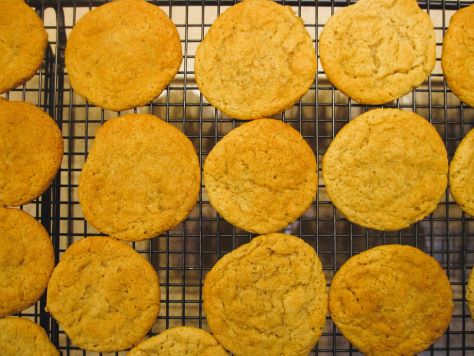
The lemon brings in a fresh element, while the ginger delivers the right amount of heat. These are sweet and refreshing cookies overall.
The one modification I made in this redux is that you can use sour cream or Greek yogurt. Both products contribute moisture, fat, and acid.
PrintBready or Not: Soft Lemon-Ginger Cookies ReduxThese soft cookies taste deliciously fresh thanks to the combined forces of lemon and ginger! The dough can be made hours or even a day ahead and kept wrapped in the fridge, too. It’s unknown how long they keep after baking–they tend to vanish rather quickly. Modified from Taste of Home.Course Dessert, SnackKeyword cookies, lemonAuthor Beth CatoEquipmentteaspoon scoop or teaspoonIngredients1/2 cup unsalted butter (1 stick) softened1 cup brown sugar packed1 egg3 Tablespoons sour cream or vanilla or plain Greek yogurt1 1/2 teaspoons lemon extract1 teaspoon vanilla extract1 3/4 cups all-purpose flour1 teaspoon baking soda1 teaspoon cream of tartar2 teaspoons ground ginger1/4 teaspoon saltInstructionsIf baking right away, preheat oven at 350-degrees.In a large mixing bowl, mix together the butter and brown sugar until they gain a fluffy texture. Beat in the egg, sour cream or yogurt, and extracts.In another bowl, sift together the flour, baking soda, cream of tartar, ginger, and salt; make sure to press any lumps out of the cream of tartar and ginger. Slowly mix the dry ingredients into the other bowl. At this point, the dough can be wrapped and chilled for a few hours or days; this will also reduce the dough's stickiness somewhat.When it is baking time, be sure to preheat the oven. Drop by rounded teaspoons onto a baking sheet. Bake for 10 to 12 minutes, until the cookies are lightly browned and no longer jiggly. Watch out–they can overbake quickly. Let them rest on the cookie sheet for just a few minutes, then transfer to a rack to cool.OM NOM NOM!May 17, 2023
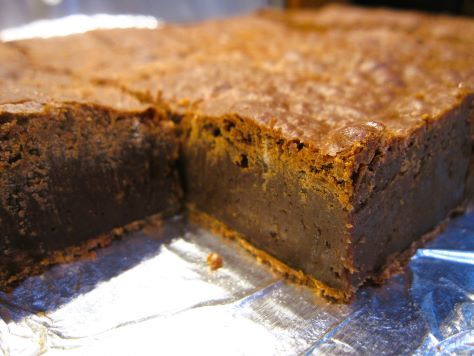
Bready or Not: Golden Syrup Brownies
I’ve made a lot of brownies that I’ve shared here on Bready or Not, but these Golden Syrup Brownies are the fudgiest I’ve ever made.

Seriously, they are good but they are dense and rich. I highly recommend cutting these things small, just as one does with fudge.
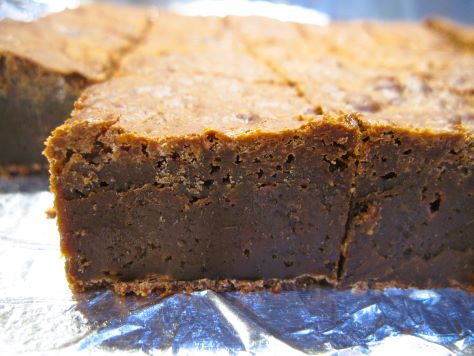
Golden Syrup and coarse sugar are what set these brownies apart. I used Lyle’s Golden Syrup, the original version, imported from the UK. Sometimes you’ll see honey and light corn syrup mentioned as American substitutes; if you want to go that route, split them half and half, but it still won’t be the same as Lyle’s.
As for the coarse sugar, the original recipe printed in Bake from Scratch called for unrefined light muscovado, but I used a mix of demerara and turbinado. Hence my general recommendation for coarse sugar.
This recipe will keep for weeks in the fridge, have you the fortitude!
PrintBready or Not: Golden Syrup BrowniesThese super-fudgy brownies use golden syrup, which is a British ingredient. I recommend Lyle’s Original Golden Syrup, which can be found in the import section of many American grocery stores. Note that these brownies need to chill for hours or overnight before eating. Modified from Bake from Scratch Magazine Sept/Oct 2019.Course Dessert, SnackCuisine BritishKeyword bars, brownies, chocolate, fudgeAuthor Beth CatoEquipment9×9 panaluminum foilnonstick sprayfine mesh sieveIngredients1 1/2 cups plus 2 teaspoons coarse sugar such as turbinado and demerara14 Tablespoons unsalted butter4 Tablespoons plus 2 teaspoons golden syrup1 1/4 cups dark chocolate chopped or in chips6 large eggs room temperature2/3 cups plus 2 Tablespoons all-purpose flourInstructionsPreheat oven at 325-degrees. Line a 9-inch square pan with foil and apply nonstick spray.In a large saucepan, heat the coarse sugar, butter, and golden syrup over medium heat until the mixture is smooth and bubbly, around 5 to 6 minutes. Remove the pan from heat and add the chocolate. Stir until everything is melted. Let cool for a bit.In a medium bowl, whisk the eggs. Strain them through a fine mesh sieve into the batter. Stir everything to incorporate. Add flour, stirring until no white streaks remain. Pour the batter into the prepared pan. Tap it on the counter a few times to knock bubbles free and level the batter.Bake until brownies are set with the center still moist, about 45 minutes. It’s okay if they look slightly underdone. Let pan cool to room temperature. Refrigerate at least 6 hours or overnight.Use foil to lift contents onto a cutting board. Use a large knife to cut brownies into small squares. If the brownies stick to the knife, wipe it clean after each pass and dip the blade in hot water before each cut. Store brownies in a sealed container in the fridge for up to two weeks, or freeze for longer.OM NOM NOM!May 10, 2023
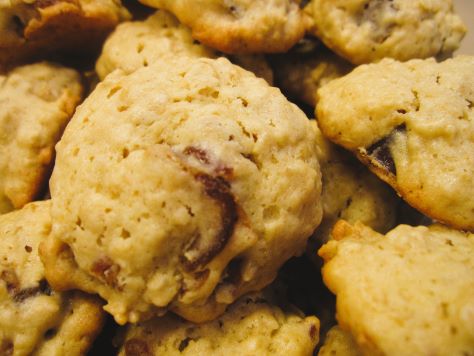
Bready or Not Original: Date Drop Cookies
If you’re in need of a old-fashioned homey cookie, these Date Drop Cookies may be just what you need.
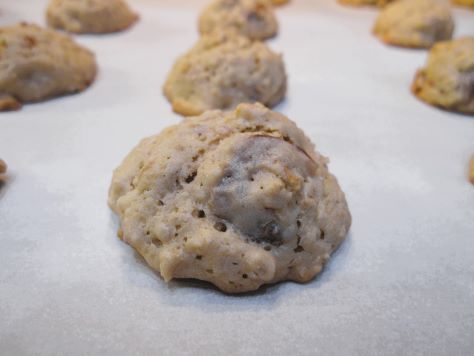
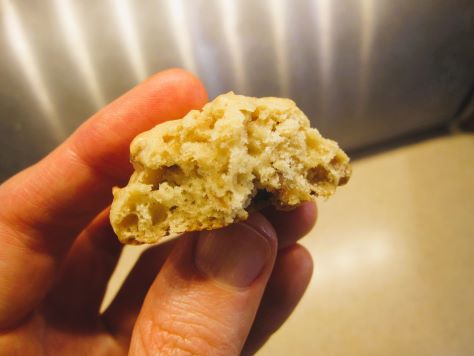
They won’t win any awards in the looks department, but you know what? They are GOOD. Quite similar to a soft, chewy oatmeal cookies, but with chopped dates instead of raisins.
I used kitchen shears to chop up dates from a big container from Costco. If you use pre-cut dates, such as from a bin, those will be good in this recipe, albeit a not quite as soft.
These should keep for at least a few days in a sealed container at room temperature.
PrintBready or Not Original: Date Drop CookiesThese are similar to a chewy oatmeal cookies, but with dates rather than raisins. They are incredibly pleasant and homey.Course Dessert, SnackKeyword cookies, datesServings 55Author Beth CatoEquipmentparchment paperteaspoon or teaspoon scoopIngredients1/2 cup unsalted butter (1 stick) softened3/4 cup light brown sugar packed2 eggs room temperature1/4 cup milk or half & half1 teaspoon pure vanilla extract1 1/2 cups all-purpose flour1 teaspoon baking powder1/4 teaspoon salt1 cup quick oats1 cup chopped dates3/4 cups chopped walnutsInstructionsPreheat oven at 350-degrees. Line a baking sheet with parchment paper.In a large mixing bowl, cream together the butter and brown sugar. Beat in the eggs, milk, and vanilla. Fold in the oats, dates, and walnuts.Using a teaspoon or teaspoon scoop, place round dollops of dough spaced out on the baking sheet. Bake for 12 to 15 minutes, until cookies are set. Transfer them to a rack to completely cool. Store in a sealed container at room temperature.OM NOM NOM!May 3, 2023
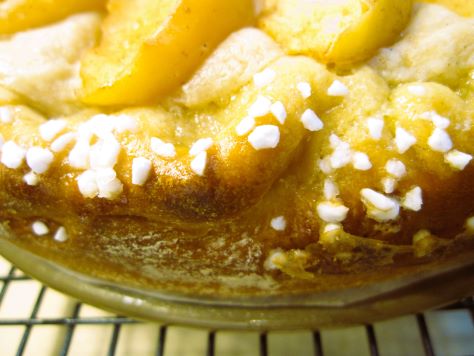
Bready or Not: Apple Cream Cheese Brioche Tart
This Apple Cream Cheese Brioche Tart isn’t a beginner’s recipe, I’ll say that straight up. There are gobs of steps, multiple rise times, lots of dirty dishes. But the result? Wow.

This is really a show-stopper kind of bread for a dessert, breakfast, or brunch. You have an enriched bread with a creamy, rich filling topped with spiced apples.
We had to test the best ways to eat the leftovers, too. The tart is fantastic fresh. Because of the creamed cheese, it needs to be stored in the fridge–but it’s thick and cloggy if eaten cold.
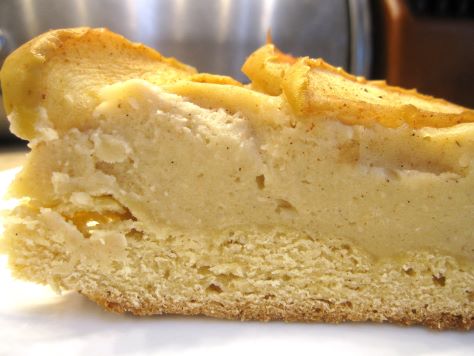
However, heating it in the toaster oven doesn’t work–the cream cheese will melt off! Like Goldilocks, we eventually found the “just right.” It was a quick zap in the microwave, maybe 15-20 seconds depending on your machine. Enough to take the chill off without making it hot.
The things we bakers must do for science and the good of the people…
PrintBready or Not: Apple Cream Cheese Brioche TartThere’s no denying that this is a complicated, time-consuming recipe, but the results are delicious and beautiful to behold. Modified from Red Star Yeast, and uses their Platinum Yeast.Course Breakfast, Dessert, SnackKeyword apple, cheese, cream cheese, yeast breadAuthor Beth CatoEquipmentrimmed baking sheet9-inch springform panparchment paperstand mixer with paddle and dough hooknonstick spray with flourpastry brushuneven spatulainstant read thermometerIngredientsApples2 cups apples peeled then sliced to 1/4-inch, about 1 1/2 medium apples (Honeycrisp recommended)1 Tablespoon white sugar1/2 teaspoon lemon juice1/4 teaspoon apple pie spiceDough2 cups all-purpose flour divided1 1/2 Tablespoons white sugar1 1/2 Tablespoons light brown sugar packed1 0.25oz package Platinum Yeast1 1/2 teaspoons kosher salt1/4 cup milk or half & half, warmed to 120-F to 130-F2 large eggs room temperature3/4 teaspoon pure vanilla extract1/4 cup unsalted butter softenedFilling2 Tablespoons unsalted butter softened3 Tablespoons white sugar2 Tablespoons light brown sugar firmly packed1 teaspoon pure vanilla extract1/4 teaspoon kosher salt1/4 teaspoon apple pie spice8 ounces cream cheese room temperature1 large egg room temperature3 Tablespoons all-purpose flourTopping1 large egg for egg wash1 Tablespoon water for egg washSwedish pearl sugar for sprinklingInstructionsPreheat oven to 400-degrees. Line a rimmed baking sheet with parchment paper.Prepare the sliced apples by using a large bowl to stir them with sugar, lemon juice, and pie spice. Let the mixture stand for 15 minutes, stirring occasionally. Spread apple mixture in an even layer on prepared pan.Bake the apples until they are fork-tender and have released significant moisture, 12 to 16 minutes. Rotate the pan and stir halfway through. The apples should reduce in size slightly but retain their shape. Let the apples cool while continuing with other stages. Also, turn off the oven, as it won’t be needed for a while.Begin the dough. In the bowl of a stand mixer fitted with the paddle attachment, beat 1/2 cup flour, white sugar, brown sugar, yeast, and salt at medium-low speed. Add the warm milk, eggs, and vanilla, beating everything on medium about 2 minutes until it’s combined. Scrape the bottom and sides of bowl a few times. Gradually add the remaining 1 1/2 cups flour.Switch to the dough hook attachment. Beat at low speed until dough is smooth and elastic. It should start to pull away from sides of bowl. This will be around 6 to 9 minutes.Add the softened butter, 1 tablespoon at a time, beating well after each addition. This will take 6 to 8 minutes total. Scrape the sides of bowl and dough hook as needed. If the dough looks slightly broken during this stage, that's okay–keeping beating it and it'll come back together.Increase mixer speed to medium-low and beat until a smooth, elastic dough forms, about 6 minutes.Turn out dough onto a clean surface and knead 4 to 5 times. Shape into a smooth round. Place dough in a large ungreased bowl. (At this stage, the dough could be covered and placed in the fridge for a few hours or overnight.) Cover it and place it in a warm spot until it doubles in size, about 45 minutes to 1 hour.Cut a piece of parchment to fit in the base of a springform pan. Apply nonstick spray with flour in pan. Add cut paper. Spray again to coat paper and sides.Punch down dough, then cover it and let it rest for about 10 minutes. On a lightly floured surface, roll dough into an 11-inch circle. Use the bottom of the springform pan to poke a 9-inch circle in the middle of the dough. Fold and press outside edges inward to create a crimped edge. Lift the dough to place it in the prepared pan. Press dough to make sure it fills the bottom. Crimp and secure the edges again if needed. Cover and let rise again in a warm place for 25 minutes. Dough should be puffed and hold an indentation when it’s poked.Preheat oven to 325-degrees.Now make the filling. In the clean bowl of the stand mixer, using the paddle attachment, beat the butter, white sugar, brown sugar, vanilla, salt, and pie spice at medium speed. Gradually add the cream cheese, beating until smooth. Add egg, beating until combined, then add the flour. Scrape the bowl to make sure everything is mixed.Use your fingertips to dimple center of dough back down, leaving outside crust higher and puffed. Crimp and secure edges if necessary, and press out any air bubbles if you see them.Spoon and spread cream cheese mixture in an even layer in center of dough. Arrange the sliced apples slightly overlapping in two concentric circles. (You may have leftover slices. Eat’em on their own!)In a small bowl, whisk together egg and water. Brush outer edge of dough with egg wash. Sprinkle pearl sugar along the crust.Bake for 20 minutes. Rotate pan. If the crust is browning, cover it with foil. Bake for another 25 to 28 minutes. When the tart is done, the crust will be golden brown. The filling should be set around outside edges and slightly jiggly in center. An instant-read thermometer inserted in center should register at least 175-degrees.Let cool in pan for 10 minutes. Using a small offset spatula, loosen edges of bread. Remove sides of springform pan. Let cool completely on pan base on a wire rack.The tart can be enjoyed fresh after it cools. Leftovers should be stored in the fridge, but will be cloggy if eaten chilled. It’s best warmed with a short zap in the microwave, about 15-20 seconds; if it’s made too hot, the cream cheese melts! Leftovers can also be individually wrapped and frozen for later. Thaw in fridge.OM NOM NOM!May 1, 2023
Are you a member of Amazon Prime? Then you can grab my book for FREE now!

A Thousand Recipes for Revenge is officially out one month from today. I have something special to share, though. My book and its sequel are being published through 47North, one of Amazon’s publishing wings. If you are an Amazon Prime member in the US, you can grab the ebook of A Thousand Recipes for Revenge NOW for free, courtesy of Amazon First Reads. Not a prime member? You can get it for only $1.99! Deals are good for the month of May. (I believe that this deal also applies in some way to folks in the UK, Australia, and Canada, but I’m not sure how the numbers differ! Hey, let me know.)
Grab the book here!The full print book and audiobook will be available on June 1st–and the ebook will still be available on Amazon (and everywhere else, too) for a few bucks more.
[Link is through the Amazon Affiliate program.]
#SFWAPro
April 26, 2023
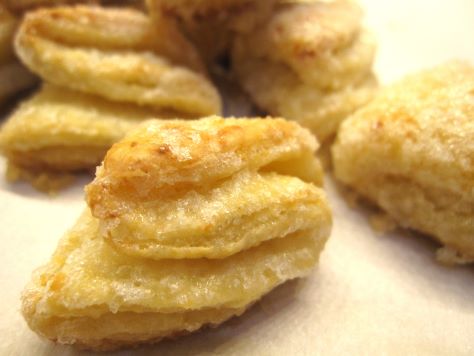
Bready or Not: Farmer’s Cheese Cookies
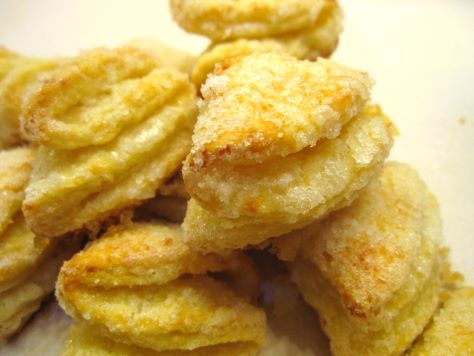
These Farmer’s Cheese Cookies don’t taste cheesy as one would expect in a gooey, cheese-pull kind of way. Instead, the cheese here adds a touch of savory flavor and a lot of light, chewy texture.
Cookies like this are traditional in Ukraine and Russia. I found a nice block of Ukrainian Tvorog Farmer’s Cheese at Lee Lee Grocery on 75th Ave in Phoenix; check your own local import markets for similar cheese.
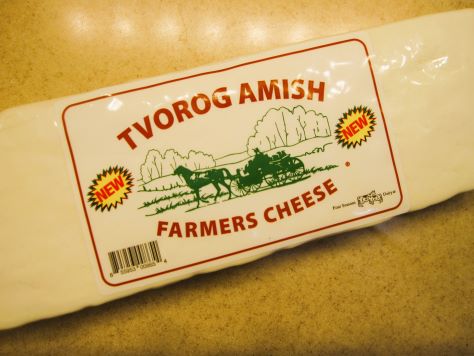
Expect a dry, crumbly texture in the cheese. Mine became somewhat powdery as I broke it down, which was fine. I was able to incorporate everything with an extra touch of water, which is a pretty common thing for me to do with roll-out cookies in Phoenix. It’s very dry here compared to most other places.
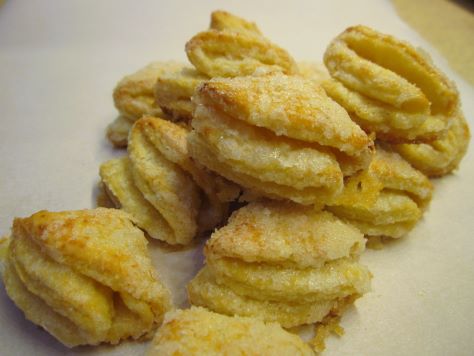
The end result is a cookie that, quite honestly, tastes fancy–light, crisp, sugary, like something that one would find in a fine bakery. Most people wouldn’t guess there’s cheese in the dough, I bet, but they’ll know there’s something different about them. Something delicious.
 PrintBready or Not: Farmer’s Cheese CookiesThese sweet, beautiful cookies originate in Ukraine and Russia. Look for farmer’s cheese in a local European import market. This recipe makes about 60 cookies.Course Dessert, SnackKeyword cheese, cookiesServings 60Author Beth CatoEquipmentgrater or food processorpastry blender3-inch round cutter or the top of a glassparchment papersaucer or bowlRolling PinIngredients1 cup unsalted butter 2 sticks, chilled8 oz farmer's cheese such as Ukrainian Tvorog cheese2 cups all-purpose flour2 egg yolks2-3 Tablespoons water1 1/2 cups white sugarInstructionsGrate the butter using a hand grater or a grater attachment on a food processor. In a large bowl, use a pastry blender to cut in the cheese, which will be crumbly. Add the flour, followed by the yolks and water. Knead the dough until it comes together in a cohesive mass.Form the dough into a disc and encase it in plastic wrap to chill for anywhere from an hour to several days.When it’s cookie time, preheat oven at 375-degrees. Line a large baking sheet with parchment paper. Place a small amount of water in a saucer or bowl. Measure the white sugar into a deep bowl.Prepare a clean work surface with a dusting of flour. Break off some of the dough and roll it into a thin layer, like for a pie crust. Use the cutter to slice out 3-inch rounds; place the leftover and unused dough to chill in the fridge while cookies are shaped.Dampen fingers in the prepared water. Brush wet fingers over one side of a dough round. Dip moist dough into the sugar to coat it. Fold in half with the sugared portion on the inside. Dampen fingers and stroke another folded side of the dough, and dip that in sugar. Fold a final time with the sugared section on the inside. Use wet fingers on outside of cookie and coat that in sugar, too. Gently press the pleats together to prevent them from unfolding during baking. Place formed cookie on sheet and repeat process with remaining rounds.Bring together dough scraps, using a little water if needed, to roll out again. Use rest of dough to form cookies.Bake in batches for 19 to 22 minutes, until puffed and set with a golden base. Store in a sealed container at room temperature.OM NOM NOM!
April 19, 2023
Bready or Not Original: Chicken and Rice Soup
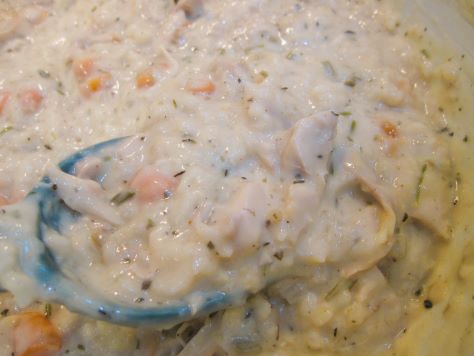
Chicken and Rice Soup is the ultimate classic, home-cooking, feel-better-soon kind of meal. I’m stunned I haven’t featured it on Bready or Not before, but here it is now: my take on the old favorite.
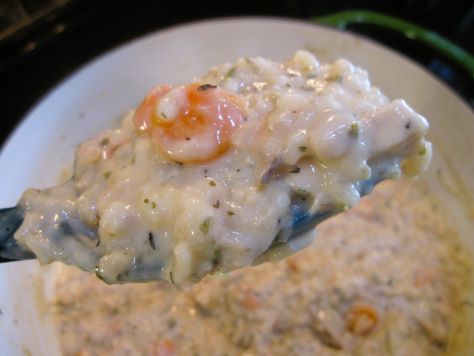
I’ve tweaked this over the years to get the balance of liquids and seasonings just right. I make this a couple times a year. It’s my stand-by if my husband is sick–it’s hearty, hot, sits well in the stomach, and the sheer amount made means the leftovers can last for days (which is nice if I come down sick next, too).
 PrintBready or Not Original: Chicken and Rice SoupThis classic from-scratch recipe takes time to make, about an hour, but results in a flavorful broth especially welcome when someone is sick or needs to warm up. Use already-cooked chicken or turkey (this is a great way to use up holiday leftovers!). The leftovers keep well in the fridge or can be frozen, too.Course Main Course, SoupKeyword chicken, rice, soup and stewAuthor Beth CatoEquipmentstock pot or other large pot with lidIngredients1 cup baby carrots chopped2 Tablespoons dried celery flakes1 Tablespoon dried onion flakes1 teaspoon garlic powder64 oz reduced sodium chicken broth 2 boxes or 4 cans3 Tablespoons flour1/2 cup short grain white rice such as sushi rice1 teaspoon dried thyme1 teaspoon dried rosemary or 1 freshly-cut sprig2 bay leaves2 to 3 cups shredded rotisserie chicken or cooked turkey1 1/2 cups half & halfInstructionsPlace carrots, celery flakes, dried onion, and garlic powder in a large pot along with 1 can of chicken broth (if using a box of broth, just pour in about 1/2 of one; no need to be exact). Sauté on medium heat for 10 minutes, until carrots are tender. Sprinkle in flour and stir for another few minutes.Add rest of broth along with the rice, thyme, rosemary, and bay leaf. Bring pot to boil.Reduce heat to medium-low and cover pot. Cook for 25 to 30 minutes. When the rice is tender, add the chicken or turkey. Cook for 10 minutes. Stir in half & half and cook for another 10 minutes.Remove both bay leaves. Add salt and pepper to preference. Serve hot. Leftovers can keep in the fridge or days or can be frozen.OM NOM NOM!
April 12, 2023
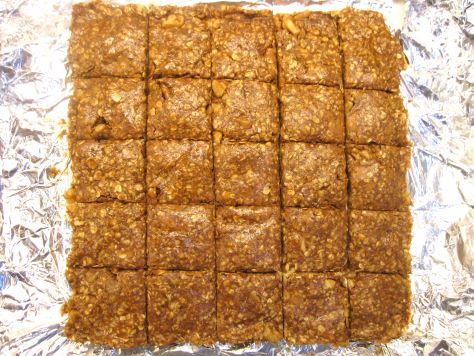
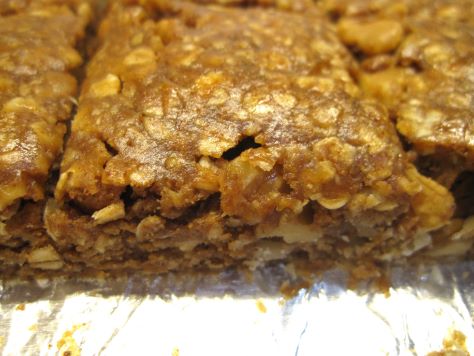
Bready or Not Original: No-Bake Almond Granola Bars
These No-Bake Almond Granola Bars are fast to make and contain wholesome, basic ingredients. Plus, they are delicious.
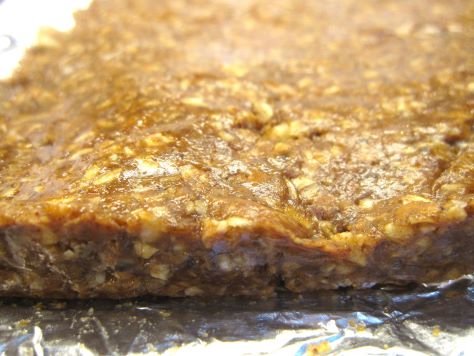
I made this recipe several times to find the right balance of ingredients. Too many almonds and oats, and nothing sticks together. You think it’s solid until you try to cut the chilled bars. (I speak from experience.)
I find it fun to make little swaps with the ingredients, too. Use cashew butter or another kind of nut butter! Try different varieties of honey. You could even use pumpkin spice mix or other spices to give it a different vibe.
The end result will keep for a week or two in the fridge, and even longer in the freezer!
PrintBready or Not Original: No-Bake Almond Granola BarsThese no-bake breakfast/snack bars use straightforward, delicious ingredients to make a likewise delicious bar.Course Breakfast, SnackKeyword almond, maple, no bake, oatsAuthor Beth CatoEquipment9×9 panaluminum foilnonstick sprayfood processorwaxed paperheavy glassIngredients1 cups almonds or buy pre-chopped almonds2 cups quick-cooking oats2 teaspoons ground cinnamon1/2 teaspoon fine sea salt reduce if using regular table salt or salted nut butter1 1/2 cups creamy almond butter1/2 cup maple syrup or honey2 teaspoons vanilla extractInstructionsLine a 9×9 square pan with foil and apply nonstick spray.If the almonds are whole, give them a rough chop in food processor, just a few pulses.In a large mixing bowl, combine the oats, cinnamon, and salt, and stir to blend. If the almond butter is stiff, measure it into a separate microwave-safe bowl and heat it for 20-30 seconds to soften it. Add almond butter, maple syrup or honey, and vanilla extract to the big bowl with the dry ingredients. Stir together until it forms a cohesive mass. If it seems too liquid, add more oats; if it’s too dry, add more almond butter. Stir in the chopped almonds to distribute them throughout.Dump the mixture into the prepared pan. Even out some, then use a pan-size piece of wax paper and a heavy glass to compress the dough evenly.Stash the pan in the fridge for at least an hour, or until the next day. Slice into bars of desired size. Store between stacked waxed paper layers in the fridge, or freeze for later enjoyment.OM NOM NOM!April 5, 2023
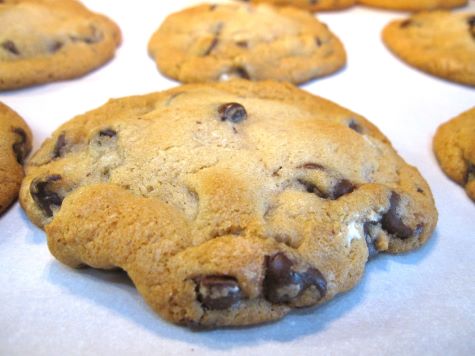
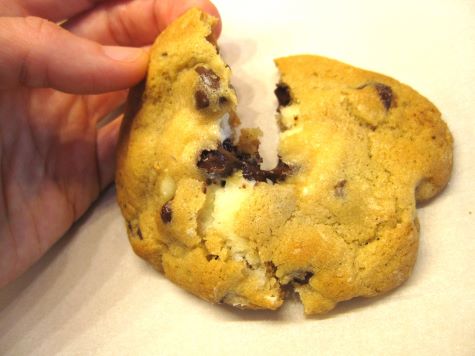
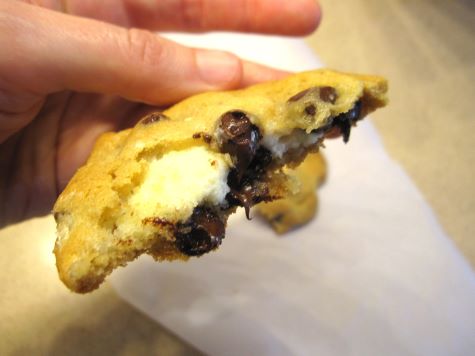
Bready or Not: Cheesecake-Stuffed Chocolate Chip Cookies
These Cheesecake-Stuffed Chocolate Cookies are big, rich, and incredible. You get a core of cream cheese surrounded by chocolate-laden dough. I mean, come on.
For this recipe, you need to make the dough and filling in advance. I made them a day ahead, but you want at least a few hours of refrigeration time. You also chill the cookie dough right after it’s shaped. That means you need some empty room in the fridge for doing this recipe.
This is also a recipe where you really do need a tablespoon and teaspoon scoop to produce even cookies. That, or you just naturally have a good eye for estimating such things.
Modified from Allrecipes Magazine Feb/March 2022.
PrintBready or Not: Cheesecake-Stuffed Chocolate Chip CookiesThis recipe makes about 24 indulgent, large cookies that load a lot of goodness into a single bite. Make the dough and filling at least a few hours ahead of time. This is definitely a recipe where tablespoon and teaspoon scoops are necessary to create cookies of equal size. Modified from Allrecipes Magazine Feb/March 2022.Course DessertKeyword cheese, chocolate, cookiesServings 24 cookiesAuthor Beth CatoEquipmenttablespoon and teaspoon scoopsfridge spaceparchment paperIngredientsFilling8 ounces cream cheese room temperature1/2 cup confectioners’ sugarCookie Dough3/4 cup unsalted butter (1 and a half sticks) room temperature3/4 cup white sugar3/4 cup brown sugar packed2 large eggs room temperature2 teaspoons vanilla extract2 1/4 cups plus 2 Tablespoons all-purpose flour1 teaspoon baking soda3/4 teaspoon salt12 ounces chocolate chipsInstructionsMake the fillingBeat together the cream cheese and confectioners' sugar to make a smooth mixture with few if any lumps. Stash it in the fridge to chill for a few hours or overnight.Make the cookie doughBeat together the butter and both sugars until they are creamy. Add the eggs and vanilla.In a separate bowl, combine flour, baking soda, and salt. Gradually pour this into the butter mixture, scraping the bottom of the bowl to make certain everything is combined. Fold in the chocolate chips. Chill the dough in the fridge for a few hours or overnight.Baking the cookiesPreheat oven at 350-degrees. Line a large baking sheet with parchment paper. Also, make room in the fridge for a small baking pan or plates on which the formed cookies will chill.Scoop out a tablespoon of cookie dough. Use a thumb to hollow out the center. Scoop out about 3/4 teaspoon of cream cheese mix using the smaller scoop. Place that inside the hollow. Fold the dough to enclose it, adding additional pinches of dough as needed to form a seal. You don't want any cream cheese visible, or it could ooze out! Flatten cookies between palms to make a fat disc. Set in fridge to chill as more cookies are shaped.Once all the cookies are shaped, pull out the coldest cookie balls to set, spaced out, on the baking sheet. Keep the remaining cookie balls chilled while the initial batch(es) bake.Bake for 12 to 14 minutes, until the cookies are golden. Let them rest on the sheet for 5 to 10 minutes, then transfer them to a rack to completely cool.Store cookies in an airtight container at room temperature for up to 3 days.OM NOM NOM!

