
Beth Cato's Blog, page 16
March 29, 2023
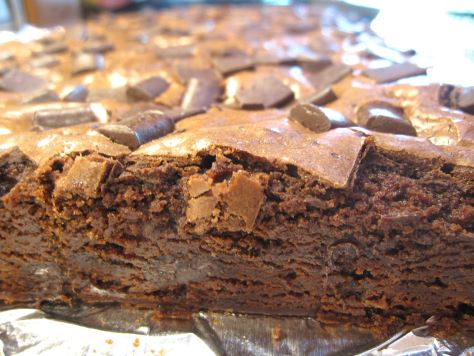
Bready or Not: Fudgy Chocolate Chunk Brownies
These Fudgy Chocolate Chunk Brownies are thick and rich. Plus, they even look amazing thanks to the chocolate chunks on top!

My favorite go-to for chocolate chunks are the German chunks sold at Aldi. They are way cheaper than those sold at other stores, but the quality is high. (I’m a major Aldi fan. They have one of the best cheese selections around, too!)
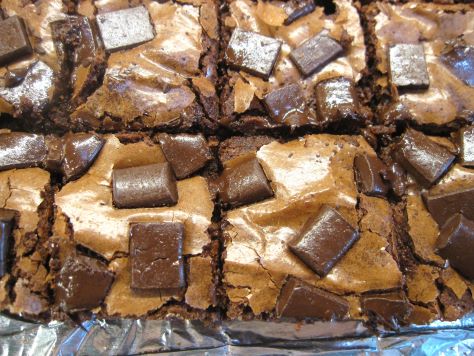
If you want to make these have a neat presentation, slice off the edges. Then eat those edges, because they can’t go to waste.
Modified from Food Network Magazine October 2013.
PrintBready or Not: Fudgy Chocolate Chunk BrowniesThese are classic thick, fudgy brownies, and this recipe makes a big batch–an entire 9×13 pan! Modified from Food Network Magazine October 2013.Course Dessert, SnackCuisine AmericanKeyword brownies, chocolateAuthor Beth CatoEquipment9×13 dishaluminum foiluneven spatulaIngredients1 1/2 sticks unsalted butter1 1/2 cups all-purpose flour1/2 cup cocoa powder sifted1/2 teaspoon salt8 ounces dark chocolate2 cups white sugar6 large eggs room temperature1 1/2 cups semisweet chocolate chunksInstructionsIn a large microwave-safe bowl or in a pot on the stovetop, melt together the butter and dark chocolate until smooth. Set aside to cool slightly.Preheat oven at 325-degrees. Line a 9×13 pan with foil and apply nonstick spray or butter.In a small bowl, combine the flour, cocoa powder, and salt.Return to the large container with the melted butter and chocolate. Stir in the sugar until no white streaks remain. Beat in the eggs one at a time. Gradually fold in the dry ingredients. Fold in 1 cup of chocolate chunks.Pour batter into the prepared dish. Use an uneven spatula to spread it into an even layer. Sprinkle the remaining 1/2 cup chocolate chunks over the top.Bake for 40 to 45 minutes, until the middle passes the toothpick test. Set on a rack to cool for at least an hour, speeding process in fridge if desired. Use foil to lift contents onto a cutting board to slice up. Store in a sealed container at room temperature.OM NOM NOM!

March 22, 2023
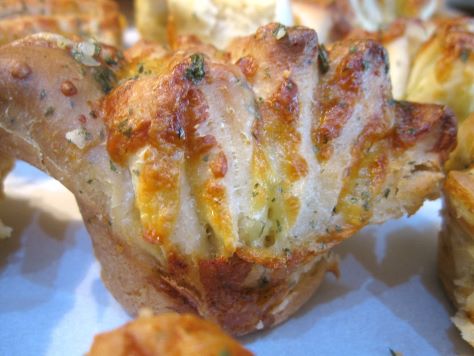
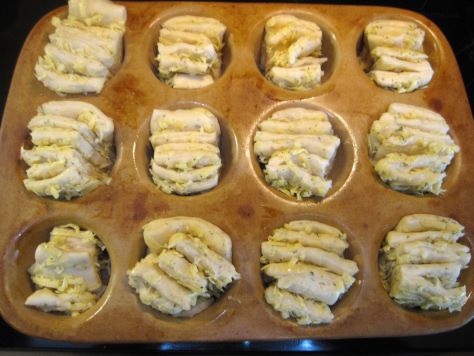
Bready or Not: Cheesy Fantail Rolls
If you know anything about me, you know I’m all about cheese. These Cheesy Fantail Rolls deliver all that good stuff with cheese in the dough and oozing from between the layers of dough.
I based this on a Bake from Scratch recipe for Parmesan-Gouda Fantails. I’m more flexible about the cheese. Just go with a good melter, or a combination of melters. I did a whole block of Roth Dill Havarti. Another firm cheese with herbs would be great. If you like spice? Go with a spicy blend. Have fun with it.
My other big recommendation is that you don’t use pre-shredded cheese, as it’s coated with preservatives and won’t melt as well. But if that’s all you have, well, it won’t end the world.
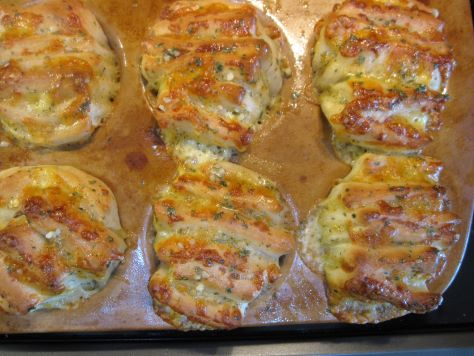
Do reserve a block of time for this recipe. Shaping the rolls isn’t hard, but it is fiddly, and it will make a mess on your counter or table. However, that effort is well worth it, because these rolls are gorgeous and delicious.
PrintBready or Not: Cheesy Fantail RollsThese rolls are a bit fiddly to form, but wow, the end result is both gorgeous and delicious. Have fun trying this with different cheeses. Modified from Bake from Scratch Bread 2018.Course Appetizer, Side DishKeyword cheese, yeast breadServings 12Author Beth CatoEquipmentstand mixermicrowave12-cup muffin panpastry brushIngredients1 cup light beer room temperature1 Tablespoon white sugar2 1/4 teaspoons active dry yeast8 Tablespoons unsalted butter melted and divided3 cups all-purpose flour2 cloves garlic minced1 1/2 teaspoons dried parsley divided1 teaspoon kosher salt8 ounces cheese such as cheddar, havarti, or other good melter; shreddedInstructionsIn a microwave-safe bowl, microwave 1/4 cup beer until it is 105-110-degrees Fahrenheit. (If it overheats, cool it for a few minutes.) Add sugar and yeast, stirring to combine. Let it sit about 5 minutes; it should become foamy. Stir in 6 Tablespoons of melted butter and the remaining 3/4 cup beer.In a stand mixer with a paddle attachment, mix 2 cups flour, a healthy pinch of shredded cheese, 1 minced garlic clove, 1 teaspoon of dried parsley, and the kosher salt. Add yeast mixture and stir for a minute. Gradually add the remaining 1 cup flour, beating until the dough begins to pull away from the sides of the bowl. That will be after 3 to 4 minutes. Cover the bowl with plastic wrap or a towel, and let it stand in a warm place for about 45 minutes.Apply nonstick spray to the wells in a 12-cup muffin pan.Punch down dough and divide it in half. On a lightly floured surface, roll a half into a 12-inch square. Sprinkle half of the grated cheese over the dough. Use a bench knife or pizza cutter to slice dough into 6 equal strips. Stack strips, cheese side up, and cut crosswise into 6 equal pieces. Place each segment of 6 stacked mini strips into a muffin cup. Repeat with remaining dough.Slightly separate and stretch each piece of dough in the cups. Cover with plastic wrap or a towel to rise in a warm spot for 30 to 45 minutes.Preheat oven at 375-degrees, then bake fantails for 20 to 24 minutes, until browned with visible melted cheese.In a microwave-safe bowl, melt the remaining 2 Tablespoons butter. Add 1 minced garlic clove and 1/2 teaspoon dried parsley, stirring to distribute. Use a pastry brush to coat each fantail with buttery goodness. Let cool for at least 10 minutes before serving.Leftovers should be refrigerated and will reheat beautifully in the coming days. Use an oven or toasted oven, and wrap up the rolls in foil. Add a touch of butter, if desired, to keep them from becoming extra crisp. Heat until warmed.OM NOM NOM!March 15, 2023
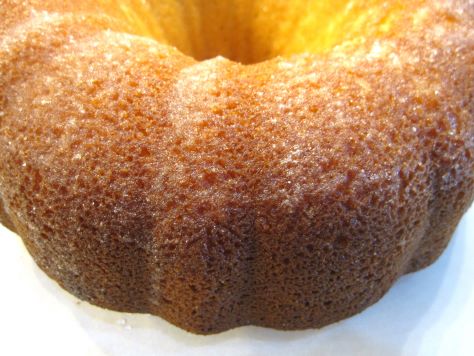
Bready or Not: Classic Vanilla Bundt Cake
This Classic Vanilla Bundt Cake is nothing fancy, but it’s all good.
This cake isn’t about hardcore sweetness. It’s about vanilla. With a tablespoon of extract in the batter, you get the fragrance and flavor coming through strongly in the final bake.
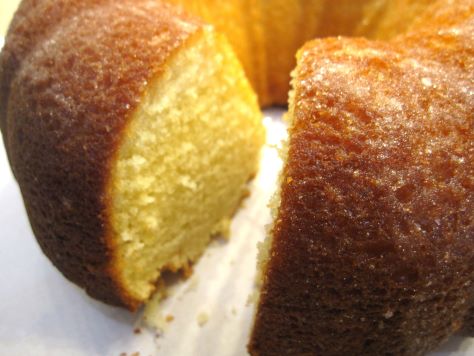
One thing I love about bundt cakes is the variety of textures. The crusty bottom is so good. If you want the cake to rest flat for a prettier presentation, then by all means, level off the base–but don’t squander those trimmings!
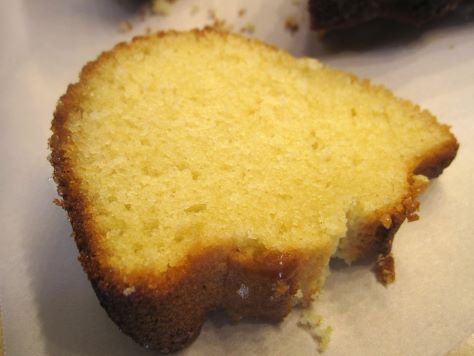
This is a great cake to serve with fruit and ice cream, as it’s similar to a pound cake, but much lighter. Me, I thought the glaze alone made things just right.
Modified from King Arthur Flour.
PrintBready or Not: Classic Vanilla Bundt CakeThis lovely cake has a crisp base and a light fluffy crumb that’s fragrant with vanilla. This is great to serve on its own, or with fruit and ice cream.Course Breakfast, Dessert, SnackKeyword bundt cake, cakeAuthor Beth CatoEquipmentlarge bundt pannonstick spraypastry brushIngredientsCake1 1/2 cups unsalted butter (3 sticks) room temperature1 1/2 cups white sugar2 1/4 teaspoons baking powder1 1/2 teaspoons salt6 large eggs room temperature3 cups all-purpose flour1 Tablespoon vanilla extract1/4 teaspoon almond extract3/4 cup milk or half & halfGlaze1/3 cup white sugar5 teaspoons watersprinkle salt2 teaspoons vanilla extractInstructionsPreheat oven at 350-degrees. Generously grease the interior of a large bundt pan.In a mixer, beat butter and sugar until light and fluffy. Mix in baking powder and salt, followed by 3 of the eggs.Measure out the flour. Add a few tablespoons of it into the mix. Add another egg. Add a bit more flour followed by another egg. Repeat to incorporate the last egg. Add the two extracts and the milk, followed by the last of the flour. Scrape the bottom and sides of the bowl well, then beat until the batter is smooth and fluffy.Pour batter into the pan and smooth out the top. Bake for 50 to 60 minutes, until the cake passes the toothpick test. Let cool for about 15 minutes, then invert it onto a rack to cool completely.Make the glaze. The amount will look like a lot, but there’s a lot of exterior to this cake. For easier clean-up, place parchment paper beneath the rack. Use a pastry brush to apply the glaze to the cake. Let glaze set an hour or so before slicing.Store in a sealed container or with slices individually wrapped.OM NOM NOM!March 8, 2023
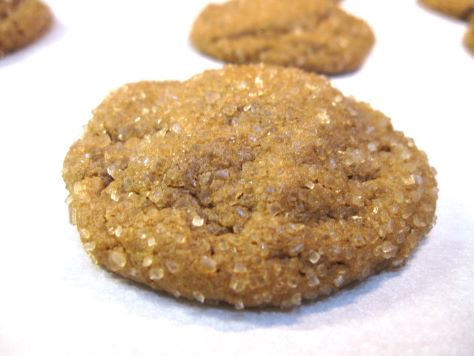
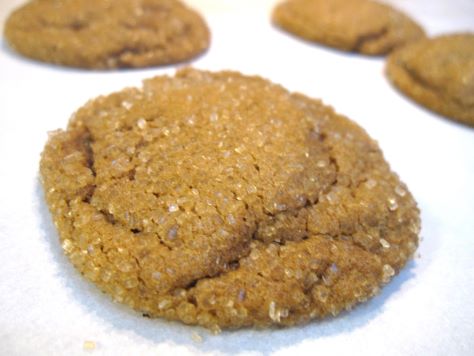
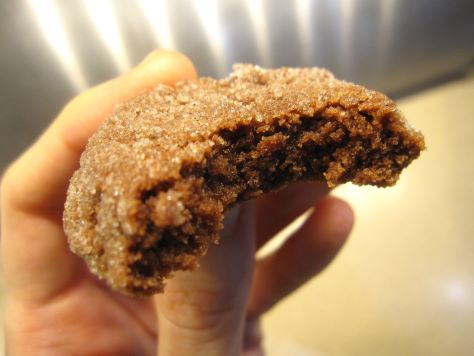
Bready or Not: Big Soft Ginger Cookies
These Big Soft Ginger Cookies are delicious any time of year!
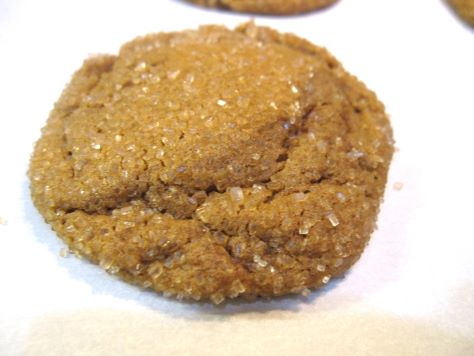
These things taste like gingerbread. They are soft, chewy, and fragrant, with a delicate crunch from the coarse sugar topping. They are good on their own, or with a hot drink!
These take some planning, as the dough is soft and could use some chill time. Make it a little bit ahead of when you plan to bake. A few hours will do; overnight is great, too. Then bake away!
Modified from Allrecipes Magazine Dec/Jan 2014 issue.
PrintBready or Not: Big Soft Ginger CookiesMake the dough a few hours or a day ahead of time, and bake up these big cookies in little time! Each one tastes a lot like gingerbread, only in a personal, portable version. Modified from Allrecipes Magazine Dec/Jan 2014 issue.Course Dessert, SnackKeyword cookies, gingerbreadAuthor Beth CatoEquipmentbaking sheetparchment papertablespoon scoopplastic wrap or sealed bagIngredients2 1/4 cups all-purpose flour2 teaspoons ground ginger1 teaspoon baking soda3/4 teaspoon ground cinnamon1/2 teaspoon ground cloves1/4 teaspoon salt3/4 cup unsalted butter (1 1/2 sticks) room temperature1 cup white sugar1 large egg room temperature1 Tablespoon water1/4 cup molasses3/4 cup coarse sugar such as turbinadoInstructionsIn a medium bowl, combine flour, ginger, baking soda, cinnamon, cloves, and salt. Set aside.In a big bowl, cream together butter and sugar until light and fluffy. Beat in the egg followed by the water and molasses. Slowly mix in the dry ingredients, scraping the bottom of the bowl a few times.Once everything is mixed, encase the dough in plastic wrap and chill in fridge for a few hours or a day or two.When ready to bake, preheat oven at 350-degrees. Line a large baking sheet with parchment. Measure coarse sugar into a bowl.Using a tablespoon scoop or tablespoon, shape dough into small balls. Roll dough in coarse sugar. Set spaced-out on prepared baking sheet.Bake for 10 to 12 minutes, until cookies are set and starting to crinkle across the top. Let rest on sheet for another 10 minutes, then transfer to a rack to fully cool. Store in a sealed container at room temperature.OM NOM NOM!March 1, 2023
Bready or Not: Apple Sheet Cake
I’ve done a lot of different apple cakes. This Apple Sheet Cake is unique in that it’s 1) in a casserole dish, so can feed a lot of people, and 2) uses apple butter, diced fresh apple, diced dried apple, and cross-wise sliced fresh apples on top!
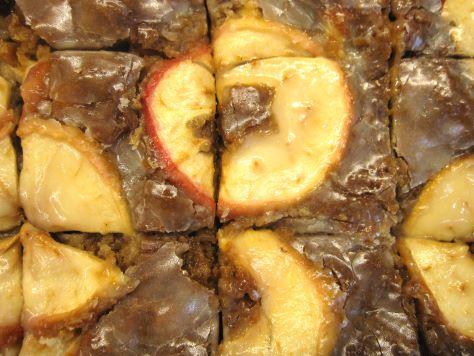
It probably goes without saying that this cake is loaded with apple flavor. There’s just enough batter to complement the fruit. Really, this is all about the apples.
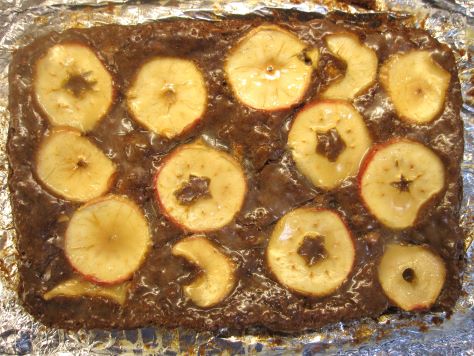
I think the apple butter in particular carries a lot of weight here. It adds a touch more spice, but most of all it adds moist texture to the crumb.
Modified from a clipping for Applicious Sheet Cake.
PrintBready or Not: Apple Sheet CakeThis 13×9 apple cake brims with apples in many forms, and will feed a lot of people! The leftovers are also great to freeze.Course Breakfast, Dessert, SnackKeyword apple, cakeAuthor Beth CatoEquipment13×9 panaluminum foiluneven spatulaIngredientsCake2 medium baking apples1/3 cup unsalted butter melted1 2/3 cup brown sugar packed1 cup apple butter2 large eggs room temperature2 teaspoons vanilla extract or vanilla bean paste1 2/3 cups all-purpose flour1 teaspoon baking powder1 teaspoon baking soda1/4 teaspoon salt1 cup dried apples finely choppedIcing1 Tablespoon unsalted butter melted1 Tablespoon maple syrup1/2 cup confectioners’ sugar1/4 teaspoon vanilla extract1 Tablespoon milk or half & halfInstructionsPreheat oven at 350-degrees. Line a 13×9 pan with foil and apply nonstick spray or butter. Set aside.Peel, core, and shred or finely dice-up one apple. Thinly slice the other apple cross-wise, removing the seeds.In a large bowl, mix together butter, brown sugar, apple butter, eggs, and vanilla. Add flour, baking powder, baking soda, and salt, scraping bottom of bowl to make sure everything is mixed. Fold in the shredded/diced fresh apple and the chopped dried apple. Spread batter in pan, using uneven spatula to level out. Arrange apple cross-sections over cake.Bake for about 40 minutes. The middle should pass the toothpick test. Move to a wire rack.Immediately mix glaze to go over hot cake. Drizzle it all over the top, using the back of a spoon or a pastry brush to distribute across surface. Cool completely to set the glaze, speeding process in fridge if desired.Use foil to lift cake onto a cutting board to slice. Pieces can be individually wrapped and frozen for later, or will keep several days covered in the fridge. Eat cold or warmed slightly in microwave.OM NOM NOM!February 22, 2023
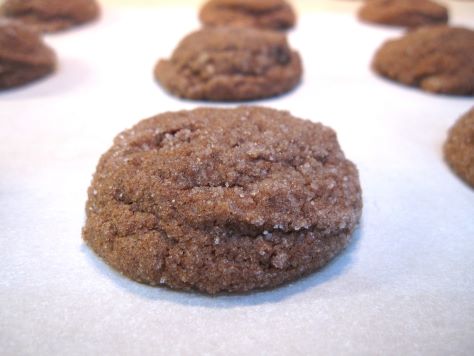
Bready or Not Original: Chocolate Chai Snickerdoodles
I reinvent Snickerdoodles on a regular basis, and here’s a fun new take: Chocolate Chai Snickerdoodles.
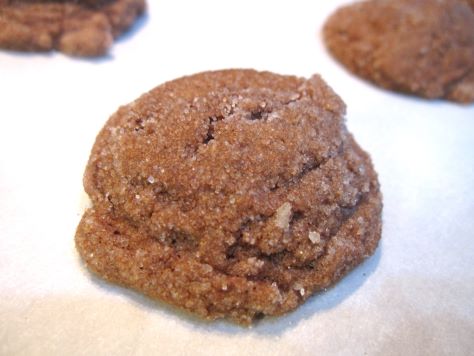
The flavor of these is chocolate-forward, followed by the warm combination of spices. The combo is fantastic, and the texture of the cookies is soft and chewy.
I highly recommend mixing up the sugar and spices a day or so in advance. There is such a variety involved that the measuring and washing of the measuring spoon ends up being the most tedious aspect of the entire recipe.
 PrintBready or Not Original: Chocolate Chai SnickerdoodlesThese luscious snickerdoodles are chocolate-forward, followed by a warming mélange of spices. The spice mixture can be done a day or two in advance, or right before baking. Using a teaspoon scoop, this makes about 50 cookies.Course Dessert, SnackCuisine AmericanKeyword chocolate, cookies, snickerdoodleServings 54Author Beth CatoEquipmentparchment paperbaking sheetteaspoon scoopIngredients2 1/2 cups white sugar1 teaspoon ground cinnamon1 teaspoon ground ginger1 teaspoon ground cardamom1/2 teaspoon ground allspice1/4 teaspoon white pepper1 cup unsalted butter (2 sticks) room temperature2 large eggs room temperature2 1/4 cups all-purpose flour1/2 cup baking cocoa sifted2 teaspoons cream of tartar1 1/2 teaspoons baking powder1/2 teaspoon saltInstructionsPreheat the oven at 350-degrees. Line a baking sheet with parchment. Combine the first six ingredients; reserve a 1/2 cup in a separate bowl.Beat the butter until soft. Add the bulk of the spice mix, continuing to beat until light and fluffy. Add the eggs and vanilla.In a separate bowl, combine the flour, cocoa, cream of tartar, baking powder, and salt. Slowly work this into the butter mix.Use a teaspoon scoop or spoon to form small balls. Roll them in the reserved sugar-spice mix. Set them spaced out on the baking sheet.Bake for 10 to 12 minutes. Due to the cocoa, it is hard to gauge doneness by color, so look for them to be set with some light crackling. These don’t crackle as much as standard snickerdoodles, though. Let them rest on the sheet for about 10 minutes, then transition them to a rack to completely cool.Store in a sealed container at room temperature.OM NOM NOM!
February 15, 2023
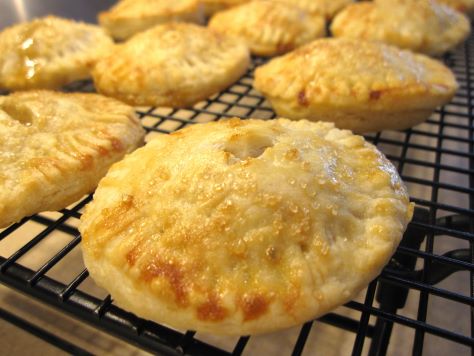
Bready or Not: Baked Lemon Curd Hand Pies
Pie is good. Portable pie is something special indeed. These Baked Lemon Curd Hand Pies are a real treat.
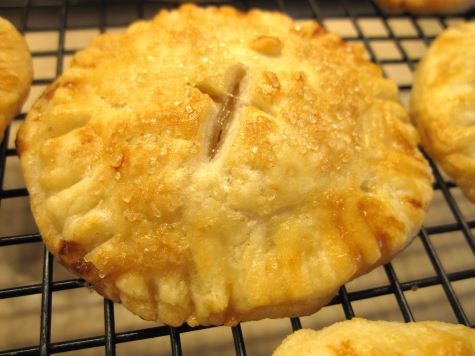
This is a pairing of recipes that dirties numerous dishes and spaces, but the result is a good batch of hand pies. The recipe makes roughly 18 to 20, so make these for a group!
I usually experiment with freezing my baked goods to see how they keep, but I didn’t do so with these. My husband took them to work, where they were pretty much inhaled!
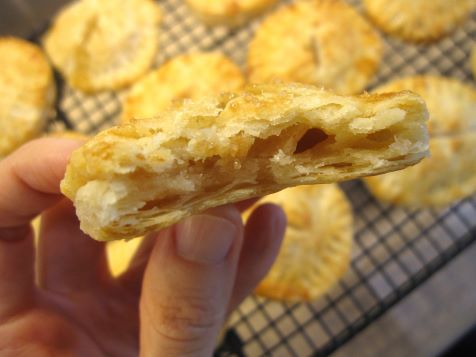
Use homemade lemon curd, if you have a reliable recipe, or use a trustworthy brand. I recommend going with one that is pretty thick, as a watery one might interfere with the seal of the pies.
PrintBready or Not: Hand Pie DoughThis dough comes together quickly in the food processor. Make at least a few hours ahead of assembling the hand pies, or freeze the dough for later. Modified from Bake from Scratch Magazine July/August 2021.Author Beth CatoEquipmentfood processorfood scaleplastic wrapIngredients2 3/4 cups all-purpose flour1 teaspoon kosher salt1 cup plus 1 Tb unsalted butter1/2 cup ice water2 teaspoons apple cider vinegarInstructionsPlace the flour and salt in the bowl of the food processor. Pulse to combine. Cut the butter into cubes and add, pulsing until the pieces are pea-sized.In a liquid measured cup, combine the ice water and vinegar. With the processor running, pour in the liquid until the dough comes together. It will look crumbly but should come together if squeezed between fingers.Turn out the dough and divide it in half. Wrap tightly in plastic and chill for at least 2 hours. Store in fridge for a few days or freeze for later. PrintBready or Not: Baked Lemon Curd Hand PiesThese hand pies don’t take long to come together since the dough is already made and prepared lemon curd is used for the filling. Makes 18-20 pies. Modified from Bake from Scratch Magazine July/August 2021.Course Breakfast, Dessert, SnackKeyword hand pie, lemon, pieAuthor Beth CatoEquipmentflour for dusting2 1/2-inch cutterbasting brushparchment paperbaking sheetIngredientshand pie dough1 cup lemon curd1 large egg room temperature1 Tablespoon watercoarse sugar optionalInstructionsOn a lightly floured surface, roll out half of the prepared pie dough to be about 1/8-inch thick. Using a 2 1/2-inch cutter, cut dough, reforming scraps to roll out again.Dollop about a teaspoon of lemon curd into the center of half of the dough rounds.In a small bowl, beat together the egg and water. Brush the egg mix around the edges that surround the curd; do not discard egg wash. Top each with a remaining dough circle, stretching them slightly to cover. Press edges firmly to seal, then apply the tines of a fork to bind the halves. Chill hand pies in fridge for 1 hour.Preheat oven at 425-degrees. Line baking sheet with parchment paper. Place hand pies on parchment. Brush tops with remaining egg wash, then use the tip of a knife to cut a small x in each to vent steam during baking. If desired, sprinkle coarse sugar over the tops.Bake for 13 to 16 minutes, until pies are golden. Move to a rack or different sheet to completely cool. Store in a covered container. Best eaten within a day or two.OM NOM NOM!February 14, 2023
Happy Valentine’s Day news–my book release has moved up!

I’m happy to share the news that the release date for A Thousand Recipes for Revenge is now June 1, 2023. That’s right, you can get it two weeks sooner!
Along those lines, I’ll repeat the plaintive plea of all authors: please, please preorder! Those orders can make or break a new release. To help you along, here are some handy dandy links.
Amazon: paperback | kindle | audio CD | audibleBarnes & Noble: paperback | audio mP3 on CD | audio CDBookshop: paperbackBooks-a-million: paperback | audio mP3 on CD | audio CD#SFWAPro
February 8, 2023
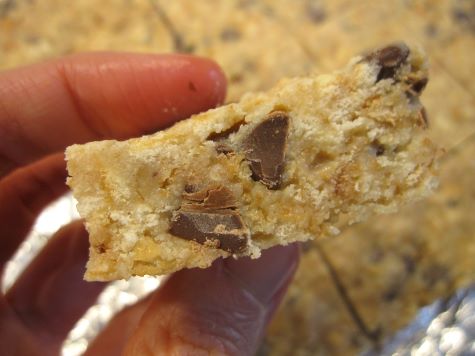
Bready or Not: No-Bake Cookie Bars
When you have no time to bake and you need sweets fast–or you don’t have an oven or can’t heat the house–no-bake treats are the way to go. These No-Bake Cookie Bars involve little fuss and are sweet and tasty.
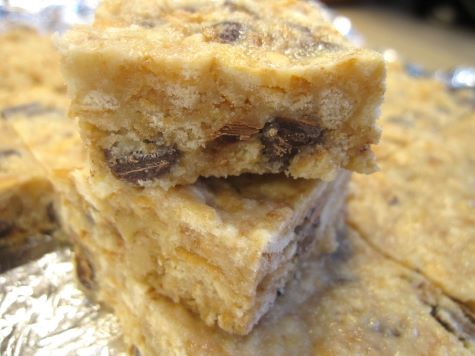
Also, these are pretty cheap to make. I used a generic kind of vanilla wafers that were a dollar-something.
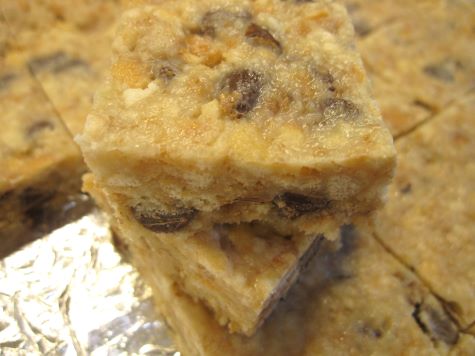
Since I live in Arizona, I had to store these in the fridge, but in most places, you’d probably be fine keeping them at room temperature.
 PrintBready or Not: No-Bake Cookie BarsThese no-bake bars are super-fast to make and are ready to slice up after a few hours of chill time. Perfect for when you need a no-fuss dessert, fast!Course Dessert, SnackKeyword chocolate, cookies, no bake, pecans, walnutsAuthor Beth CatoEquipment9×9 pannonstick sprayaluminum foilwaxed paperheavy glassIngredients11 ounces vanilla wafer cookies generic is fine14 ounces sweetened condensed milk1 cup chocolate chips semisweet or milk1/2 cup chopped walnuts or pecans1 teaspoon pure vanilla extract1/4 teaspoon saltInstructionsLine a 9×9 pan with foil and apply nonstick spray.Use a food processor or a gallon bag, rolling pin, and muscle to crush all of the vanilla wafers.In a big bowl, stir together the cookies crumbs, sweetened condensed milk, chocolate chips, nuts, vanilla, and salt. Completely mix and coat.Dump the mixture into the prepared pan. Level it out, then use waxed paper and a heavy object such as a glass to evenly compress the crumbs. Chill in fridge for at least 2 hours.Use the foil to lift the contents onto a cutting board. Slice up and store in a sealed container either at room temperature or in the fridge.OM NOM NOM!
February 1, 2023
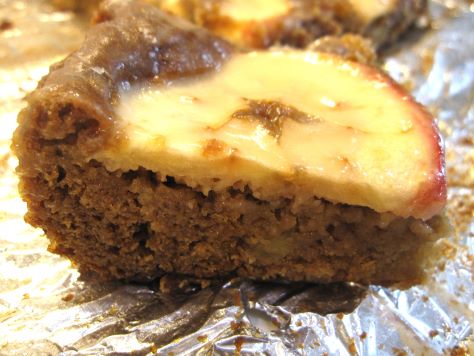
Bready or Not: Double Apple Spice Cake
This Double Apple Spice Cake includes chopped apples in the batter and sliced apples prettily arranged on top. You’re pretty much guaranteed to get apple in every bite!
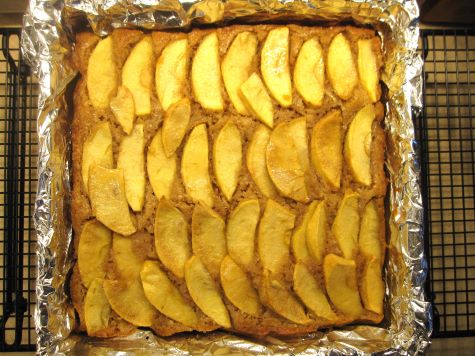
I came across a version of this recipe promoted by Kerrygold Irish Butter. I thought it looked amazing, but I wanted to change it to a square pan for easier slicing and freezing and make a number of other little changes, too.
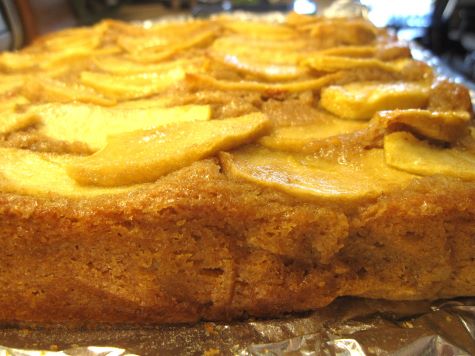
Instead of dusting the top with confectioners’ sugar, I decided to use a technique I also use for my Calvados Apple Galette: brushing honey across the top near the end of baking to add some sweetness and glisten.
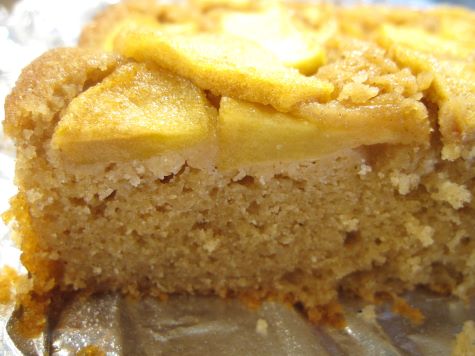
This is really such a pretty cake. The spices are gentle, but present enough to boost the flavor of the apples.
Modified from Kerrygold.
PrintBready or Not: Double Apple Spice CakeThis cake has a chopped apple in the batter and sliced apples beautifully arranged across the top. The perfect cake for apple-lovers! Modified from Kerrygold Butter.Course Breakfast, Dessert, SnackAuthor Beth CatoEquipment8×8 or 9×9 square panaluminum foilnonstick spraybasting brushIngredients3/4 cup brown sugar packed2 large eggs room temperature3/4 cup sour cream or full-fat Greek yogurt2 teaspoons pure vanilla extract8 ounces Kerrygold Salted Butter melted1 1/2 cups all-purpose flour1/2 teaspoon kosher salt1 1/2 teaspoons baking powder2 teaspoons ground cinnamon1/8 teaspoon ground cardamom1/2 teaspoon ground ginger1/4 teaspoon allspice3 medium baking apples like Pink Lady, Envy, Granny Smith, etc2 Tablespoons turbinado sugar1/3 cup honeyInstructionsPreheat the oven to 350° F. Line an 8×8 or 9×9 square pan with aluminum foil and apply nonstick cooking spray.Prepare the apples. Peel then dice up one of the apples. The other two, peel and slice thinly.To a large bowl, add the brown sugar and eggs. Whisk for about a minute until thoroughly combined and creamy.Add the sour cream/yogurt, pure vanilla extract, and melted butter. Whisk well.In a separate medium size bowl, combine flour, kosher salt, baking powder, cinnamon, cardamom, ginger, and allspice.Add the dry ingredients to the wet ingredients. Before the dry ingredients are fully incorporated, add the diced apples. Continue to fold in until no streaks of flour remain.Pour batter into the prepared baking pan, then use an offset spatula to smooth it out. Shingle the thinly sliced apples on top. The sprinkle turbinado sugar all over the slices.Bake for 35 minutes. Pull out the cake and brush on the honey across all of the nooks and crannies. Place the cake back in oven to bake for another 5 to 10 minutes, until the top is turning golden brown. The apples on top should be fork-tender with the center cake passing the toothpick test.Let cool at least 30 minutes before slicing in. Store covered in the fridge. Cake can also be frozen for later enjoyment.OM NOM NOM!

